For a network deployment of Tracker, the Tracker application can be installed locally; however, it must be able to access the network that contains the Global Database, Reports, and Projects. The network database would be the integrated database that is used for CADmep, CAMduct and ESTmep which is normally stored on the network.
There are a few options in the Tracker application that should be specified prior to using it. These options ensure that the Tracker application is mapped to appropriate folders.
The steps below describe how to set the locations (paths) for these folders.
- Run the Tracker installation and install Tracker to the desired destination folder.
- Launch Tracker using any of the following methods:
- Click the Tracker desktop icon.
- Browse to the installation folder, and double-click TrackerX64.exe.
- Click the Start button
 Programs
Autodesk
Fabrication Tracker <version>
Tracker <version>.
Programs
Autodesk
Fabrication Tracker <version>
Tracker <version>.
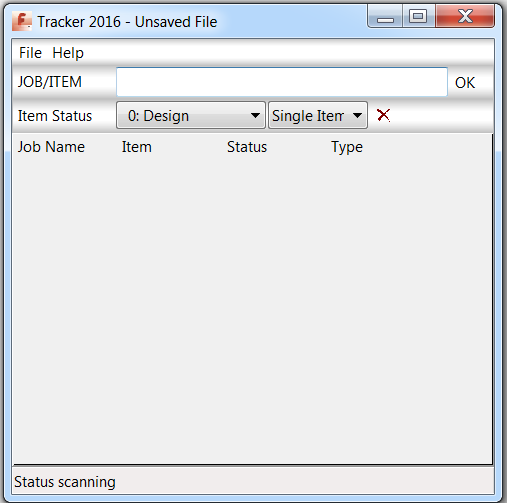
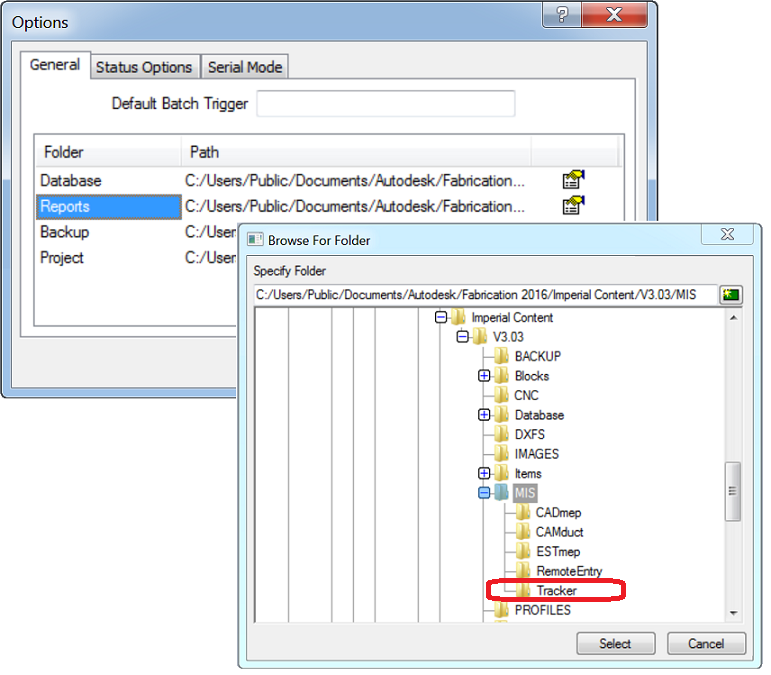
- On the Tracker application window, click File
Options to display the Options dialog, as shown below:

The General tab lets you specify the paths for each of the folders related to Tracker functionality (Database, Reports, Backup, Project).
- On the General tab, click the Browse button
 to the right of each path (Database, Reports and Project folders) to specify each path. These can be network paths, if applicable.
-
At this point of the configuration, you must configure the Autodesk Fabrication application that Tracker will be running in conjunction with; for example, CADmep, CAMduct or ESTmep. This step ensures that the status fields, reports and projects can be used by Tracker.Note: For local systems that are not sharing the same PC or database as the Autodesk Fabrication software installation, such as laptops, in order to obtain the statuses and reports, the installation directories need to be copied over from the master installation (for example, CAMduct, CADmep or ESTmep) onto the local PC. The paths can then be pointed to the "copy of" folders, ensuring they are kept up-to-date with any new status or report changes.Copy the following folders from your master Autodesk Fabrication product installation (for example, Fabrication CAMduct) to the Tracker installation:
- Database - Contains the latest Status entries
- MIS - For Reports (*.IRP)
- Projects - If Required
- Select the MIS folder, create a "Tracker" folder under the MIS folder, and then copy the IRP files for Reports and IEX files for Exports into this location.