The Job Contents view displays a detailed list all of the items that exist in the current drawing. It provides a quick method of viewing item details, such as item names, item numbers, quantities, materials, connectors, specifications, and more. You can customize the Job Contents view to display the specific information useful for your projects.
Video: Job Contents View Enhancements
- To display the Job Contents view, do one of the following:
- From the CADmep toolbar, click the Display Job Contents View
 button located near the bottom of the CADmep toolbar, on the CADmep Takeoff-Folder Tools flyout toolbar.
- In CADmep, at the command line, type JOBCONTENTS, and then press Enter.
- In ESTmep and CAMduct, open a job and click the Items tab.
The Job Contents view displays a list of items and the details of the current job, similar to that shown below.

- From the CADmep toolbar, click the Display Job Contents View
- Make sure you are viewing the Detail List, as shown above. To view the Details List, right-click on a column heading (title), and click View
 Details.
The columns of information that display in the Job Contents view can be customized. This allows you to display additional information, such as Specification, Connectors, or other properties required by your projects.
- To customize the information that displays in the Job Contents view, right-click on any column heading and click Customize.
Note: If the Job Content view is already sorted into groups, and contains various levels of organization, you must right-click on a blank area of the Job Contents view (where no data is displaying) to display the right-click menu that includes the Customize option. You may need to enlarge (stretch) the right side of the Job Contents view window to display a blank area of it.
The Job Contents dialog displays. It includes two tabs: Item Details and Group By.
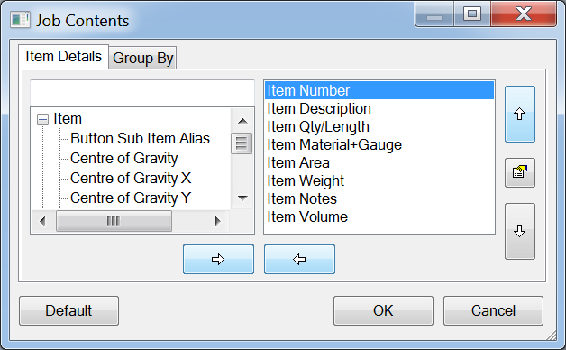
The Item Details tab lets you choose and organize the information that is displayed in the Job Contents view.
- Select an item property in the left pane, and click
 to move the selected information to the right pane.
- Use the up and down arrows to place the information in the order they will be displayed, from left to right, in the Job Contents view.
The Group By tab lets you further customize the Job Contents view by sorting\organizing the displayed information according to specified properties. The example below shows the Name and Material properties added to the Group By tab.
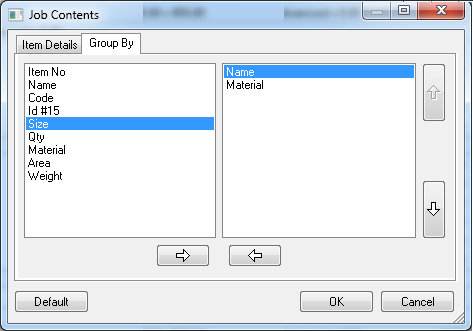
- Select an item property in the left pane, and click
to move the selected information to the right pane.
- Use the up and down arrows to specify the order in which the information will be grouped by in the Job Contents view.
In the example shown above, the Job Contents view will display information grouped by Name first, because it is at the top of the right pane list, and then by Material, because it is below Name. The example below shows how this would display in the Job Contents view.

Note that the information shown in this example is organized (grouped) by Name first, and then by Material.