When using standard fittings, it is possible to adjust all of the dimensions and options that exist within the fitting. However, if a dimension, option, connector or a seam within the fitting is always the same, and does not need to be edited, it is possible to lock the dimension field to save time when inputting the part.
To lock a dimension:
- Right-click on a fitting and click Edit.
A dialog similar to the one shown below displays.
- On the Dimensions tab, select a dimension that will always be the same, and enter the dimension in the Value field, as shown below.
- Lock or unlock the dimension by clicking on the unlock or lock icon.
For example, if the Length is always 300, click on the lock icon beside the 300 dimension in the Length field so that a lock icon is displayed.

It is possible to lock as many or as few dimensions as necessary.
- In the reducer example shown above, on the Dimensions tab, click on the lock icon in row A, B and C, then change the value of F, and click the lock icon.
- Click Redraw to view the new pattern.
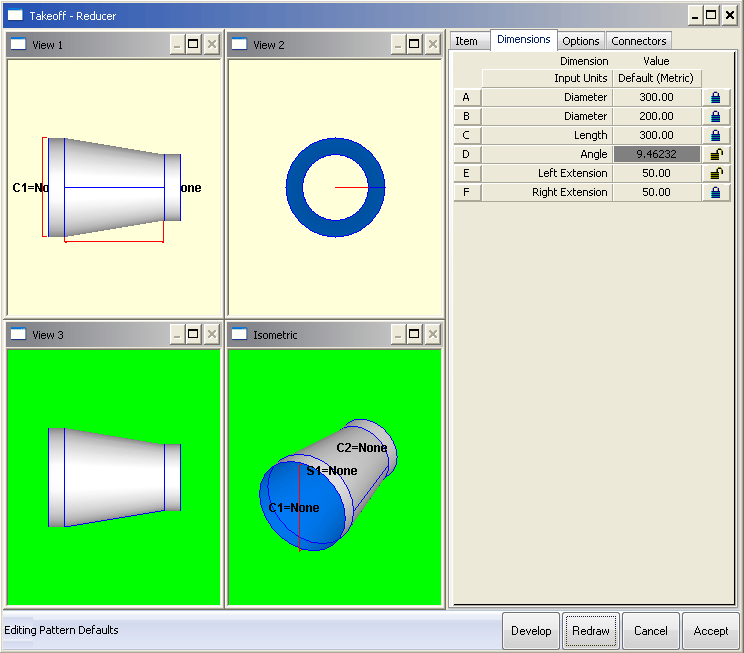
- Click OK and the changes to the pattern defaults are saved.
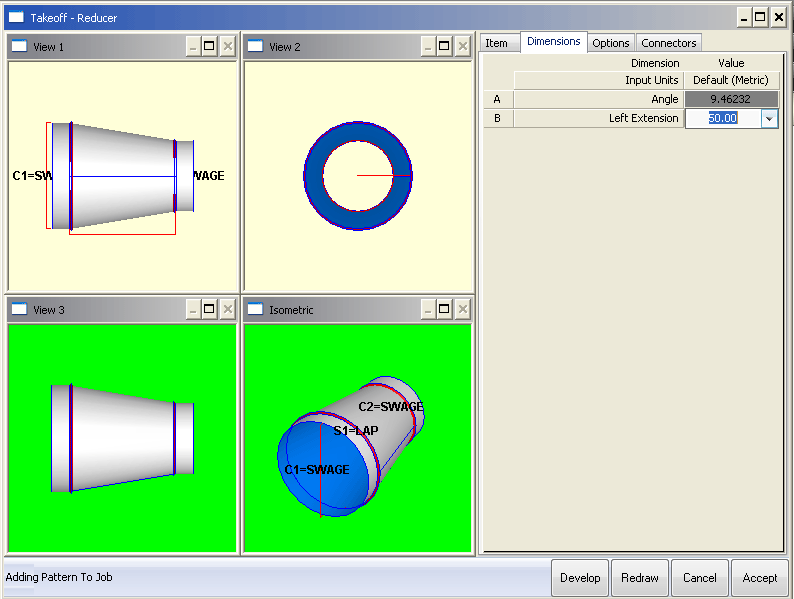
The next time the pattern is added to a job, the only dimensions that will be visible, and therefore can change, are the ones that were left 'unlocked', in this example, the Angle and Left Extension fields, as shown below.
It possible to view the locked dimensions without being able to change them.
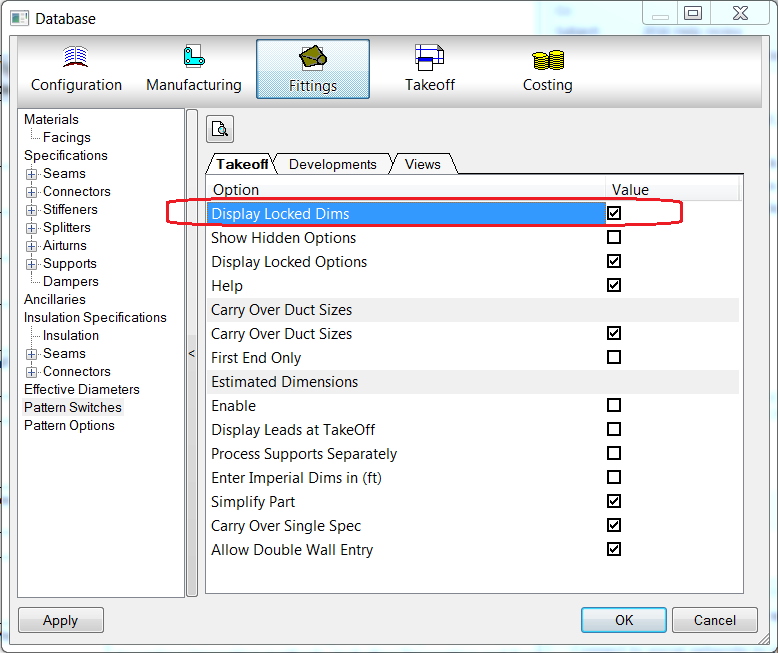
- To view the locked dimensions without being able to change them, on the Database dialog, click Fittings
 Pattern Switches, or select the Pattern Database icon from the Utility Bar.
Click the Takeoff tab, as shown below, and enable the Display Locked Dims option.
- Add the same item again and the pattern Takeoff dialog displays as shown below.
 Note: All of the original dimensions are visible, but only the dimensions that are not locked can be edited.