Both CADmep and ESTmep provide the ability to share Fabrication models in the cloud using Autodesk BIM 360 Glue. With Autodesk BIM 360 Glue, you can share Fabrication models with project team members, customers, and other stakeholders easily. In addition to viewing models, you can also display object-level Fabrication Item data, and attach documents to objects displayed in Glue.
- Item Service Name
- Item Service Abbreviation
- Item Description
- Item Number
For example, using Autodesk BIM 360 Glue, you can:
- Push models to the cloud for interrogation by other project team members, clients, customers, and stakeholders
- Show a bid model to your others using an iPad® interface
- Interrogate costs, labor, and equipment parameters through the model on-site
Uploading a model to Autodesk BIM 360 Glue and displaying a bid model on an iPad is one of the simplest ways to show a client a model, without the need for generating and printing PDFs. Interrogate associated model information onsite, and more easily access intelligent model data in the field. For example, any data available on Fabrication items, including item properties related to manufacturing and costing, can be displayed in Glue. This helps downstream teams understand information, such as labor, material costs and manufacturers, and equipment parameters.
Uploading Fabrication Models to Autodesk BIM 360 Glue
To upload models to Autodesk BIM 360 Glue:
- In CADmep or ESTmep, verify that the BIM 360 Glue options are specified as desired in the Database CAD Settings. Typically, the default choices are suitable for most environments. To access these options, on the Database dialog, click Takeoff
 CAD Settings
Output\Print\CAM tab.
CAD Settings
Output\Print\CAM tab.
- BIM 360 Glue Upload Format: Specify the desired output format for files uploaded to BIM 360 Glue.
- BIM 360 Glue X\Y\Z Rotation: Specify the desired X\Y\Z rotation for models that are uploaded to BIM 360 Glue.
- Do one of the following:
- In CADmep, display the desired items or model in the Fab Viewer.
- In ESTmep, display the items in the 3D Viewer.
- In the Fab Viewer (CADmep) or 3D Viewer (ESTmep), make sure the Data Exchange toolbar is displayed.
If it is not displayed, right-click in the viewer and click Tools
Data Exchange.
- On the Data Exchange toolbar, click the BIM 360 Glue button
 .
.
- The cursor changes. In the viewer, select the objects to upload to BIM 360 Glue.
-
Right-click or press Enter to end the selection command. The following BIM 360 Glue dialog displays.
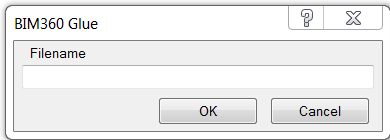
- Enter a filename for the file that will be uploaded to BIM 360 Glue, and click OK.
Note: Using Autodesk BIM 360 Glue requires an Autodesk Account and a BIM 360 Glue Account. If you do not have these accounts, you are prompted to create them.
- If you are not already signed in to your Autodesk Account, you are prompted to do so. Sign in with your Autodesk ID and follow the instructions.
To create an Autodesk Account, click Need an Autodesk ID?
- Next, you are prompted to sign in to Autodesk BIM 360 Glue. If you do not have a BIM 360 Glue account, you may sign up for one. Sign in or create a BIM 360 Glue Account, and enter a site name in the Create BIM 360 Glue Site Name field. Click OK or Sign up to continue.
- If this is your first time using Autodesk BIM 360, you are prompted to Install BIM 360 Glue. Click Install BIM 360 Glue, and follow the on-screen instructions to complete the installation.
- When the message "Connected to BIM 360 Glue..." is displayed, click on the Autodesk BIM 360 Glue icon displaying in the background, or in the system tray, and sign in to Autodesk BIM 360 Glue with your Autodesk Account login.
- Once logged in to Autodesk BIM 360 Glue, if you are the host administrator, complete the steps in the Create Projects section. See the BIM 360 Glue Help for more information.

- In BIM 360 Glue, if you are not the host administrator, you are prompted to select a host. Select a host from the drop-down list, and click Next.
- At the Select Project dialog, select the project to upload to and click Next.
- At the Review and Confirm dialog, you may want to add the model to a folder within the selected project. To do this, click on the Folder (optional) field, and add a folder.
- When you are ready to begin the upload to Glue, click Glue It.
A status indicator dialog "Gluing in Progress. Your model is being glued." details the progress of the upload.
- Click OK on the status indicator dialog to close it. The upload continues in the background.
- When the model has been successfully glued, the message "Your model has successfully glued." displays.
Optionally, you may also use the "Set Attribute Export" (SEA) command to apply Fabrication data to the model which can be displayed in BIM 360 Glue. Using this method, a large selection of data can be added to the model and saved for future uploads. For example, you can display Item properties related to manufacturing and costing in Glue, along with the visual model. On the Setup Export Attributes dialog, click Create New Format, set the name to something like "BIM360Glue - Fabrication Attributes". On the Define Attributes dialog, select the attributes to add to the model.
The model can now be viewed in BIM 360 Glue. See the Autodesk BIM 360 Glue Help for more information.