In the Fabrication products (CADmep, ESTmep, and CAMduct), Item Folders are where you can find, sort, group, and edit any Item templates you may have located on your system. The Item Folders view, or Folder View, looks like a Windows Explorer window, but is actually a "virtual explorer" in that you can have folders and sub folders arranged in a Tree View, but where in reality they reside could be in different locations (such as having files locally and on a network share).
The Item View folder view is organized into 2 sections, or panes. On the left is the Tree View where you select the folders and subfolders to view. On the right is the Contents View where the contents of the selected folder are displayed.

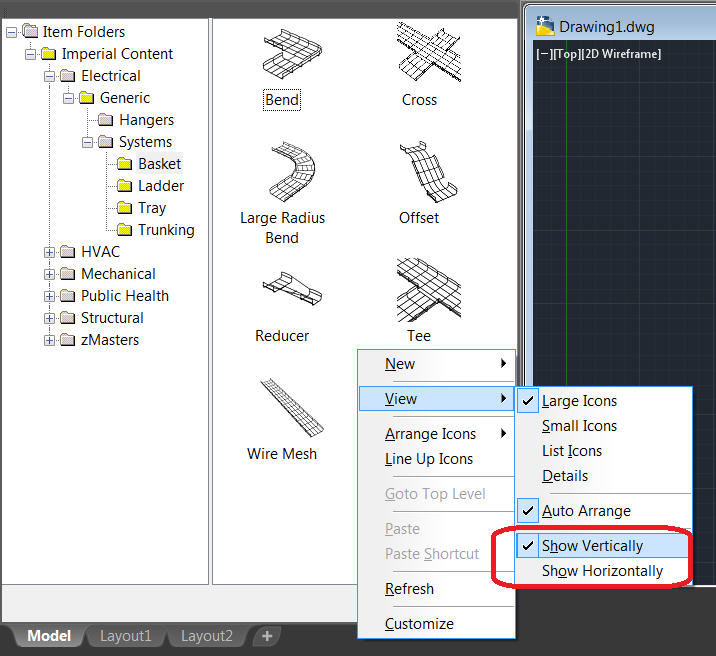
In CADmep, the Item Folders view can be oriented either vertically or horizontally. In the Contents View, right-click to display the right-click menu. Then click View  Show Vertically (or Show Horizontally) to change the orientation.
Item Search Toolbar
In ESTmep and CAMduct, above the Tree View there is a Search toolbar. This can be displayed or hidden by clicking View Toolbars Item Search Toolbar. The Search toolbar lets you search the Folders for a specific item template by the following:
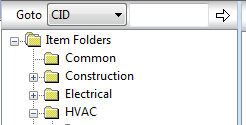
- CID
- Alias
- Description
Creating a New Folder
Select the Folder that you want the New folder to appear in. If you need a new Root folder, select the top-level folder (Item Folders).
Right click on the Folder and select New Folder.
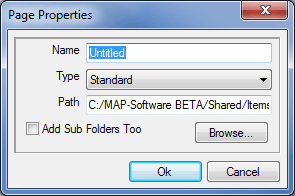
This displays the Page Properties dialog.
Name: If creating a new Folder that does not physically exist on your system then i n the Name field type in a descriptive name for the folder i.e. CAD Parts, this will then create that folder in the Windows environment, if however, you are adding an existing folder to your system then leave the Name as Untitled, the Name will be picked up from the existing Folder.
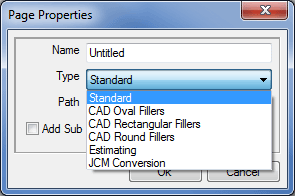
Type: The following types of folders can be created:
- Standard: This is the default Folder type and is simply a Windows folder, it has no special properties or features.
- CAD Oval Fillers: The CAD Filler type Folders were used for Fill Routines in CAD before the introduction of Service Templates. These are now obsolete.
- CAD Rectangular Fillers: The CAD Filler type Folders were used for Fill Routines in CAD before the introduction of Service Templates. These are now obsolete.
- CAD Round Fillers: The CAD Filler type Folders were used for Fill Routines in CAD before the introduction of Service Templates. These are now obsolete.
- Estimating: When a folder selected as Estimating then the contents of this folder will be used when Surveying is carried out.
- JCM Conversion: When a folder is selected as JCM Conversion (Job Conversion Module), the contents of this folder will be used when using ASCII Text Import or Job Import. (See Job Import Tool for details).
Normally the Type field is left set to Standard.
Path: If linking to an existing Folder then either type the path to its location on the hard drive or network, alternatively you can use the Browse button to browse to the directory location. If creating a new folder then you can ignore this field.
When the specified directory does not exist, a message box will be displayed, asking if you want to create it.

Clicking Yes creates the folder in the location selected.
The new empty folder will now be displayed in the Tree View, and is ready for use.
Contents View: The Contents View pane on the right displays the contents of a selected Item Folder. In ESTmep and CAMduct, this view can be modified using the Icons in the Item Folder Toolbar, or by right clicking and selecting the desired View.

The icons available are:
 Go to Parent Folder: This icon is only active if you are inside a Collection within an Item Folder, it will then take you back to the parent folder that the Collection resides in.
 Cut: This icon performs a standard Windows Cut function on the selected items. These are then placed in the Windows Clipboard for Pasting in a different location.
 Copy: This icon performs a standard Windows Copy function on the selected items. These are then placed in the Windows Clipboard for Pasting in a different location.
 Paste: This icon performs a standard Windows Paste function, this is only active if the user has previously performed a Cut or Copy action. This then pastes the Items from the Windows Clipboard into the selected folder.
 Delete Selection: This icon will delete any selected Items from the Folder, these items will be placed in the Windows Recycle Bin in case of accidental deletion.
 Properties: This icon displays the selected items Template Properties.

 Large Icons: This icon displays the Items using large Icons.

 Small Icons: This icon displays the items using small icons.

 List Icons: This icon displays the icons as small icons but in a List view.

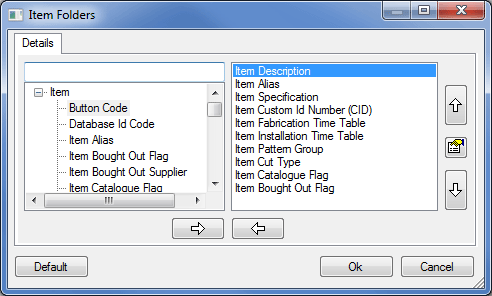
 Details: This icons displays the items in a details view which can be customised by the user using View Customize from the File menu.

 New Opus Part: This opens the Opus program for the creation of 2D files for cutting.
The Contents can be further modified using either the View menu or by right-clicking on an empty space in the Contents view.
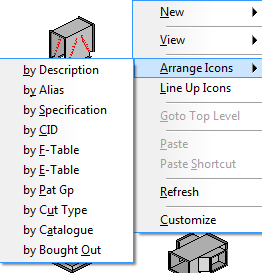
The contents can be arranged by whatever fields you have selected when using Details. These can be added to or excluded from this list by using the Customize dialog.