Bar code printing is an optional feature which requires the installation of the bar code dll supplied with the Fabrication products. Bar codes and QR codes may be added to the all report headers, labels and worksheets where the font properties are user definable. Bar codes and QR codes may not be included in the bodies of reports.
There are two tasks you can perform that are associated with bar codes and QR codes:
- Configuring for bar codes or QR codes
- Attaching a bar code or QR code to a part label
Both tasks are described below.
Configuring for Bar Codes or QR Codes
To configure for bar codes or QR codes:
- Click File
 Setup
Setup  Database
  Configuration
  Barcodes, or select the Database icon from the Utility Bar. The Database dialog is displayed.
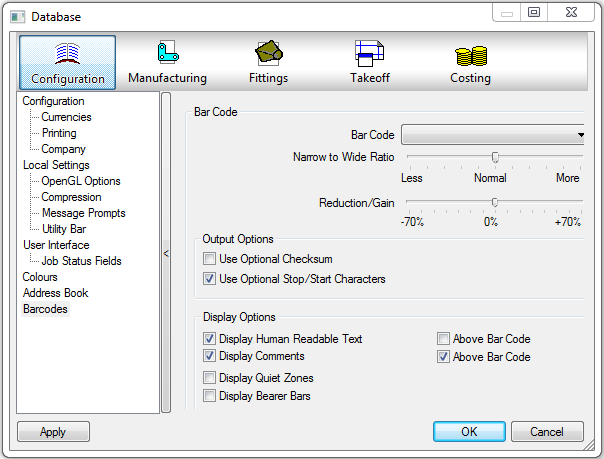
On this dialog, you can configure bar code options near the top of the dialog and QR code options near the bottom of the dialog.
The Bar Code section has the following options:
- Bar Code: Specifies which bar code format to use.
- Narrow to wide ratio: This slide-bar alters the relationship of the wide to the narrow element widths.
- Reduction/Gain: This slide-bar alters the proportional thickness of the bars comprising the bar code data.
- Output Options: This section has these options:
- Use Optional Checksum: This option enables the optional checksum character. Check characters are normally found at the end of the encoded data.
- Use Optional Stop/Start Character: This option enables the optional bar code Start/Stop character. This may be necessary for use with the bar code reader.
- Display Options: This section has these options:
- Display Human Readable Text: This option enables the display of the encoded data in human readable form, for confirmation of the encoded data.
- Above Bar Code: This option alongside the Display Human Readable Text positions the Human Readable text above the bar code, if selected.
- Display Comments: This option displays the source object of the encoded data i.e. Item Number and the Above Bar Code option positions the comments above the bar code.
- Display Quiet Zones: This option enables the clear area located at either end of the bar code data.
- Display Bearer Bars: This option displays the bearer bars within the bar code. These serve a function similar to start/stop characters.
The QR Code section has the following option:
- Low: Uses an error correction level of 7% .
- Medium: Uses an error correction level of 15%.
- Quality: Uses an error correction level of 25%.
- High: Uses an error correction level of 30%.
Once bar codes or QR codes have been configured as above, it is then possible to attach bar codes or QR codes to reports and labels, etc. The example below describes how to attach a bar code or QR code to a part label.
Attaching a Bar Code or QR Code to a Part Label
To attach a bar code or QR code to a part label:
- Click File
 Print Layouts
  Labels.
 - Select Part Labels from the Label Type drop-down menu.
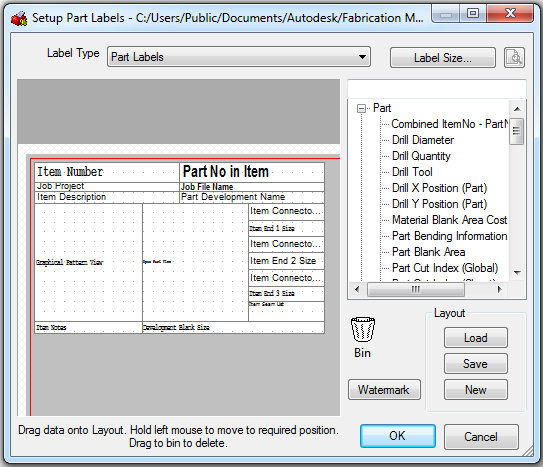
- Right click the Item Number field in the label layout displayed on the left, and click Properties. The Object Properties dialog displays.
- On the Object Properties dialog, click the Font tab.
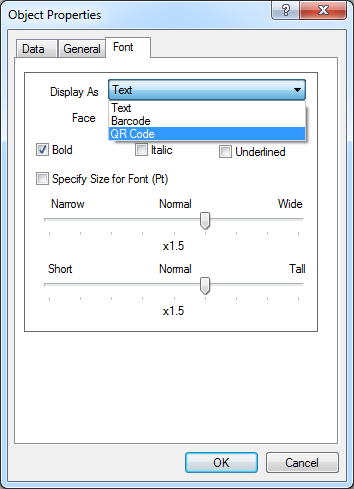
- On the Font tab, for the Display As drop-down menu, select either the Bar Code or QR option, and click OK.
Note: If Human Readable data is to be displayed, an appropriate font may be selected from the Face drop-down menu. The selected font may also be underlined, italicized and bolded by clicking the relevant check box. The settings for Narrow - Normal - Wide and Short - Normal - Tall will affect both the human readable and the bar code and QR code display properties.
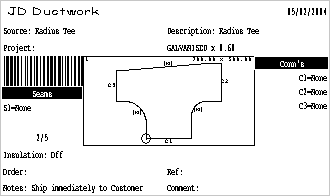
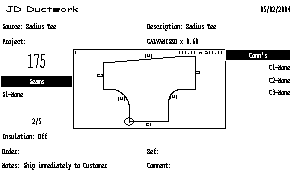
The example labels below show the same part label with the bar codes enabled (first one) and without bar codes enabled (second one).
