Before configuring and editing the layout of a worksheet, users must consider printer settings. The Autodesk Fabrication applications can be configured either to print a hard paper copy or an electronic version, for example a *.pdf file.
- With the required worksheet layout active, select
 Set-Up Paper Layout.
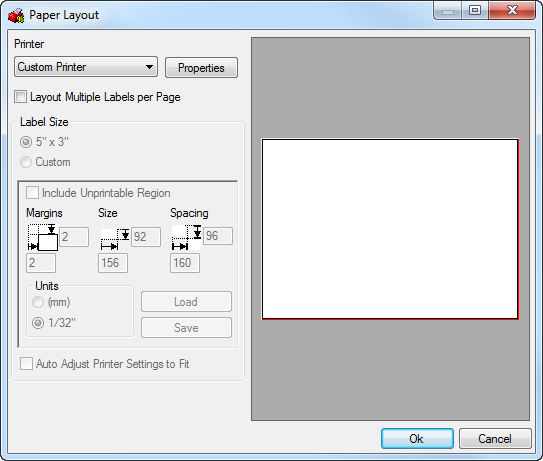
The Paper Layout dialog displays.

- Click the Printer drop-down menu, and select one of these four options:
- Nest Printer
- Report Printer
- Label Printer
- Custom Printer
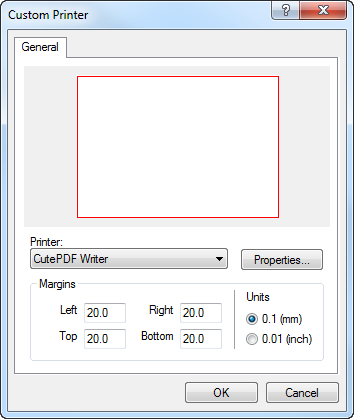
- Select Custom Printer then Properties. The Custom Printer dialog displays.
 Note: For electronic (*.PDF) worksheets, a suitable PDF writer plug in may need to be installed. Also printer selection will vary dependent on the type of printer installed to the local or networked system.
 - Select the Printer drop-down menu, to indicate the installed printers available for selection.
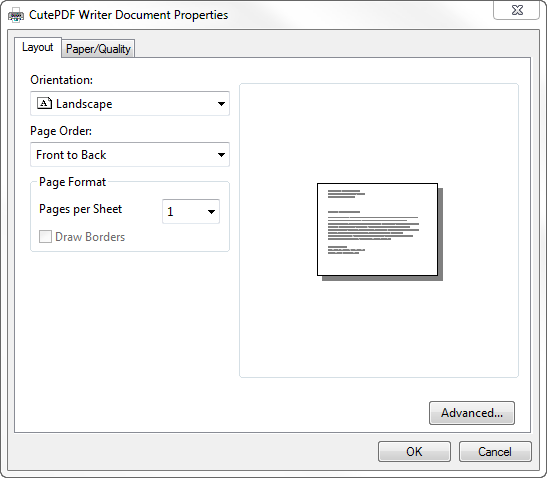
- Select PDF Printer of Choice then Properties.
The PDF Printer of Choice document properties dialog displays.

-
Note: Depending on the selected Printer installed, these options / settings will have variations. Please ensure to check the appropriate printer software help provided from your supplier.
- In the PDF Printer properties, configure the orientation and other settings.
- Click the Advanced tab. The PDF Printer dialog displays:

- In the Advanced tab
 Graphic
 Print Quality, and click the drop-down menu to display the available dpi options. This ranges from 72 dpi to 4000 dpi.
- Select 300 dpi.
- Click OK to save the settings and close the PDF Printer dialog.
- Click OK again on the previous dialog.
Now the Paper space Worksheet has been configured. The Custom Printer dialog displays.

- Click OK to save changes and close the dialog.