The Installed Machines dialog lets you set up the machines that will write NC data for the jobs created using the Autodesk Fabrication products.
To display the Installed Machines dialog, in ESTmep or CAMduct, click File  Setup
Setup Installed Machines, or select the Installed Machines icon from the Utility Bar.

To update an existing machine, click the  button, or double click the name of the machine. This displays the Machine Editor dialog.

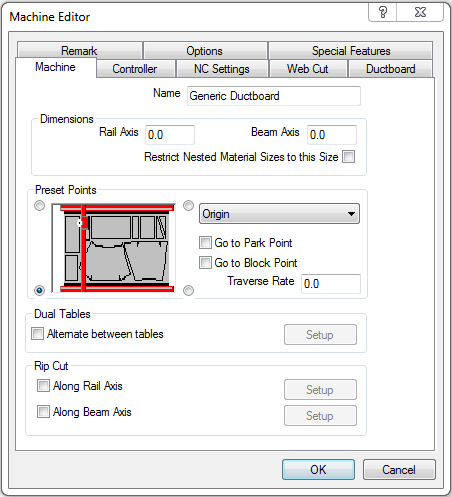
The Machine Editor dialog is comprised of a variety of tabs that let you specify machine behavior. The tabs that display are different depending on the type of machine (Flatbed, Rotary, Shear, Round Linear, Rectangular Linear, or Ancillaries) you are updating or setting up. For example, the Machine Editor dialog for a flat sheet cutting type of machine (such as for the "Generic Ductboard" machine, shown above) displays different tabs than for a linear nesting type of machine (such as for the "Rectangular Linear" machine shown below). For more information, see Machine Editor.

To add, setup or update the tools fitted to the machine, click  . For more information, see Add Tools to a Machine.
To install a new machine, click New  . For more information about installing a new machine, see Installing a New Machine. (For more information on the difference between installing a new machine and installing a custom NC machine, see Before Installing a Machine.)
To install a custom NC machine, click Custom NC  . For more information, see Installing a Custom NC Machine.
To delete an installed machine, select the machine name in the left pane, and click  .
.
The  button is used to check the materials and tool settings of the machine, and displays a dialog of any settings that have not yet been configured, as shown below.

The  button creates and prints out a complete list of settings configured within the tabs of the Machine Editor dialog and the Installed Machines dialog.