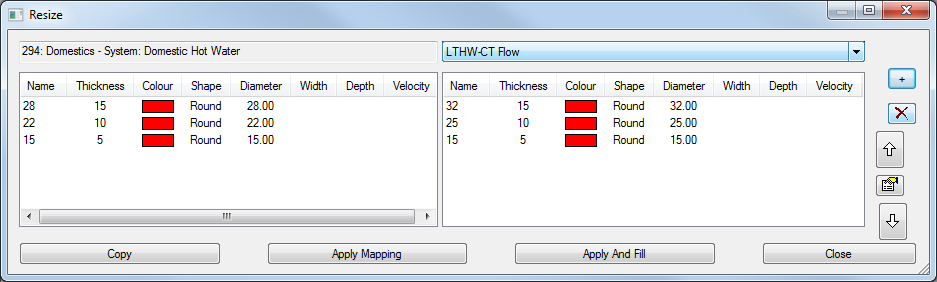
The Resize dialog allows users to switch the material and sizes of previously drawn Design Lines. A common example of this is for switching Copper to Steel. This can be utilised for reviewing cost differences between installation times or supplier prices.
The Resize dialog is accessed from the View menu  Resize.

The user is able to select a service for mapping against the existing service currently in use Copper sizes to Steel sizes for example. (Existing service in use - Left column, New Mapping - Right column).
Using the drop-down, a selection of the new service is required. When the service is selected, the  can be used to open up the available constraints of that service. Selecting each Constrains size individually allows for them to be added to the list using the button. The
  should be used to delete any unwanted constraints in the list. Multiple select the constraints followed by the button.
Tip: You are able to select the order for how they are assigned to the list so no arrangement is required prior to mapping stage.

Each size should be allocated a position using the arrow selections to move the constraint up and down the list so it corresponds to the constraint size on the left hand column it to be resized with.

 The arrows are used to position the constraint in the correct order. Ensure the constraint is positioned on the same row as the constraint required from the left hand column.
 You are able to view and define the constraint using the selection and then selecting the Define Constraint icon.
After the constraints are in the correct order, click the  to perform the switch or alternatively
  to attempt the Fill automatically in one process.
 The copy button is used to attempt to duplicate the sizes from one service to another is that size exists.
 the Close button is to be selected once the Apply Mapping button has been selected. Clicking Close without the Apply method will lose any changes.