Use the Setup controls to define the simulation.
Solution Mode
2D Simulation
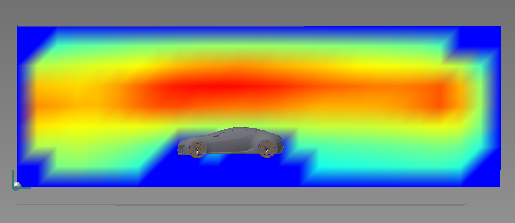
To model the flow on a single slice in the wind tunnel, select 2D Simulation. This mode is the fastest, and produces results on a two-dimensional slice through the model. Use it to quickly understand the wind behavior through a specific cross-section. Note that while results produced in 2D mode are conceptual, they provide a quick and valuable view of how the air moves past the design. The displayed results update as you change the wind speed and direction.
3D Simulation
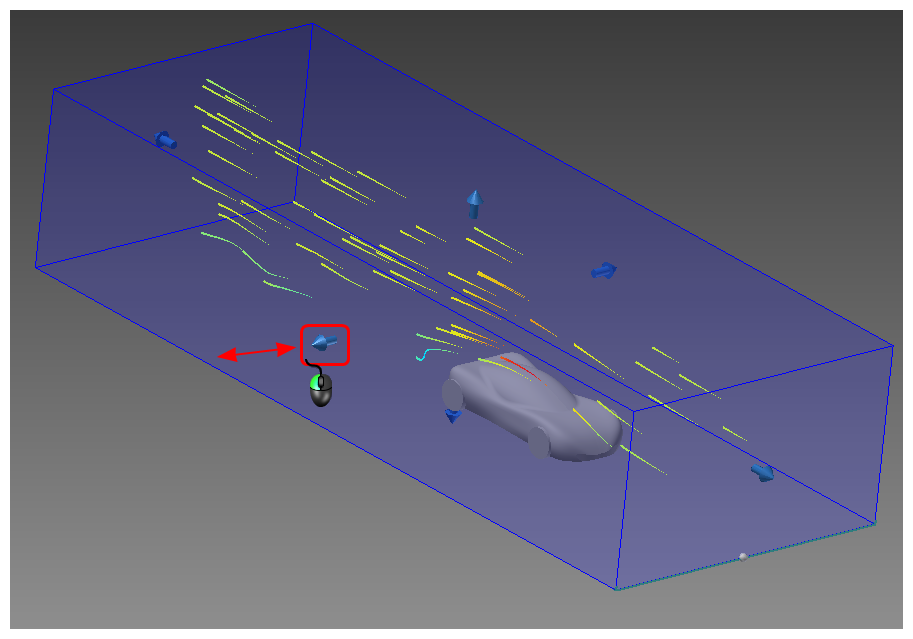
To model the flow throughout the entire wind tunnel, select 3D Simulation. This mode is useful for visualizing the interactive nature of the flow around the object. Results computed in 3D are more complete than in 2D because they encompass the entire object and the air throughout the wind tunnel. Use 3D to see where the flow is smooth and where it changes direction. Look for regions that show flow separation, recirculation, and abrupt direction changes.
For more about the differences between 2D and 3D wind tunnel flows, click here.
Simulation Settings
Wind Speed
Interactively change the flow velocity with the dial control.
Simulation Resolution
To adjust the solution fidelity, modify the grid resolution. A lower resolution grid typically runs faster, but is less accurate than a higher resolution grid. In the following example, the grid resolution is too low:
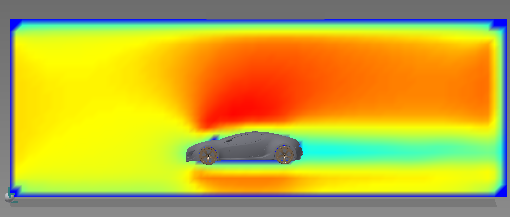
When the grid resolution is increased, the results look much better. Note that the higher resolution captures flow details that were missed by the lower resolution solution:
Wind Tunnel Manipulators
To change the size and position of the air volume around the object, use the blue wind tunnel grab handles at the sides of the domain:
It is important to select an appropriate size for the flow domain to ensure that bounds to not artificially influence the flow. Click here for more about sizing the domain correctly.
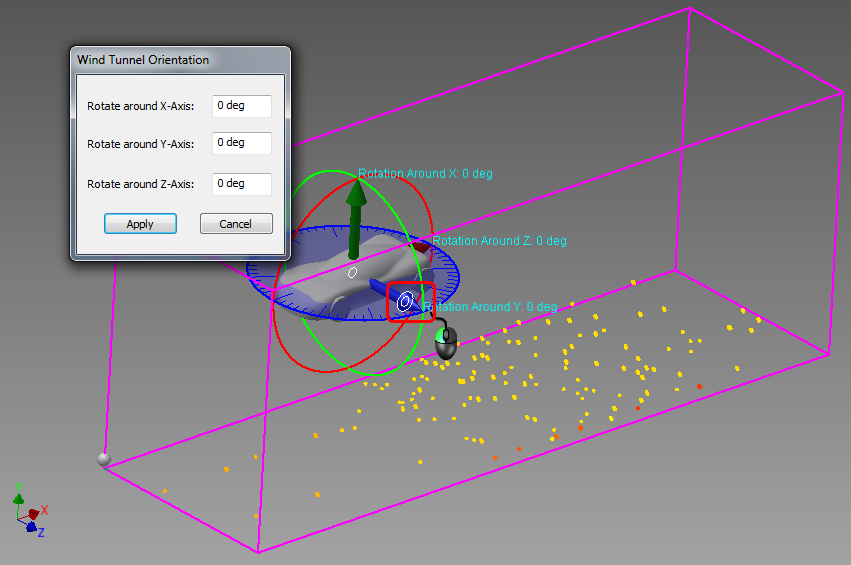
Wind Tunnel Orientation
Because it is not practical to reorient the model in Inventor, you can modify the orientation of the wind tunnel instead.
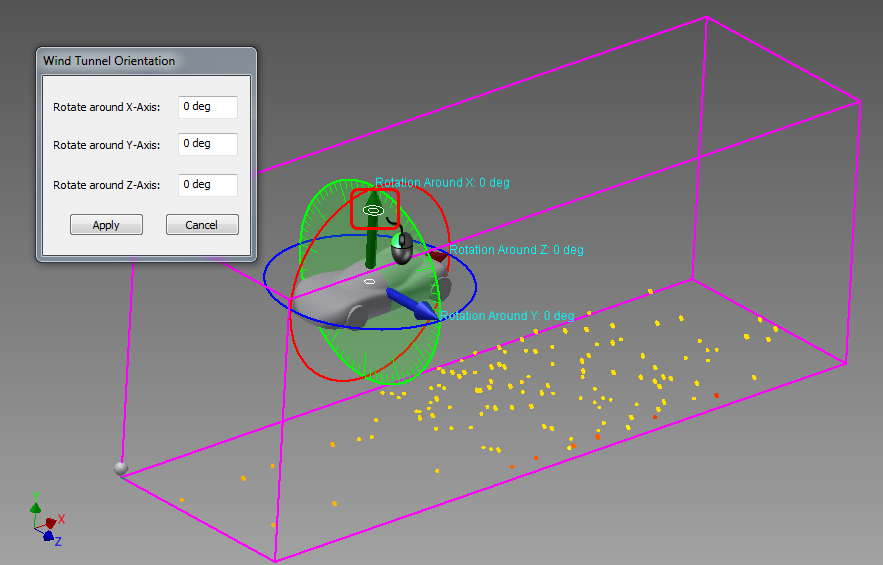
After clicking the Wind Tunnel Orientation command, a Cartesian axis and an orientation dial for each axis appears on the model.
To change the orientation of the wind tunnel:
- Hover your mouse over the arrow within the dial that is perpendicular to the intended axis of rotation.
- Drag the arrow about the axis until the wind tunnel is in the desired orientation.
To rotate about the X axis:
To rotate about the Y axis:
To rotate about the Z axis:

You can also change the orientation by keying in values in the Wind Tunnel Orientation dialog box.
Note that this is different from the Standalone version in which the wind tunnel orientation is fixed and the model orientation can be changed.