Manage the Post Library
Add a post processor to a Cloud or Local library folder.
On the Manufacture workspace toolbar, click Milling > Manage > Post Library.
The Post Library opens.
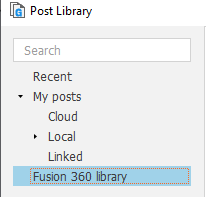
In the left panel, select the Fusion Library folder.

In the middle panel, select the installed, generic post processor that you want to copy to your Cloud or Local library folder.
Tip: Hold theCtrlkey to multi-select post processors. In the right panel, use the Filters tab to reduce the list of post processors by capability and vendor.Click Copy Selected
 .
.Depending on where you want to add the post processor, in the left panel, select:
- My Posts > Cloud to make them available in the Data Panel, in Libraries > Assets > CAMPosts, or
- My Posts > Local to make them available in
C: \Users \<name> \AppData \Roaming \Autodesk {{fusion}} CAM \Posts(Windows).
Click Paste
 .
.A copy of the selected post processor is added.
Optional steps:
To import a post processor, select the Cloud or Local library folder, then click Import
 and select a
 *.cpsfile.To export a post processor as a
*.cpsfile, select the post processor in the Cloud or Local library folder, then click Export Selected .
.To access post processor files that are located in a folder elsewhere on your device, right-click the Linked folder and select Link folder then specify the location of the folder.