Setup tab (additive) reference

Additive setups do not require a work coordinate system or the stock. You should, however, set +Z to Up through the ViewCube. Also, any post-processors, if applicable, are set in print settings.

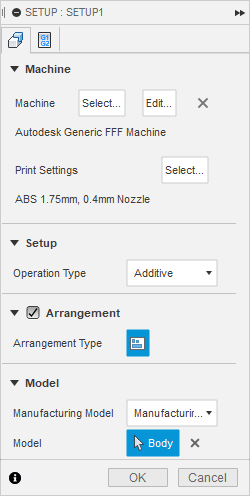
Machine
Opens the Machine Library, where you can select the additive machine you want to use. In the Machine Library, selecting an additive machine from the Fusion Library folder, or from one of the My Machines folders, copies the additive machine to the Document folder.
Print Settings
Opens the Print Setting Library, where you can select a set of print settings, which are a collection of parameters used for toolpath generation. In the Print Setting Library, selecting print settings from the Fusion Library folder, or from one of the My Machines folders, copies the print settings to the Document folder.
Operation type
Specifies the manufacturing process. This is set automatically based on the machine type you select.
Arrangement
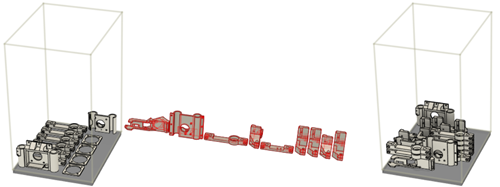
Automatically arranges multiple components so that they fit inside the additive machine’s build volume.
When you finish creating the setup, you choose which components to arrange. Choose to automatically arrange components in 2D or 3D. Components that cannot be automatically arranged are left outside the build volume and are colored red.

Example of components arranged in 2D (left) and 3D (right).
Manufacturing Model
Associates the active manufacturing model with the setup.
If only the < Default > manufacturing model exists, Fusion creates a manufacturing model.
Model
Specifies the models to be added to this setup. Setups must always contain at least one model. It is recommended to work with components as models instead of bodies.