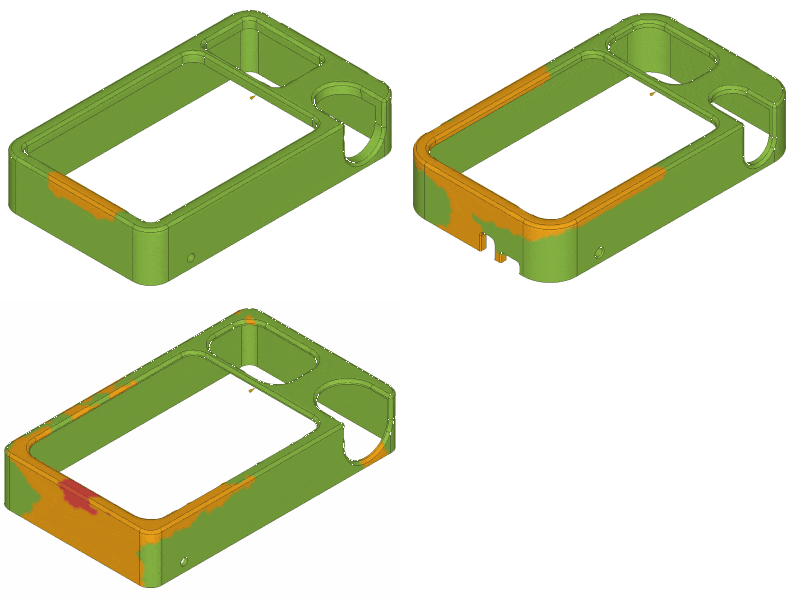
Set up, solve, and compare simulation studies for configurations
Learn how to set up and solve Simulation Studies and compare Simulation Results for Configurations in the Simulation workspace in Fusion.

Set up and solve a Simulation Study for a Configuration
You can setup and solve simulation studies for each Configuration in a Configured Design.
Switch to the Simulation workspace.
The New Study dialog displays.
Select a Study Type.
Click Create Study.
The new Simulation Study is created for the active Configuration and displays in the Browser.
On the Simulation > Setup toolbar, prepare the simulation study:
- Use the Study > New Simulation Study tool to create additional studies for the active Configuration.
- Use the Simplify tool to enter the Simplify contextual environment and simplify geometry for the study.
- Use the Materials tools to select materials, create new material libraries, and modify material properties.
- Set up relevant boundary conditions for the study type:
- Use the Constraints tools to constrain geometry and limit motion.
- Use the Loads tools to apply loads to geometry and simulate realistic conditions.
- Use the Contacts tools to identify and define contacts between components and bodies that touch or overlap each other.
- Use the Display tools to adjust the view.
- Use the Manage tools to modify the study type or its parameters, adjust mesh settings, and view load case attributes.
Use the Solve tools to solve the simulation study:
- Run a Pre-Check.
- Solve the study.
- View progress in the Job Status dialog.
- View the Solve Details for the study.
Enter the Results contextual environment to view and compare the study results:
- Use the Results Tools to customize the presentation of results, view numerical results, and generate reports.
- Use the Compare tools to enter the Compare contextual environment to compare different studies.
- Use the Inspect tools to view minimum and maximum values, probe results in specific locations, display reaction forces and moments, create a slice plane through results, and view solver data.
Studies and their results are associated with the Configuration they were created for, and they remain that way even as you activate different Configurations. Results go out-of-date if you update the associated Configuration in the Design workspace or Simplify contextual environment.
Compare Simulation Results for different Configurations
After you create and solve simulation studies for two or more Configurations, you can compare their results.
Enter the Results contextual environment.
On the Results toolbar, click Compare to enter the Compare contextual environment.
The active Study displays in the Canvas.
Optional: Select a different study from a different Configuration to compare.
In the view window, expand the list of Studies.
Select a Study.
The selected Study displays in the Canvas.
On the Simulation toolbar, on the Compare tab:
- Use Syncronize tools to control the camera view, result type, and legend settings of all visible configurations at the same time.
- Use Options tools to modify the legend controls and range.
- Use Layout tools to customize the layout of the view window.
- Use Display tools to toggle Mesh Visibility and Wireframe Visibility.
The Studies display in Compare.
Activate a different Configuration
- Switch to the Simulation workspace.
- In the Browser, expand the list of Configurations.
- Select a Configuration.
The Configuration you selected displays in the canvas. The Browser updates to reflect the active Configuration. The studies and results are filtered to display only those that are associated with the active Configuration.
The first time you activate a Configuration, the New Simulation Study dialog appears so that you can select a study type and create its first study.
Tips
- After you create similar studies for different Configurations, enter the Compare contextual environment to compare results across different Configurations.