Activity 5: Create balloons and text
In this activity, you:
- Create Balloons on the Shaded View.
- Add text to the drawing.
Prerequisites
- Activity 4 is complete.
Steps
Create Balloons on the Shaded View.
The balloons display on the sheet and point to the components. The numbers in the balloons match the Item numbers for each component in the parts list.
In the Tables toolbar, click Balloon.
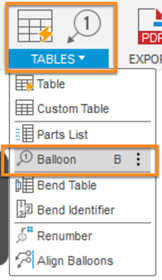
The Balloon command is located under the Tables drop-down list.
On the Shaded View, select an edge of a component (as shown in the image below).
Click to place the balloon.
Select an edge of the second component on the Shaded View (as shown in the image below).
Click to place the balloon.
Click Close to complete the Balloon command.
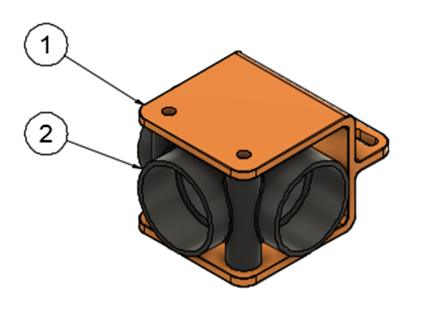
The balloons on the shaded view.
Add text to the drawing.
The Text command creates a text object to label parts of a drawing, provide specifications, or add annotations and notes.
In the Text toolbar, click Text.
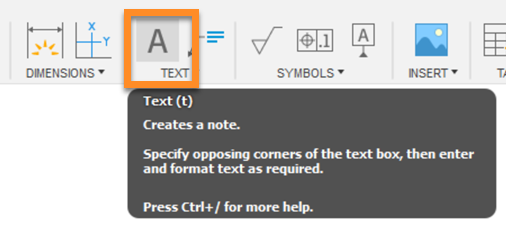
The Text command is located under the Text drop-down list.
Select two corners in the top left corner of the sheet to create a text box.
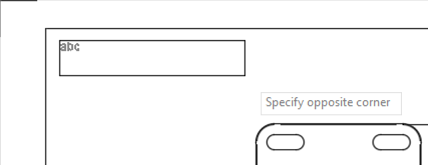
Selecting two corners in the top left corner of the sheet.
Type the following text into the text box:
NOTES:
1.ALL MEASUREMENTS IN INCHES
In the Text dialog, make sure the Height is set to 0.12 in and Numbering is selected.
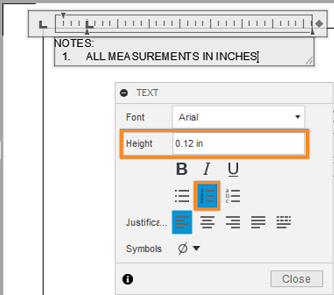
The Text dialog.
Click Close to complete the Text command.
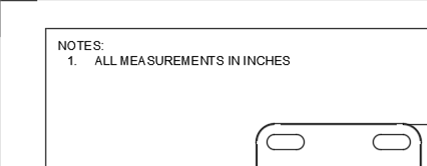
The Text in the top left corner of the sheet.
Activity 5 summary
In this activity, you:
- Created Balloons on the Shaded View.
- Added text to the drawing.