Fusion Home
Home is a central location in Fusion where you view and access your data. Many Autodesk products use a similar view, giving you a consistent way to reach your work. From Home you can start or open designs, return to recent work, browse projects and folders in your hub, explore example designs provided by Autodesk, and find learning resources.
The overview below introduces navigation and other controls you use in Home. My Fusion is shown in the main area as an example; each page is described in the sections that follow.
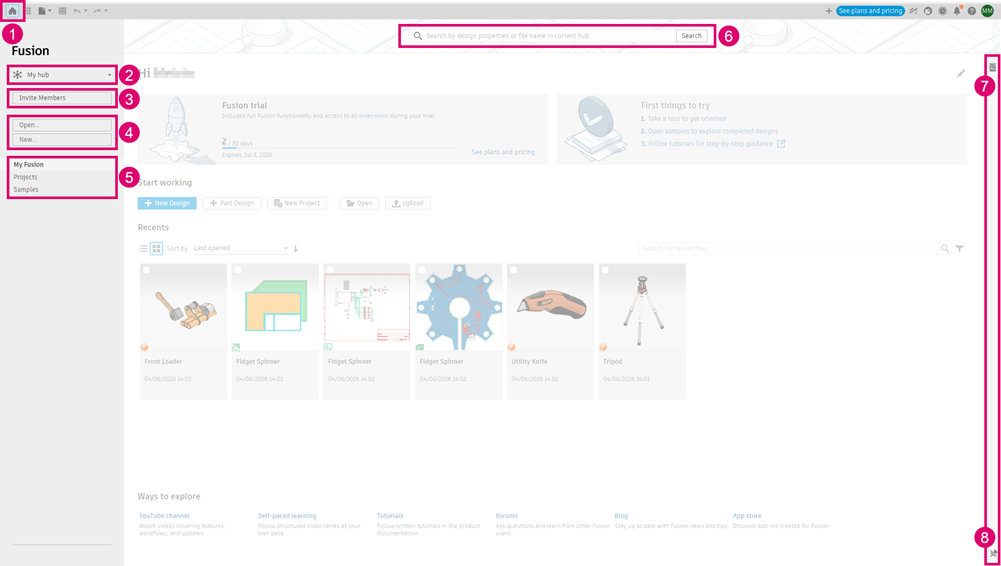
- Home
 — Open Home from any workspace.
 - Hub switcher — Work in the hub that holds your projects and data. Switch hubs when you collaborate with more than one team.
- Invite Members — Add people to the hub (hub admins only).
- Open and New — Create a design or open an existing one.
- My Fusion, Projects, and Samples — Open the page you need: start work and find recent files (My Fusion), browse and manage projects and folders in your hub (Projects), or explore example designs (Samples).
- Search — Find designs, files, and properties in the current hub.
- Details
 — Open the Details panel for the selected file or folder.
 - Pin
 — Pin the Details panel so it stays open while you work in Home.
My Fusion
My Fusion is the first page in Home and brings together shortcuts to start work, your recent files, onboarding guidance for new users, and links to learning resources.
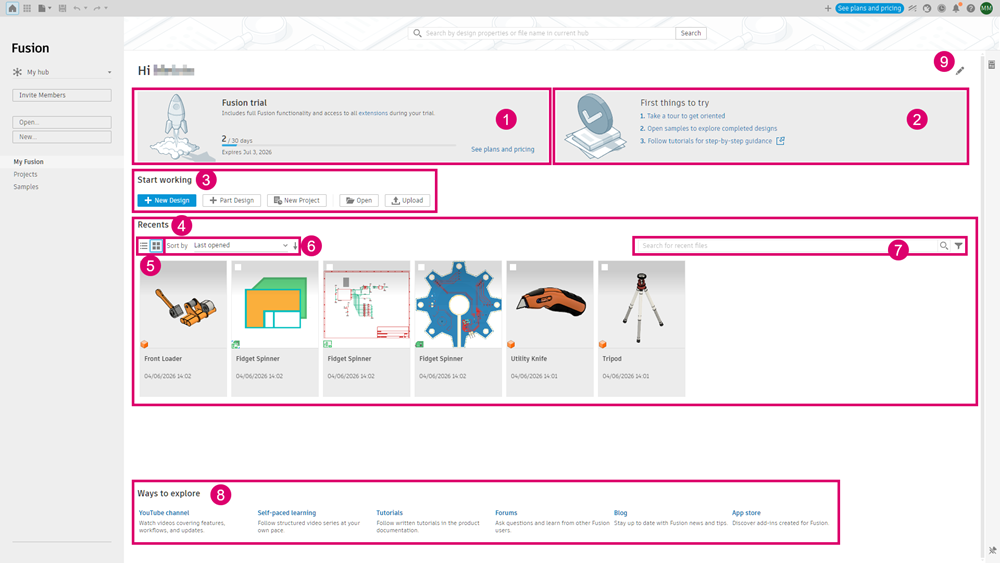
Access information — See information about your Fusion access and whether any action may be required. Depending on the type of Fusion access you have, this may include trial status, expiration details, or renewal-related actions.
Note: This section is shown only for eligible users.First things to try — See onboarding guidance designed to help you get started. This includes:
Taking a tour
Exploring sample designs
Following guided learning
Note: This section is shown during the onboarding period for eligible users. After onboarding, the space may be used to surface other relevant information, such as recent product updates.
Start working — Quickly create a design, create a project, open a file, or upload data.
The second action is a shortcut that launches your default design type, which may be part design, assembly design, hybrid design, electronics design, or electronics library. See Edit (9) to change the default design type.
Recents — Access files you've recently worked on.
List View and Grid View — Switch between List View
 and Grid View
  .Note: In List View, you can customize columns using Column Settings
 .
.Sort by — Change the order of files in the Recents list.
Search for recent files — Use Search for recent files
 and Filter
  to find and narrow the Recents list.
Ways to explore — Explore video-based learning content, product documentation, community resources on the forums, blogs, and the Design and Make Marketplace.
Edit
 — Update your purpose for using Fusion and basic preferences. Choose a purpose such as design, manufacturing, or electronics, or a combination.
Purpose influences the First things to try section. You can also set default design type, units, and mouse setup. Default design type determines the second shortcut in Start working.
Projects
Projects is the second page in Home and lets you browse and manage projects and folders in the current hub. Select a project in the project list to see its folders and files in the main area. Use the Search for drop-down to look for files and folders or projects. Choose whether to search the hub, a project, or a folder.
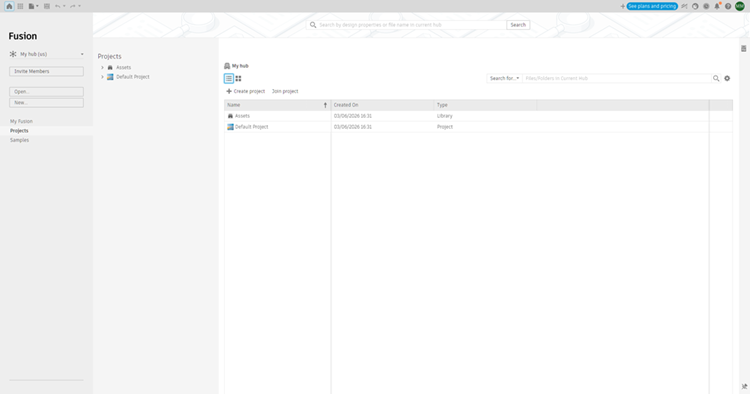
For information about managing projects, see Create, rename, and move project folders to Trash.
Samples
Samples is the third page in Home and provides example designs from Autodesk, grouped by area such as design, manufacture, electronics, and simulation.
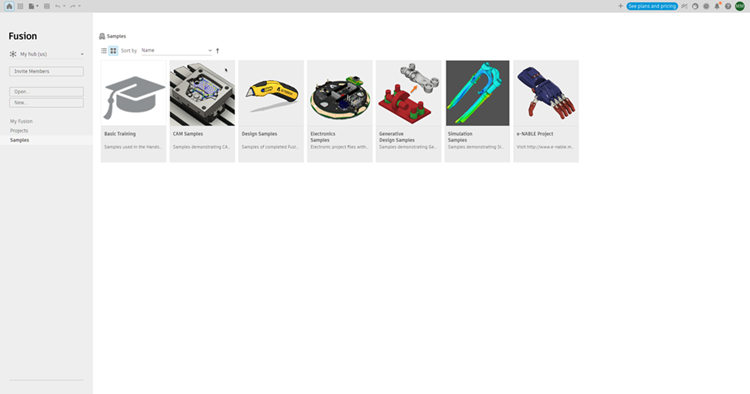
Some tutorials use sample files.
Start Fusion in Home
Fusion can start in Home or in a new design. The same setting applies when you close the last open design.
- On the application bar, click your profile icon.
- Select Preferences.
- In the Preferences dialog, select the General tab.
- Set Start-Up Experience to Home or Default Design Type.