Tour the interface
Explore the Fusion interface to learn where all the design tools are located as you start designing.
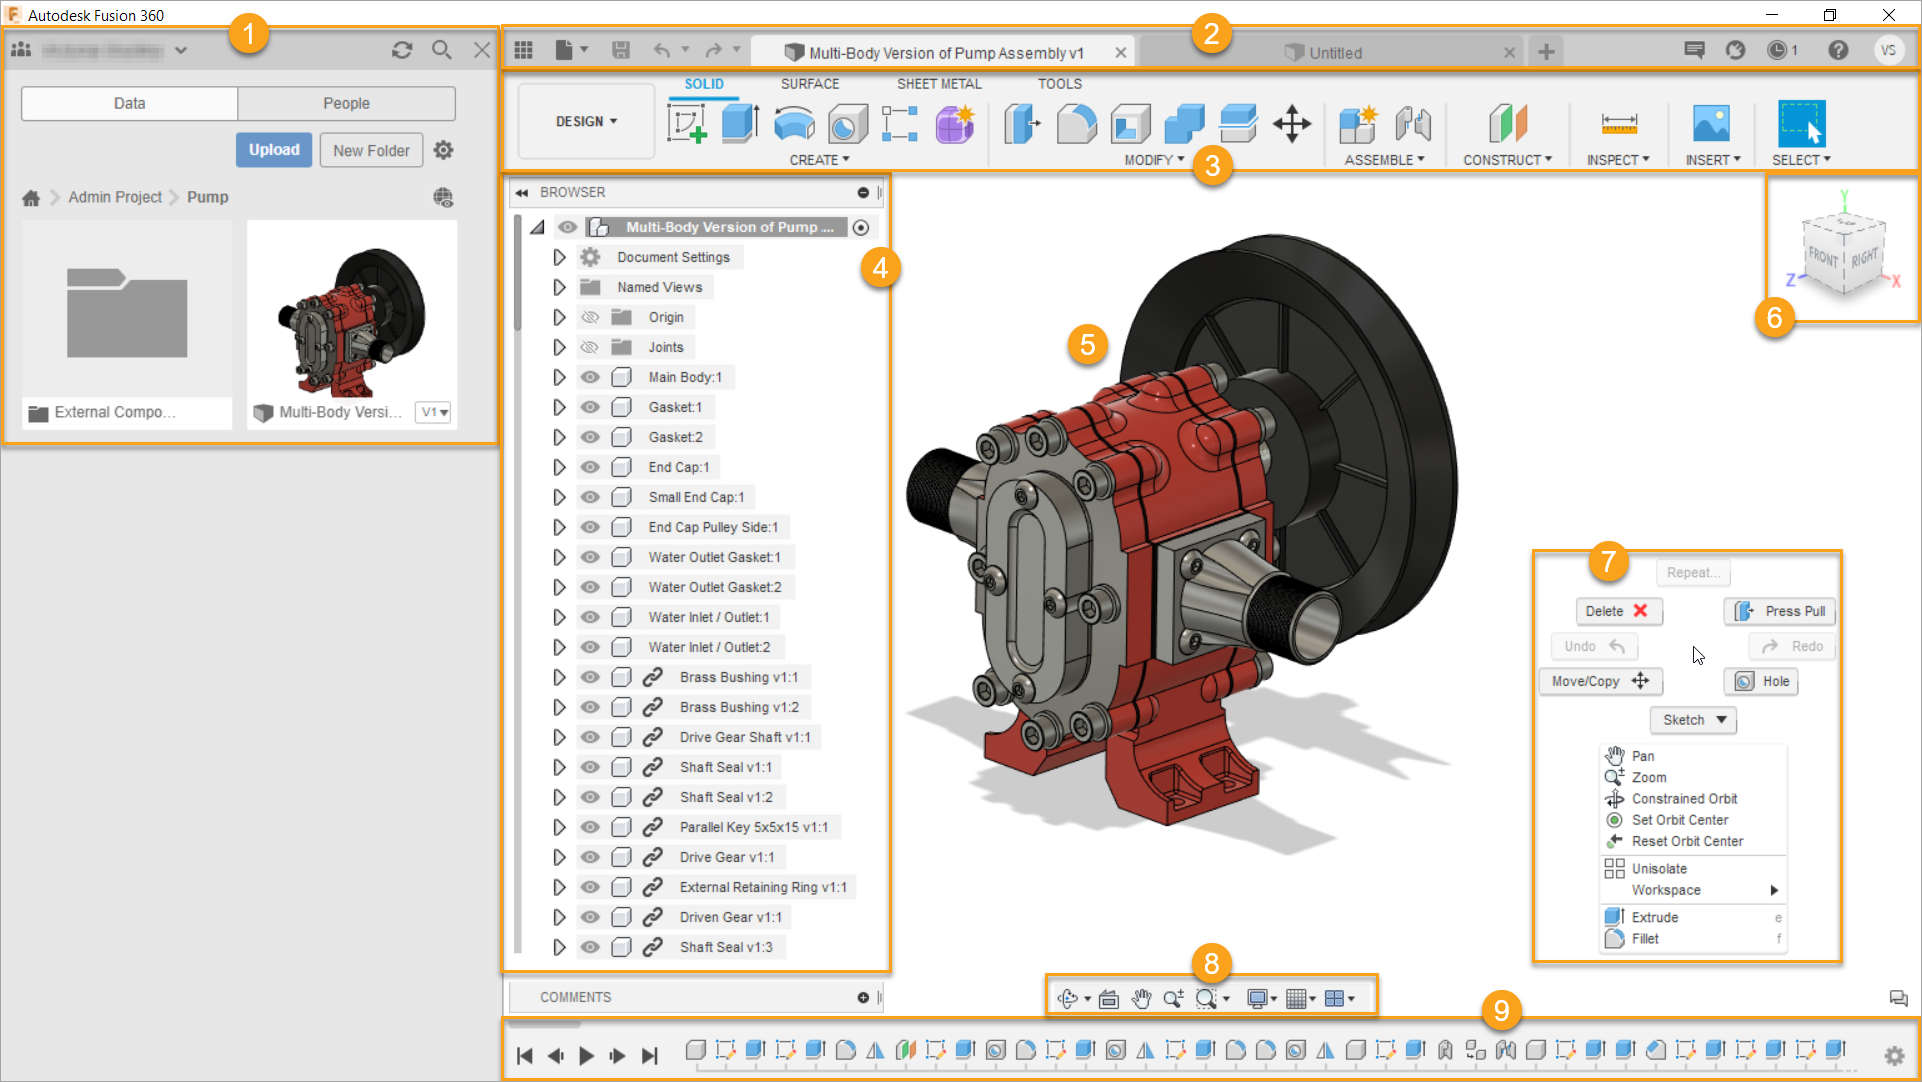
Data Panel: Access teams, projects, and designs, manage design data, and collaborate with others from the Data Panel.
Application Bar from left to right:
Data Panel
 : Show or hide the Data Panel.
File menu
 : Create, open, upload, save, export, recover, 3D print, and share designs.
Save
 : Save an untitled design or save changes to a design.
Undo/Redo


Open design tabs.
New Design
 : Create a new design.
Notification Center

Extensions
 : Manage access to Fusion extensions.
Job Status
 : View job status, Fusion update status, and online/offline status.
Help
 : Access learning content, documentation, quick setup, community resources, technical support, diagnostic tools, and information about the Fusion installation. Also from the Help menu, you can access the latest What's new blog post.
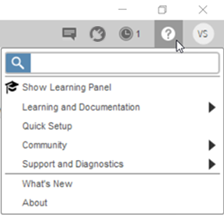
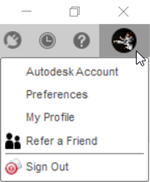
Click My Profile to:
Access your Autodesk Account.
- Change the photograph associated with your profile.
Adjust your Fusion preferences.
View or edit your profile.
Sign out.
Toolbar: Select the workspace you want to work in. The tools on the Toolbar differ in each workspace. The Toolbar is divided into tabs that organize the tools into logical groupings.
- Workspaces: Fusion uses workspaces to control which commands are available and the type of data you create.
- Workspace picker: Select the name of the current workspace to switch between workspaces.
- Tabs: Each workspace is organized into tabs that contain logical groupings of related tools.
- Contextual tabs: Some commands activate a contextual tab, like Sketch. The contextual tab displays on the Toolbar alongside the other tabs within the workspace, while the contextual tools are active.
- Contextual environments: Some commands activate a contextual environment, like Form. The contextual environment displays on the Toolbar, and its tabs replace the default tabs in the current workspace until you exit the contextual environment.
- Workspaces: Fusion uses workspaces to control which commands are available and the type of data you create.
Browser: Lists objects in your assembly (components, bodies, sketches, origins, joints, construction geometry, etc.) and lets you control visibility of objects.
Assembly in the Canvas: Left-click to select objects from the assembly in the canvas.
ViewCube: Orbit your design or view it from different positions.
Marking Menu: Right-click to access the Marking Menu, which contains frequently used commands in the wheel and additional commands in the overflow menu.
Navigation Bar: Contains commands used to zoom, pan, and orbit your design, as well as display settings to control the appearance of the interface and how design assemblies are displayed in the canvas.
Timeline: Lists operations performed in your design. Right-click operations in the timeline to make changes. Drag operations to change the order in which they are calculated. (Parametric Modeling mode only)
Toolbar tips
- If another tab is visible, you can access the tools from that tab.
- When you are in Sketch mode, Change Parameters is accessible from the Modify drop-down menu.
- The API structure lets you put your Add-in in its own panel within the tool of any given tab. You can find the sample script in the Add-ins section.