Modify volumetric properties of a solid body
Learn how to use the Volumetric Lattice tool to modify an existing solid or closed mesh body by adding an internal lattice structure within the body boundary in Fusion.
This feature is part of an extension. Extensions are a flexible way to access additional capabilities in Fusion. Learn more.
On the Design toolbar, select Solid > Modify > Volumetric Lattice
 .
.The Volumetric Lattice dialog displays.
In the canvas, select a solid or closed mesh body to create an internal lattice.
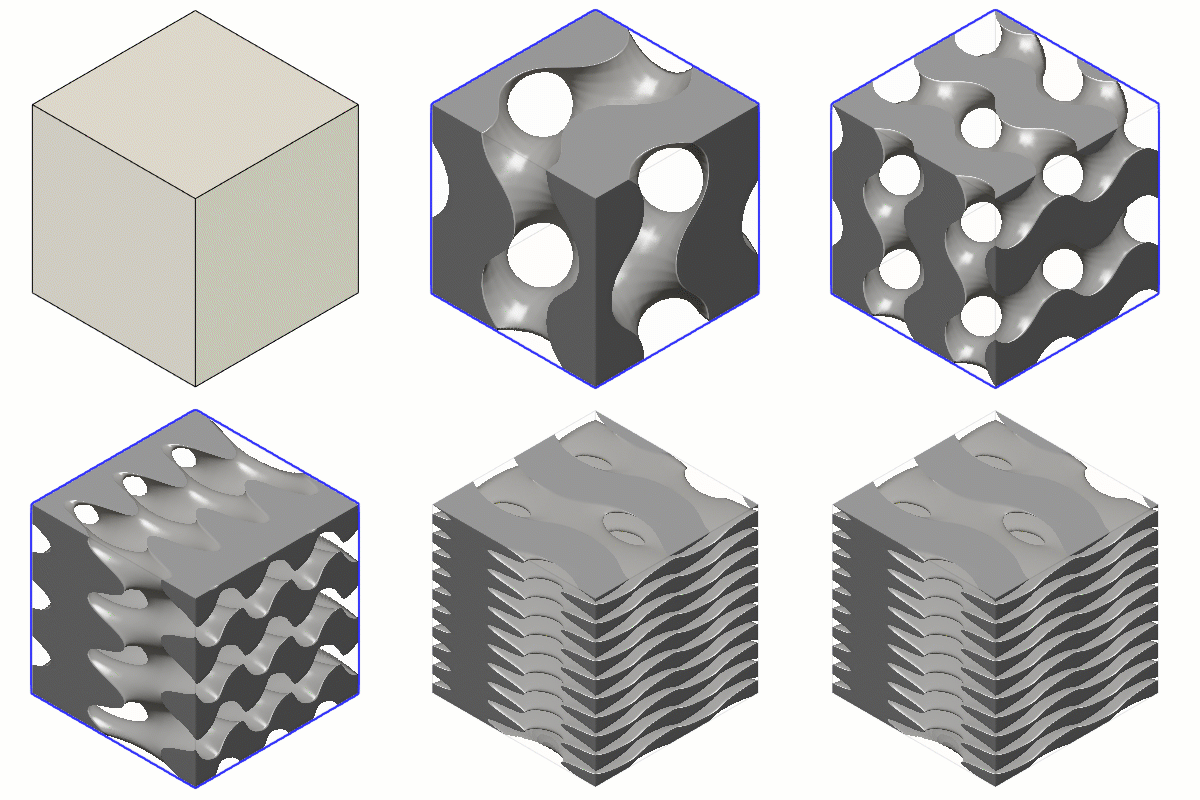
In the dialog, on the Setup tab, select a Cell Shape:
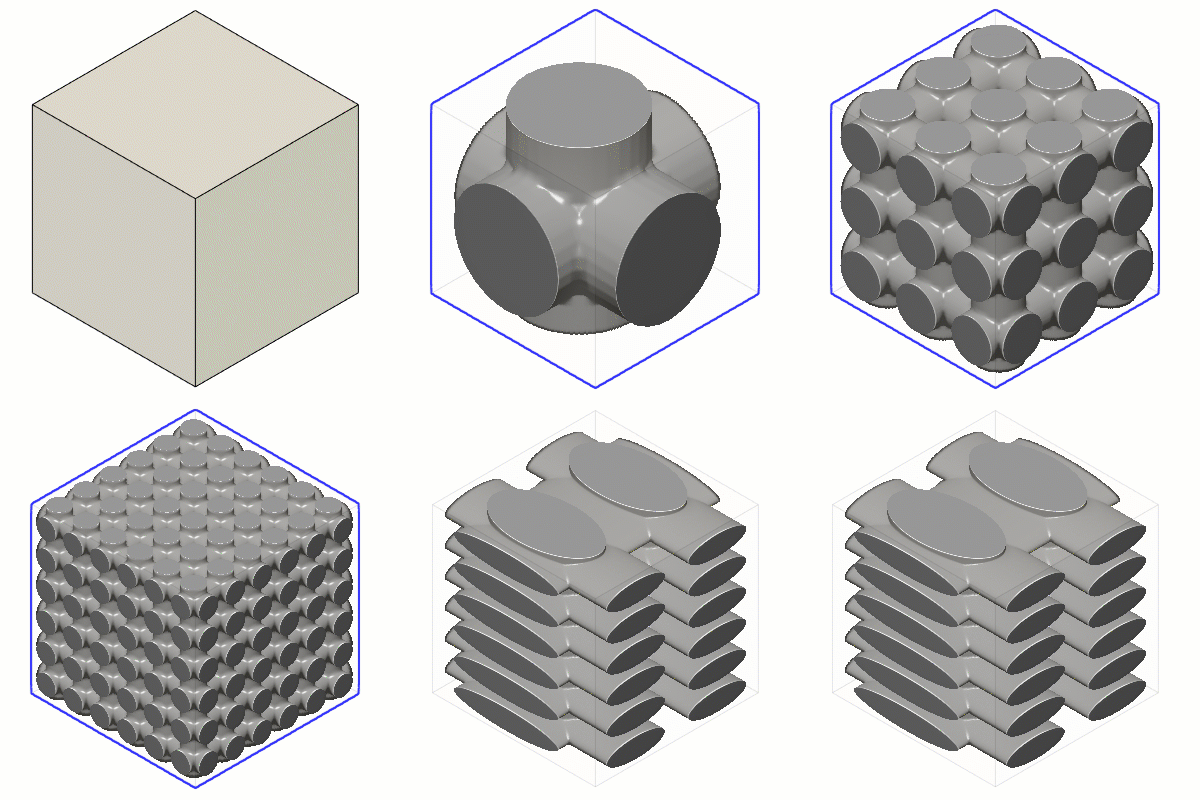
Gyroid
 : Creates a gyroid structure per cell.
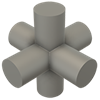
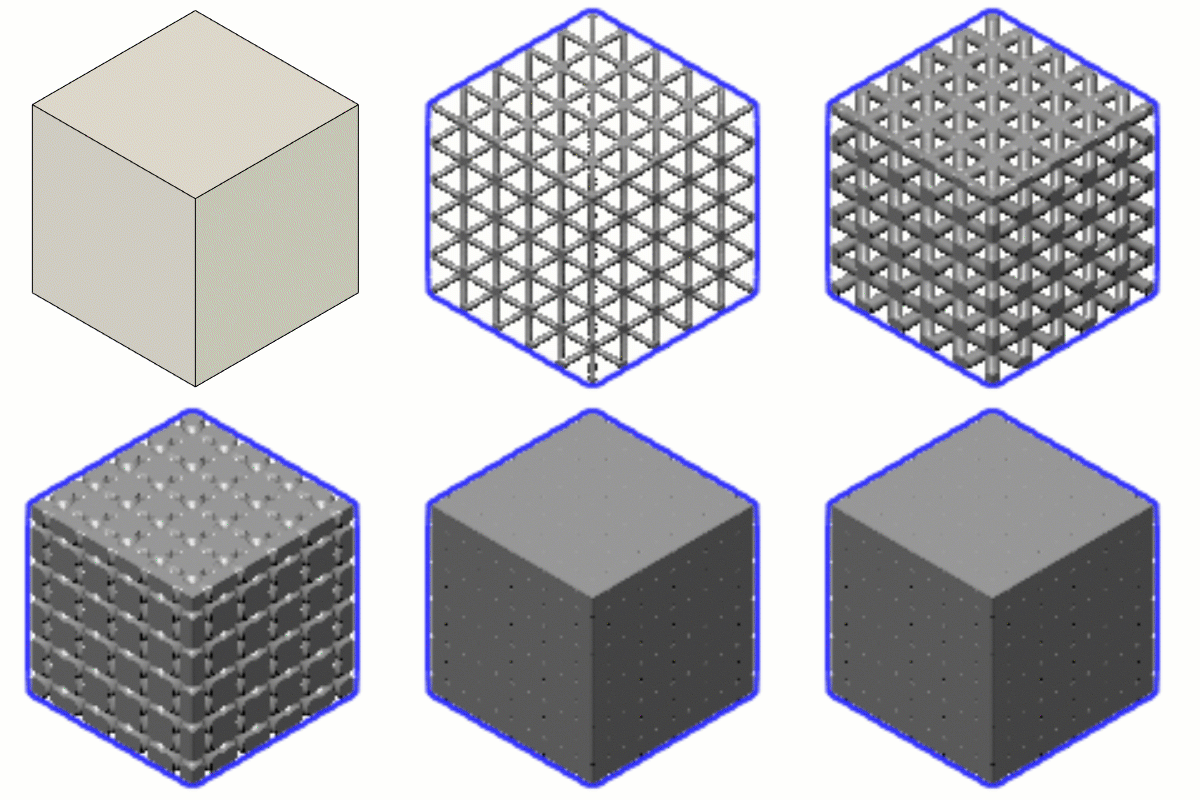
Cross
 : Creates a simple cross structure per cell.
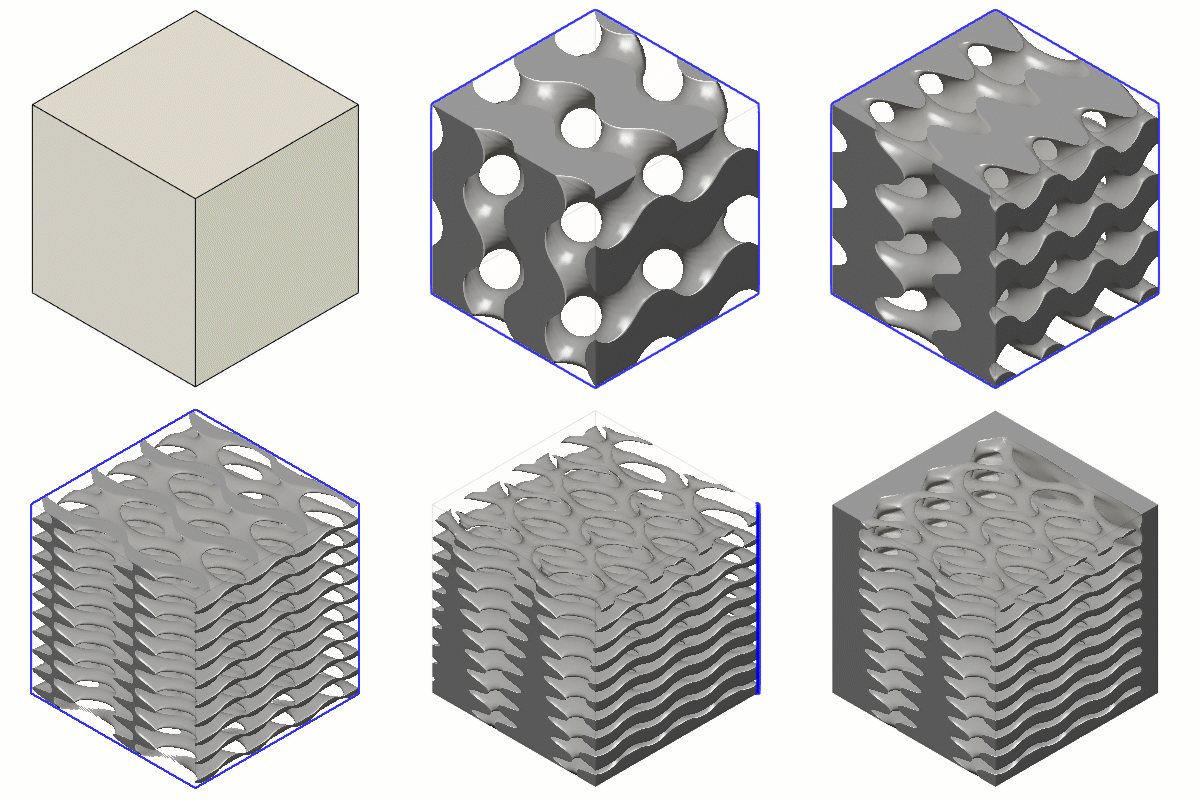
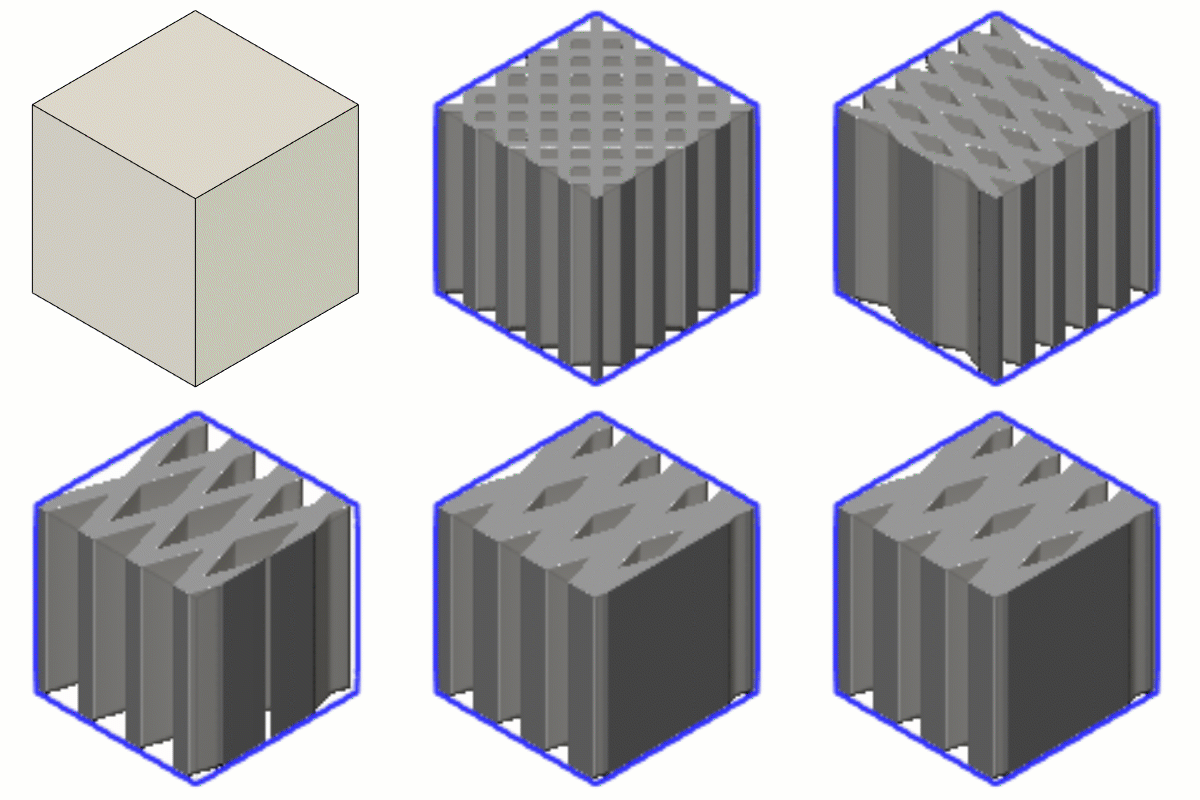
X-Cell
 : Creates an X structure per cell.
2.5D X-Cell
 : Creates an X structure per cell.
Schwarz P
 : Creates a Schwarz P minimal structure surface per cell.
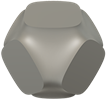
Schwarz D
 : Creates a Schwarz D structure surface per cell.
Custom
 : Creates a structure based on selected geometry.
Specify the Proportions of the cells:
- Uniform: Creates cells of the same size in each direction.
- Nonuniform: Creates cells of different sizes in each direction.
Specify the Scale of the cells:
- For the uniformly distributed cells, set the Size of cells.
- For the nonuniformly distributed cells, adjust the cell sizes in X, X and Z directions.
Click Move / Rotate to adjust the cell position and orientation in the specified direction.
If needed, Reset cells to the original position.
On the Solidity tab, select the Distribution type:
- Uniform: Distributes an even percentage of material volume to all cells throughout the selected body.
- Gradient Along Path: Distributes a varying percentage of material volume to cells along a path that you select.
Specify the Solidity percentage of the volumetric lattice.
In the Offset tab, specify the offset areas of the body.
In the canvas, select bodies, faces, points or lines to specify region of solidity.
In the dialog, specify the Solidity percentage of the offset region.
In the Blend Distance field, specify the length of the gradient between the offset area and the solidity of the rest of the lattice.
Click OK.
A volumetric lattice node is added to the parent component of the solid body or mesh body and the lattice structure is applied to the solid body or mesh.
 |
 |
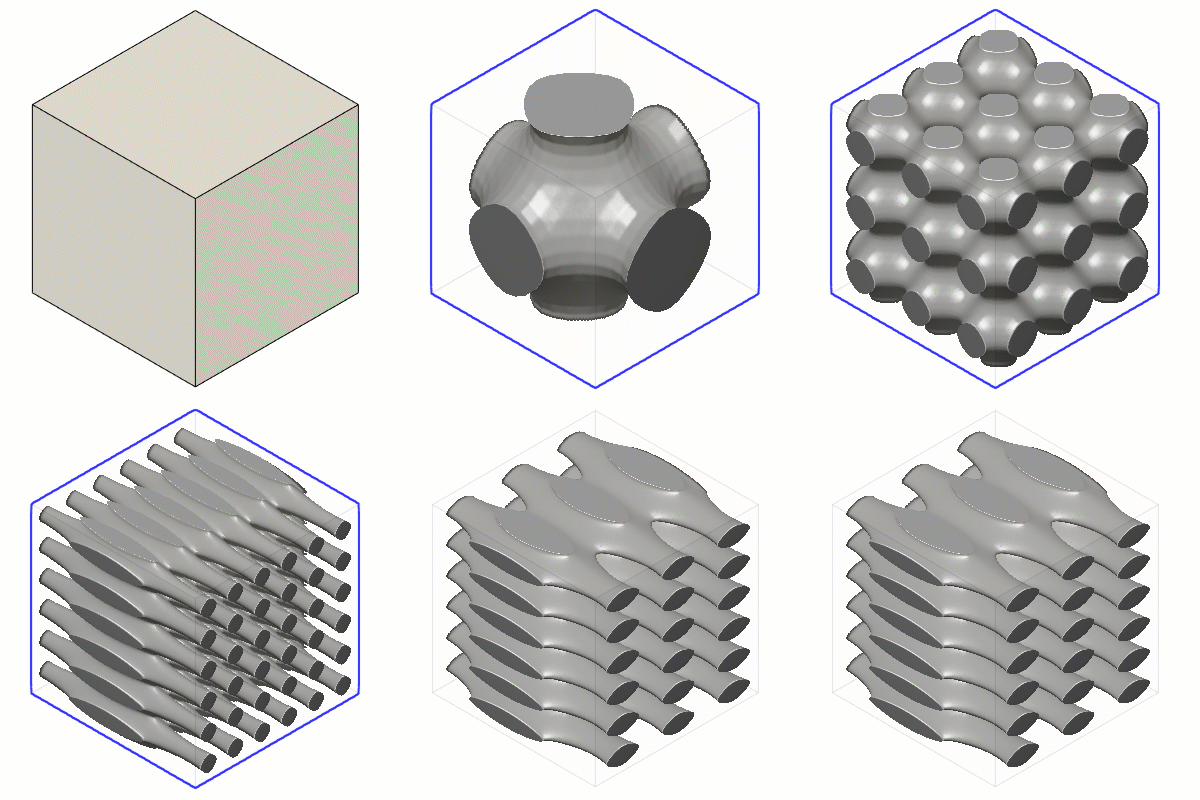 |
| Gyroid | Cross | Schwarz P |
 |
 |
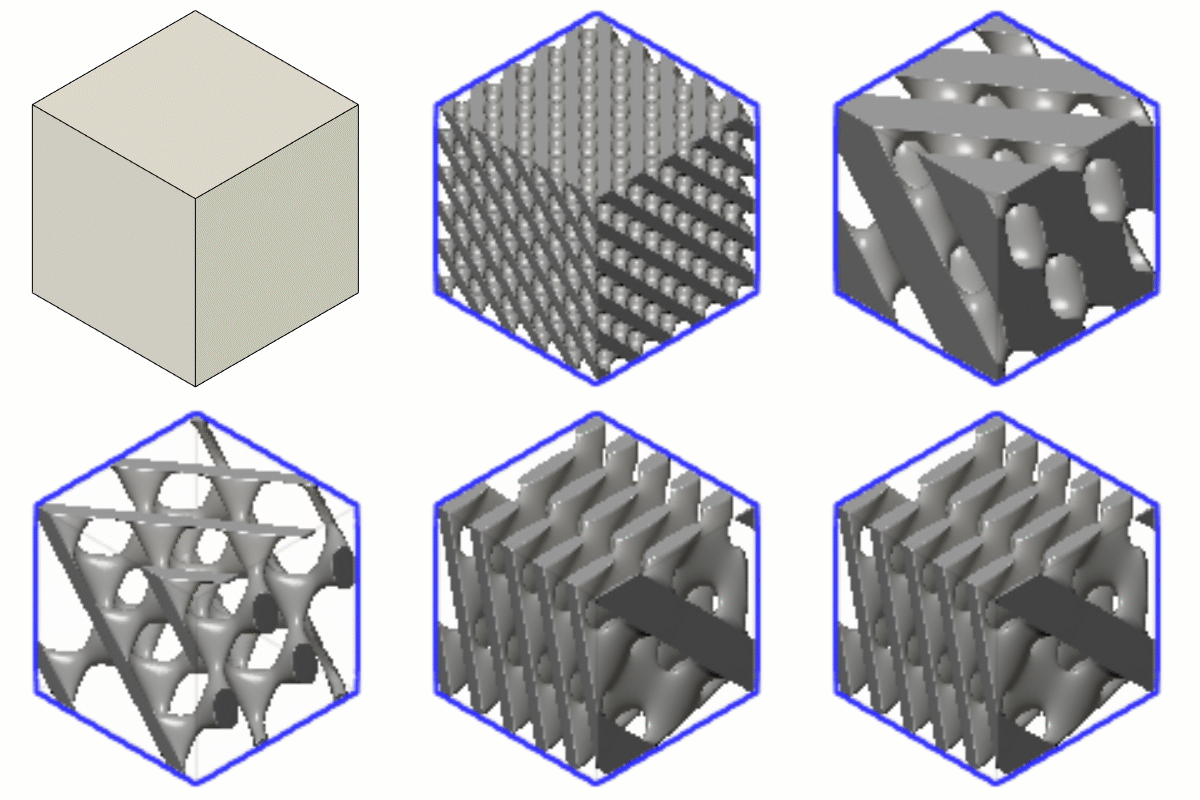 |
| X-Cell | 2.5 D X-Cell | Schwarz D |
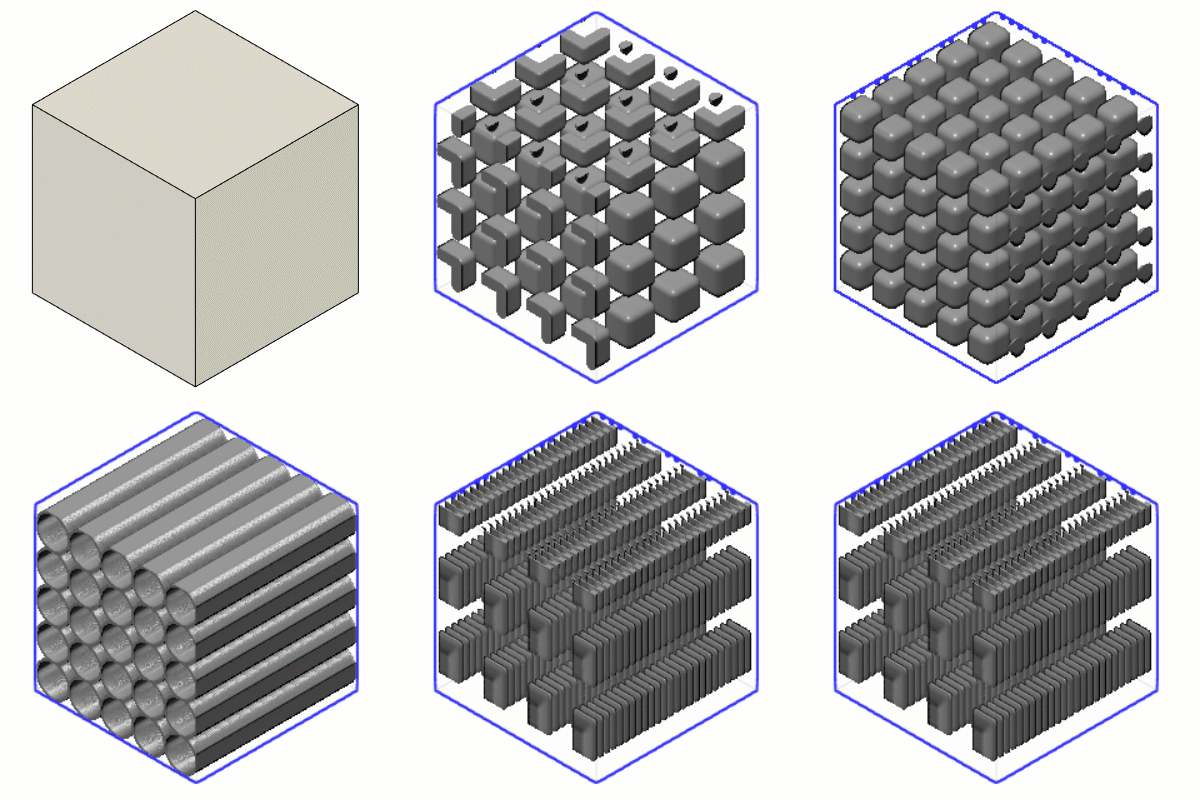 |
||
| Custom |
Edit a volumetric lattice
In the Browser locate the Component where the volumetric lattice is applied. Right-click the Volumetric Lattice node and select Edit Volumetric Lattice
 .
.The Volumetric Lattice dialog displays.
Adjust the settings.
Click OK.
The volumetric lattice structure updates to reflect the changes.
Unassign a volumetric lattice definition
- In the Browser, right-click a body with a Volumetric Lattice applied to it, and select Unassign Volumetric Lattice
 .
.
The existing volumetric lattice is unassigned from the selected body.
Assign a volumetric lattice definition
- In the Browser, right-click a body with a Volumetric Lattice applied to it, and select Assign Volumetric Lattice.
- Select Volumetric Lattice Actions > Show/Hide
 .
.
The volumetric lattice is assigned to the selected body.
Show or hide a volumetric lattice
- In the Browser, right-click a body with a Volumetric Lattice applied to it.
- Select Volumetric Lattice Actions > Show/Hide
 .
.
If the volumetric lattice was visible, it is now hidden in the canvas and the original body displays. If it was hidden, it is now visible in the canvas.
Delete a volumetric lattice
- In the Browser locate the Component where the volumetric lattice is applied.
- Right-click the Volumetric Lattice node.
- Select Delete
 .
.
The volumetric lattice is deleted and the original body displays in the canvas.
Create a mesh body from an existing volumetric lattice
In the Browser, right-click a body with a Volumetric Lattice applied to it.
Select Create Mesh
 .
.The Create Mesh dialog displays.
Set the Refinement:
- High: Applies a preset with high resolution settings to tessellate the volumetric lattice.
- Medium: Applies a preset with medium resolution settings to tessellate the volumetric lattice.
- Low: Applies a preset with low resolution settings to tessellate the volumetric lattice.
- Custom: Applies custom resolution settings to tessellate the volumetric lattice.
Specify the Element Size to indicate the size of each element in a grid used to divide the volumetric space.
Click OK.
A mesh body is created from the volumetric lattice. It displays in the canvas and in the Browser, under the Component in the Volumetric Lattice folder.
Tips
- The Gyroid cell shape can create stiff structures. However, can lead to trapped powder or resin in some printing processes.
- When using the Cross cell shape, consider using Move / Rotate to rotate the structure to ensure the Cross shape is able to support itself when printing.
- Slicing of parts with a volumetric lattice definition is much slower that it would be to slice a mesh body.
- The support structure and other print preparation tools only use the bounding geometry, not the lattice structure. This can result in outcomes like extra support structures that don't touch the lattice, or orientation results that don't consider overhangs in the lattice structure.
- When you create a mesh body from a volumetric lattice, the mesh may be extremely dense. Use the tools on the Mesh tab to make the mesh body easier to work with:
- Use Prepare > Repair to repair any issues with the converted mesh body.
- Use tools like Modify > Remesh and Reduce to adjust the topology and reduce the number of faces on the mesh body.
- Use Modify > Direct Edit to make more targeted adjustments.