Activity: Sweep, extrude, and revolve from sketches
In this activity, you create the trumpet in a few short steps from sketches that are provided to you.
Create the trumpet body using the Sweep tool, with a path and guide rail.
In the Design workspace, click Create panel title bar > Sweep.
In the Sweep dialog, from the Type drop-down list, select Path + Guide Rail.
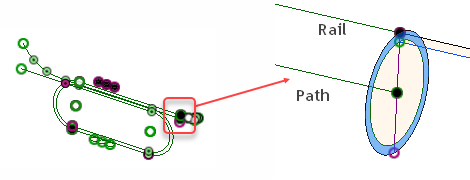
Select the profile of the sweep feature. Be sure not to select the inner circular sketch profile, only the outer thin annular sketch profile. Zoom in as necessary to easily select the profile.
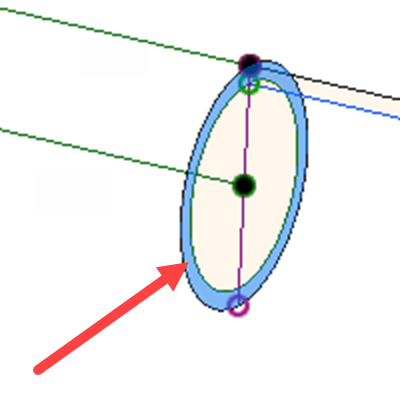
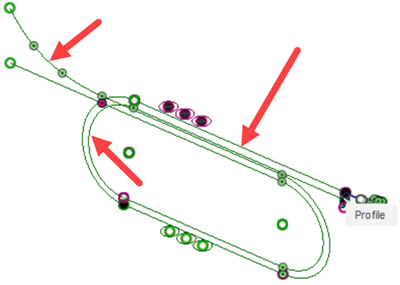
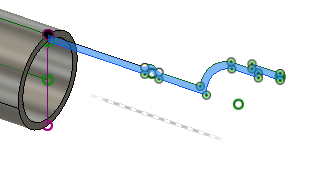
Click the Select button for Path, and select the sketch connected to the center of the circle as the path. Be sure to select all of the sketch segments along this path. Zoom out as necessary to see the entire model.
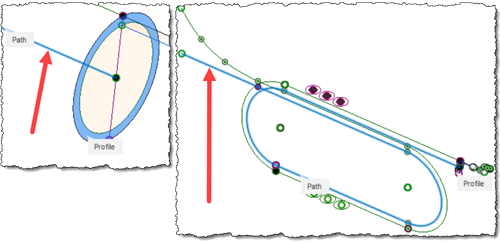
Click the Select button for Guide rail, and select the sketch connected to the outer edge of the circular profile as the guide rail. Continue selecting all sketch segments along this path as the total guide rail. Zoom out as necessary to see the entire model.
Click OK to finish the sweep.
From the bottom up, extrude the keys 185 mm to join them to the body.
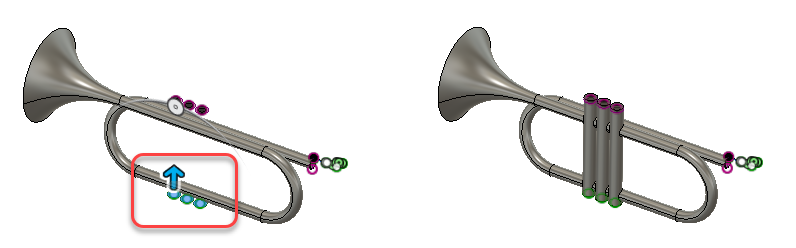
Three sketch features selected for extrusion. The distance has not been entered in the figure, (left), Keys are extruded (right).
Click Create panel > Extrude.
At the bottom of the trumpet, select the three circle sketches.
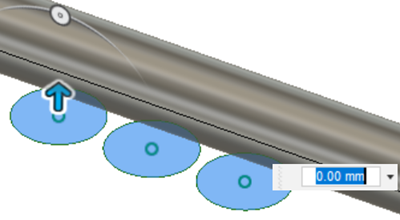
In the Extrude dialog, enter a distance of 185 mm.
Set the operation to Join.
Click OK.
Extrude cut the annular sketch -20 mm to create the key tops.
Click Create panel > Extrude.
Select the three ring sketches at the top of the trumpet. Ensure the ring geometry is selected, not the top of the key.
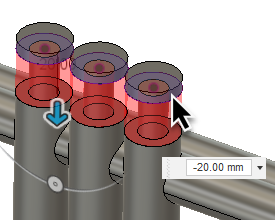
Enter a distance of -20 mm.
Set the operation to Cut.
Click OK.

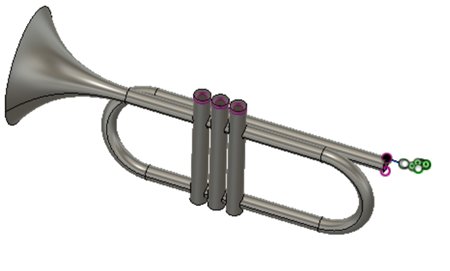
Create the mouth piece with the revolve tool, as a new body.
Click Create panel > Revolve.
Select the sketch representing the profile of the mouth piece.
On the Revolve dialog, click the Select button for Axis.
In the Browser, show Sketch 7, which represents the axis for the trumpet body and the axis of the mouth piece.
Select Sketch 7 as the axis.
Set the operation to New Body.
Click OK.