Activity 5: Create a rendered image
In this activity you use In-Canvas Render and Render, either Cloud or Local, to create a rendered image.
Fusion uses Ray Tracing to create an image. Ray Tracing attempts to simulate the natural flow of light in your scene using a technique called Global Illumination (GI) which takes into account, not only the direct light that comes from a light source, but also indirect light that reflects off of other surfaces in your scene.
There are 2 types of rendering methods that you can use in Fusion:
- In-canvas Render: Uses your computer CPU to create photo realistic images from your Fusion models. This In-canvas Render works in real-time, meaning that as soon as you click the Enable In-canvas Render icon, your computer starts rendering the image immediately. The image will start off noisy and will start clearing up. If you change the orientation of the model or change materials and environment, the In-canvas Render will restart the rendering process. The length of time needed to create the image depends on the Quality setting and the number iterations (or passes) that are needed to create the image. The size and resolution of your computer screen determines the size and resolution of your final image. You don't need to be connected to the internet to start the In-canvas Render.
- Rendering, Cloud or Local: Uses a rendering engine in the Autodesk cloud, or local computer resources to create photorealistic images from your Fusion models. The size and resolution of the images can be set in advance of starting the cloud render. The advantage of using the cloud render is that it will not require any of your computer resources to create an image and create an image faster than your local computer. However, using the cloud rendering service may require Tokens to create images, but renderings of single images at Standard quality under 1 MP are free. You must be connected to the internet to start a cloud render.
Prerequisites
- Ensure all the components have the proper materials assigned.
- Ensure the scene settings are applied.
- Ensure you are in the Render workspace.
Steps
Start an in-canvas render and modify the quality settings.
Click
 In-canvas Render > In-canvas Render.
As soon as you start the In-canvas Render you will notice that the screen starts to get "noisy" and starts to clear up as the In-canvas Render starts to work on the image. If you rotate the design the In-canvas Render restarts the calculations.
In-canvas Render > In-canvas Render.
As soon as you start the In-canvas Render you will notice that the screen starts to get "noisy" and starts to clear up as the In-canvas Render starts to work on the image. If you rotate the design the In-canvas Render restarts the calculations.Click
 In-canvas Render > In-canvas Render Settings.
Click the Fast tab. With Fast rendering, the materials and lighting render is simplified.
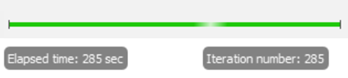
Look in the bottom right of the Fusion window to see the time and iteration for the fast render. It keeps going until a change is made.
Move the Limit Resolution slider to 20%. When the image renders, it will be blurry.
Move the Limit Resolution slider to 100%. When the image renders, it will be sharp.
Click the Advanced tab. The progress bar in the bottom right of the Fusion window shows the progress of the render. With the advanced setting, you can move the slider to indicate the level of quality you want from below Excellent to Infinite.
Move the slider to the left of Excellent, then rotate the model to initiate a render. Notice that rendering stops at the slider.
Set the slider at other locations to see the effect on the quality of the render.
Set the slider to Final and let the render finish before going on to the next step.
Save a rendered image to your computer.
Click
 In-canvas Render > Capture Image.
Click OK on the Image Options dialog to accept all the options.
On the Save As dialog, enter a Name for the image.
Ensure Save to my computer is checked.
Click the Ellipsis button and select the location on your computer to save the image.
Click Save.
Note: When creating an image using the local In-canvas Render, the image size and resolution is always based on the size and resolution of the screen you are using. You do not have independent control over the size and resolution of the final image.
Render the knife on the cloud with web settings of 1024 x 768, and standard quality.
Rotate and zoom the knife to the rotation and size you want your rendered image to be. The screen size determines the size of the render.
Click
 Render > Render.
Click the tabs on the Render Settings dialog to see the setup options for each tab:
- Mobile.
- Print.
- Video.
- Custom.
- Web.
Ensure the Web tab is active.
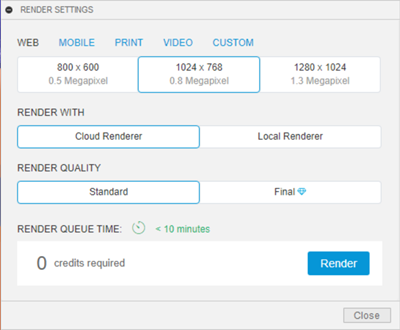
Set the size to 1024 x 768.
Set Render with Cloud Renderer. The procedure for setting up Cloud Render and Local Render is the same. If you have a good graphics card on your machine, you can experiment with local rendering.
Set Render Quality to Standard.
Notice the number of tokens is 0.
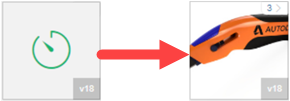
Click Render. In the Rendering Gallery you will see a green clock icon appear. This indicates that the render job has been sent to the Autodesk cloud and is in the queue to be rendered to an image. When rendering is completed a thumbnail of the image will replace the clock icon.
Save an image that is rendered in the cloud.
Click on the icon of the rendered image in the Rendering Gallery to open the Rendering Gallery viewer.
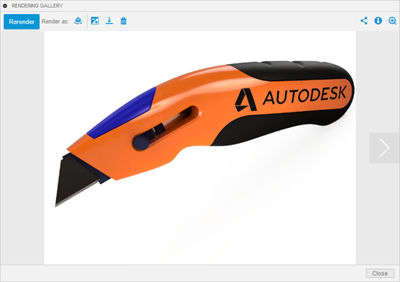
Click
 Download icon.
Set the Background as Transparent.
Click Download image as PNG.
Navigate to the folder you want to save the image.
Enter a file name.
Click Save.
Click Close.
Activity 5 summary
In this activity, you learned how to render images three ways to render an image:
- In-canvas render.
- Cloud render.
- Local render.
All types of render have quality settings that may be adjusted to set the resolution or quality of the render. The higher the quality the longer it takes to render.
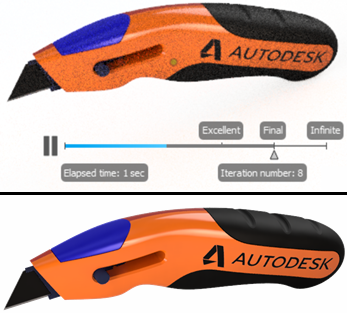
On-screen rendering in progress (top) and a local render with Excellent quality settings (bottom).