Activity 1: Apply materials
In this activity, you apply five materials to the design., and later change the texture for one of the materials.
Material properties define the color, texture, gloss and other properties that influence the appearance of the part.
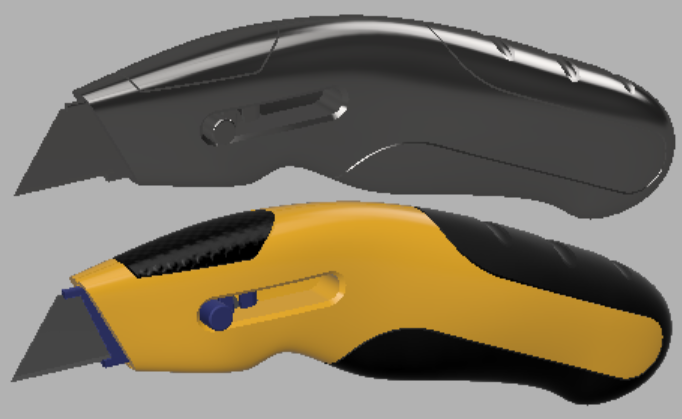
Utility knife before materials applied (top), after materials applied (bottom)
Prerequisites
- Ensure the utility knife design is open.
- Ensure the Workspace is set to Render.
Steps
Apply Plastic opaque plastic glossy yellow to the right and left body components.
Click
 Setup > Appearance.
Ensure the Apply to option is set to Bodies/Components in the Appearance dialog.
In the Library section of the Appearance dialog scroll down to Plastic > Opaque > Plastic - Glossy (Yellow).
Click and hold on the Plastic - Glossy (Yellow) swatch icon and drag it on the side of the utility knife.
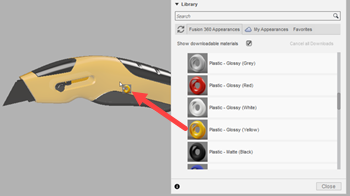
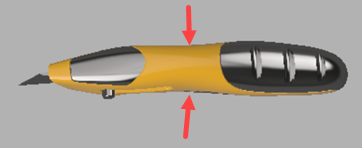
Click and hold on the Plastic - Glossy (Yellow) swatch icon and drag it on the other side of the utility knife. The arrows indicate the two sides of the knife in the image below.
 Note: Editing the material will affect all bodies it is assigned to.
Download two materials, Plastic - Textured – Polka and Rubber - Bumpy. Not all materials available locally when Fusion is installed. When you need materials that are available but not installed locally, they must be downloaded first.
If necessary, click
 Setup>Appearance.
Ensure the Show downloadable materials is checked on the Appearance dialog.

In the Library open the folder for Plastic > Textured> Plastic -Textured – Polka and click the Download icon.
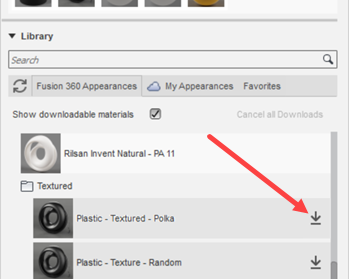
In the Library open the folder for Other > Rubber> Plastic -Rubber - Bumpy and click the Download icon.
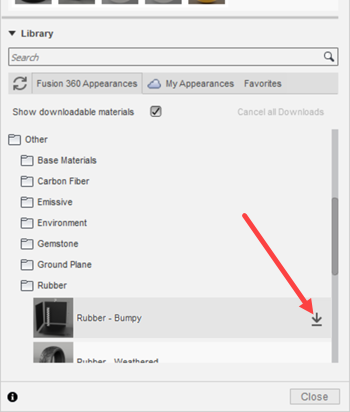 Note: it will take a few seconds to download the material.
Apply the Rubber – Bumpy material to the Grip 1:1 body using the Browser.
In the browser locate the component called Grip 1:1.
Click the arrow next to the Grip 1:1 component to expand its contents.
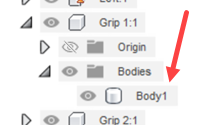
Click the arrow next to the Bodies folder to expand its contents.
Open the Appearance dialog if necessary and scroll down to Other > Rubber > Rubber – Bumpy.
Click and hold on the Rubber – Bumpy swatch icon and drag it to the Body1 browser node for Grip 1:1.
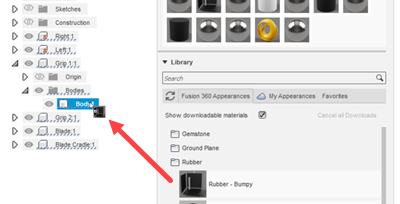 Note: To assign a material to all of the bodies in a component, drag the material to the top-level component in the browser.
Apply the Plastic - Textured – Polka material to the Grip 2:1 body using the Browser.
- Find the Grip 2:1 component and navigate to the body node for the component.
- Click and drag the material swatch Plastic > Textured > Plastic – Textured – Polka to the body of component Grip 2:1.
Apply the Plastic - Translucent - Matte (Blue) material to the Blade Cradle:1 component.
- Find the Blade Cradle:1 component in the browser.
- Click and drag the material swatch Plastic > Translucent > Plastic – Translucent – Matte (blue) to component Blade Cradle:1.
Apply the Metal – Stainless Steel – Satin material to the Blade:1 component.
Find the Blade:1 component in the browser.
Click and drag the material swatch Metal > Stainless> Stainless Steel – Satin to component Blade:1.
If you get a warning about removing appearances applied to faces, click Remove.
 Note: If you apply materials to a face of a body or component, and then apply a material to the body or component, you are asked to keep or remove the appearances to the applied faces. The Keep option does not apply the new material to faces that have been individually assigned. The Remove option applies the new material to the entire body or component, removing material on specific faces.
Activity 1 summary
In this activity, you downloaded materials, and applied materials to components and bodies three ways:
- Directly on the design.
- Using the browser on a body.
- Using the browser on a component.

Utility knife before materials applied (top), after materials applied (bottom)