Populating City Streets
Walking characters can easily be setup to populate streets and squares, resulting in realistic crowded urban environments. In this tutorial, we will go through the setup of walking characters using Navigation and Locomotion Behaviors.
Initial Setup
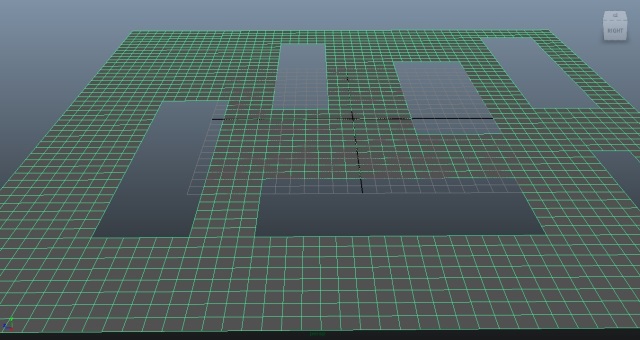
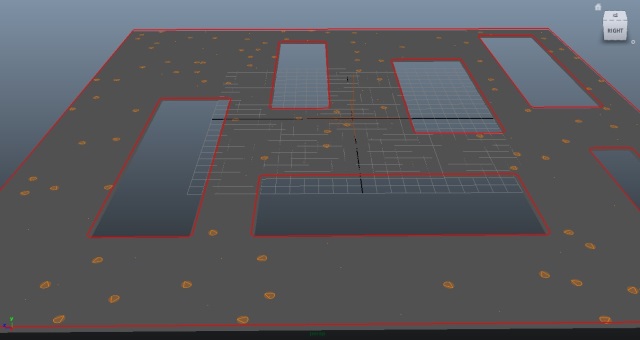
In this example, we use a simple plane geometry drilled in some places, in order to represent different walking areas. Any geometry with navigable areas can be used as well.
We also need to create an EntityType (using the EntityType icon
 ), which skeleton and
skeleton mapping will be the one provided in the Samples Pack. See the Quick Start for more details about how to create an
EntityType.
), which skeleton and
skeleton mapping will be the one provided in the Samples Pack. See the Quick Start for more details about how to create an
EntityType.
Create A Terrain
Select the navigable geometry and click on the
NavMesh Creator icon
 to compute the navigation information
and save it into a
.gse
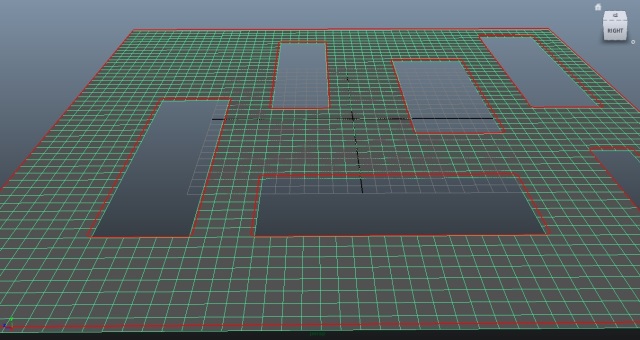
file, using the "Compute and save ..." button. In Maya viewport, the
navigable areas are now delimited by red borders (use Terrain Display Attributes to show/hide it) .
to compute the navigation information
and save it into a
.gse
file, using the "Compute and save ..." button. In Maya viewport, the
navigable areas are now delimited by red borders (use Terrain Display Attributes to show/hide it) .
Default computation parameters should be fine.If not, have a look at the NavMesh Creator Parameters to properly compute navigation mesh.
Placement
Click on the Population
Tool icon  then click in the
center of the scene to place population around it. Then adjust the
placement settings:
then click in the
center of the scene to place population around it. Then adjust the
placement settings:
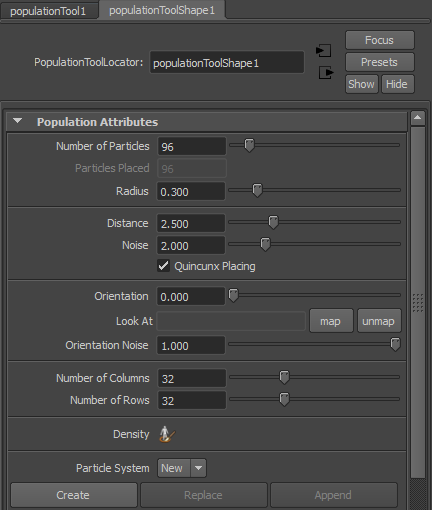
- Change the distance and grid attributes to cover the entire scene (use a high distance value to avoid entities to be generated too close to other ones);
- Adjust the number of particles as desired;
- Adjust orientation noise (set maximum value to orient entities in all directions);
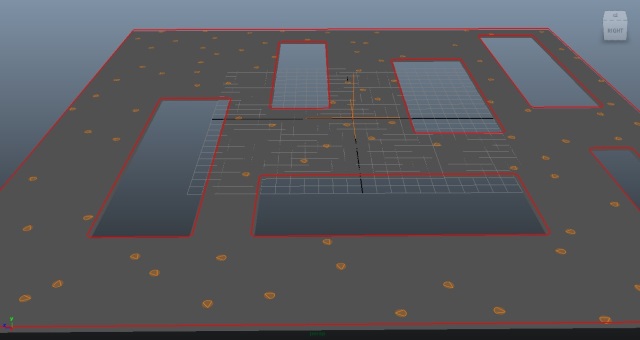
Once the population is properly placed, click on the "Create" button in the Population Attributes of the Population Tool. When playing the simulation, Characters should now appear.

Navigation Setup
Now, we have to setup entities navigation by defining for each of them a target, then by assigning them Behaviors to make them reach this target avoiding other entities.
Target Setup
Navigation targets are set up using a Population Tool. First, hide the Population Tool previously used to place entities at start, in order to avoid confusion with the new Population Tool we are about to create and use to place entities targets.
Only hide the Population Tool previously created, not the generated particle system. Otherwise, the generated entities will no longer be displayed.
Create and configure a new Population Tool as previously described, with a number of particles equal or greater than the number of simulated entities (notice that adjusting orientation is useless, only particles position is used for navigation purpose). Once done, just click on the "Emit particles" button in the Population Attributes of the Population Tool: the generated particle system will then then be used as target in Behaviors.
Behaviors Setup
Open the Behavior Editor using
the Behavior Editor icon  then
double-click on the available EntityType to open the tab corresponding
to the behavior of the characters related to this EntityType. To drive
an entity to a target in the generated particle system, it needs on
parallel:
then
double-click on the available EntityType to open the tab corresponding
to the behavior of the characters related to this EntityType. To drive
an entity to a target in the generated particle system, it needs on
parallel:
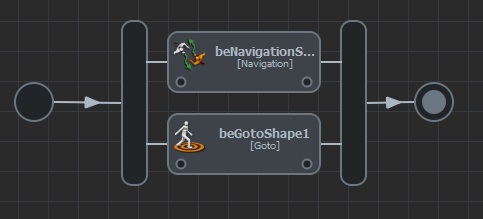
- A GoTo Behavior, to find a path and move its target.
- A Navigation Behavior, to enable to avoid other entities when moving.
To do so, create a Parallel Operator and fill it with a Navigation Behavior and a GoTo Behavior (or just create a Navigation Behavior and drag and drop a GoTo Behavior over it).
Now, we just have to set the generated particle system as target for GoTo Behavior. Just click the GoTo Behavior, then set the "Target Mode" option to "Target Particle System" value, and set the generated particle system to the "In Particle System" attribute.
The "Random Target in Environment" target mode can be used instead, but declaring a target particle system provides more control and visibility.
Now when playing simulation, characters are moving to a given target and avoiding other entities, but they are still not animated with walk motions.

For more details about how to setup navigation in Golaem, check the Navigation Tutorials section.
Locomotion Setup
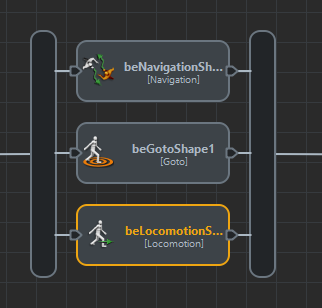
A Locomotion Behavior is needed to use animate characters with walking motions according to navigation controls. A custom Locomotion Behavior is provided in Samples Pack, along with a set of walk motions especially design for locomotion (meeting the requirements described here).
Drag and drop a Locomotion Behavior in the Parallel Operator.
Then double-click on the added Locomotion Behavior to load files.
Note that as the "Walk Fast" and "Run Normal" motions nearly have the
same speed, you should load one OR the other but not both, otherwise
your character will keep switching between these motions and create a
strange animation.
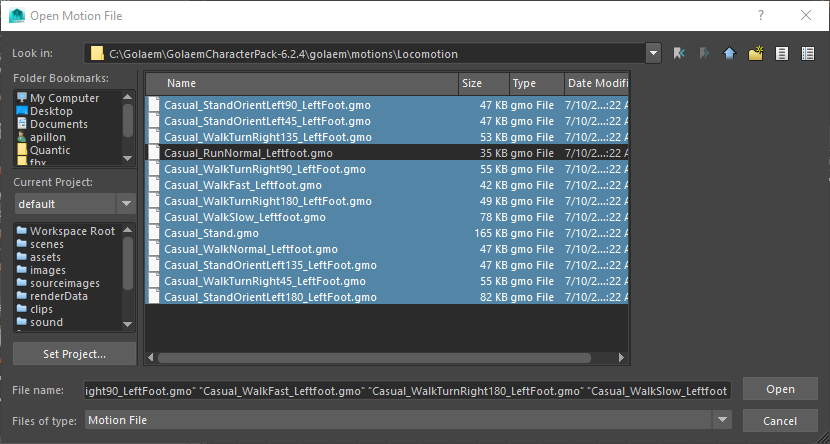
In the Locomotion Behavior attribute editor, you will notice that Golaem created several motion clips and linked them to your Locomotion Behavior.
- Some of these Motion Clips need to be mirrored (this is the case for all turn motions) by clicking twice on the small orange/gray disk next to each motion clip.
- However DO NOT mirror motions going straight. Otherwise, same as the "Walk Fast" and "Run Normal" motions, because they will be to close from each other, the animation will keep switching between mirrored and original motion.
You can take a look at the below screenshot for a better understanding of which motion should be mirrored or not. Note that your motion clips will probably not be loaded in the same order as in this screenshot, so check the name of the motion clips.
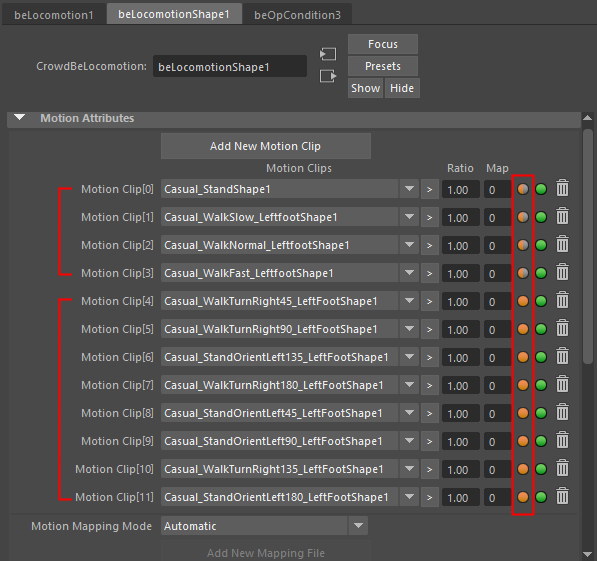
Locomotion Behavior with turn motions mirrored, walk motion NON-mirrored
Now, you can rewind the timeline and click play. If you select a character (note that if the character is far from its particle, to select it you should rather click on its particle than on the character mesh), you will be able to check the Locomotion model in the Visual Feedback panel.
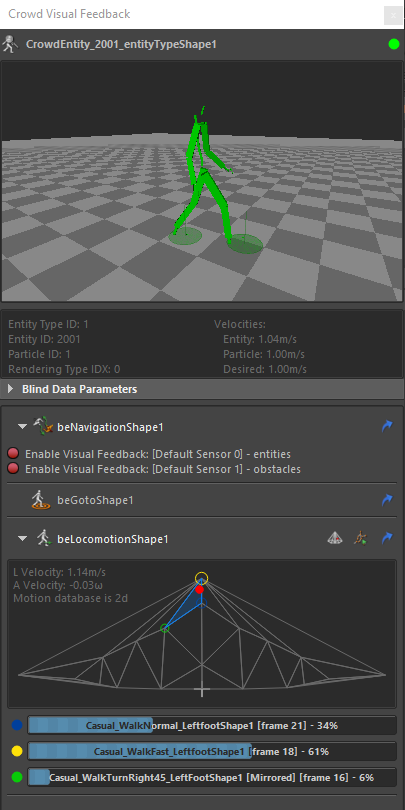
This representation shows the distribution of your motions following two parameters: linear speed and angular speed:
- At the center of the distribution, from bottom to top, we have the stand, walk slow, walk normal and walk fast motions
- On the left hand side, the turn left motions, and on the right hand side, the turn right motions.
If your Locomotion Behavior visual debug does not look the same, you probably make one of the two common errors:
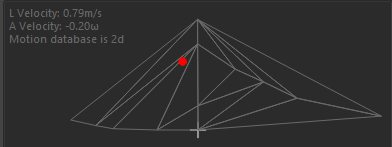
Example of a Locomotion Behavior for which motions have not been mirrored at all
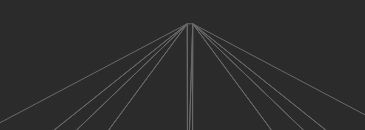
Zoom on a Locomotion Behavior for which ALL motions have been mirrored. Walk Fast motion and its mirrored motion are too close from each other
If everything is ok, you should see your characters navigating the scene and avoiding each others as well as obstacles.

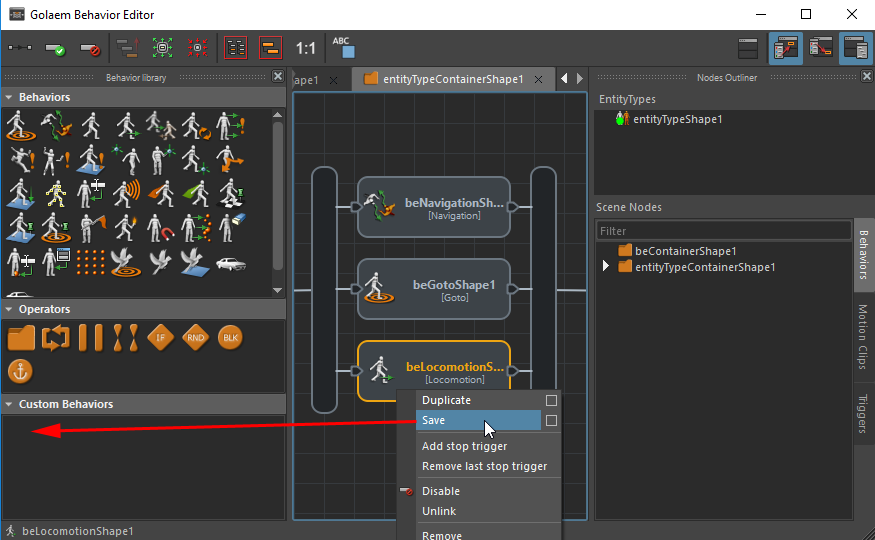
If you are happy with your Locomotion Behavior, you can save it to be reused in other scenes. Just right-click it and choose Save.
Note that when creating your first Custom Behavior, a dialog may pop up asking you where Golaem Crowd should save all your Custom Behaviors.
To re-use this behavior, all you need is to drag and drop it into the Behavior Editor as you do with standard behaviors.
For more details about Locomotion and other animation behaviors check the Animation Tutorials section
Rendering
See Using The Samples Pack to know how to automatically configure the sample for rendering.
For more details, check the Rendering section.
