Customizing Ready-to-Use Characters Shaders
The Golaem Character Pack is provided with different textures for each prop, but it is obviously possible to customize these textures and even to add new ones.
Replace An Existing Texture
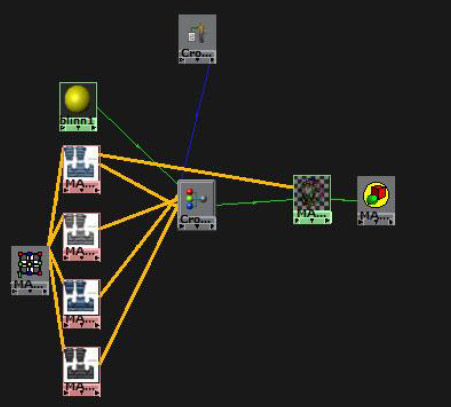
Replacing an existing texture is fairly simple, as it is enough to edit the existing file with your preferred image editing software. The quickest way to find which texture should be edited is to select the associated props and show the shader network of the associated blinn shader in the Hypershade.
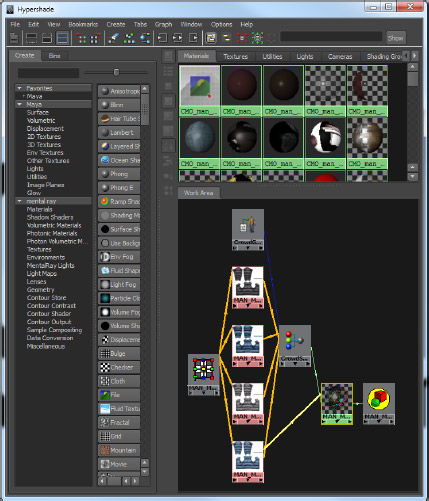
Disable An Existing Shader
Disabling an existing shader basically consists in breaking the connection between the shader and the associated Crowd Switch Shader node (see above capture), and adjusting the character file shaders attributes.
- Find the blinn shader associated to the prop for which you want to disable a texture
- Load the associated network in the Hypergraph (see above capture)
- Break connections between the texture to remove and the CrowdSwitchShader (beware if the shader to remove also send transparency information to the blinn shader, you should either keep this connection or remap it to another shader)
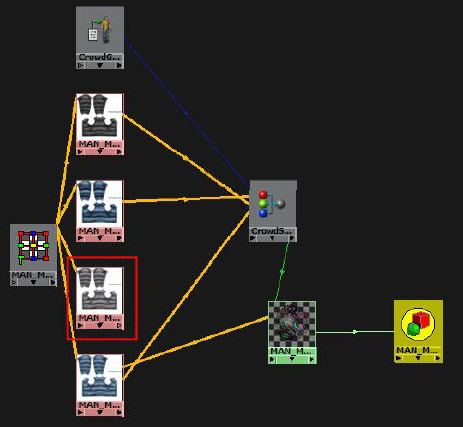
- Check in the CrowdSwitchShader node if shaders connections need to be rearranged so that there is no missing shader in the middle (otherwise you could end with black color in your crowds)

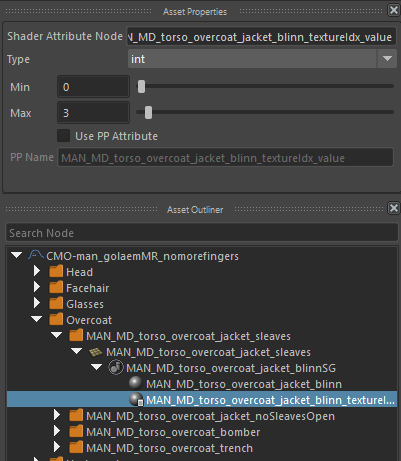
- Adjust the Shaders Attributes in the Character Maker, so that it matches the number of configured shaders. Do not forget to save the Character File (.gcha).
Add A New Shader
Adding a new shader consists in linking a new shader to the CrowdSwitchShader associated to the Blinn shader of the prop.
- Find the Blinn shader associated to the prop for which you want to add a shader
- Load the associated network in the Hypergraph (see above captures)
- Select the CrowdSwitchShader feeding the Blinn
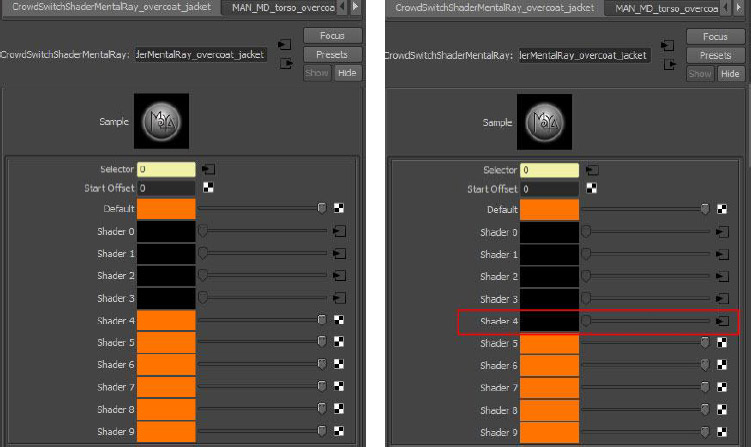
- Find the next available shader in the shader list and click on the checker to create new shader.
- Choose the shader type you want to create and configure it. Note that you can create any type of shader provided it can be rendered with your renderer.
- Check if it is needed to connect the created shader output to other input of the CrowdSwitchShader or prop Blinn shader
- Adjust the Shaders Attributes in the Character Maker, so that it matches the number of configured shaders. Do not forget to save the Character File (.gcha).