Once you have uploaded your inspection files, you can then upload the associated media files.
Info360 Asset provides a list of expected photos and videos from the inspection file to help you find the associated media files.
Supported media types:
- Images in .jpg, .jpeg, .png, or .gif format.
- Videos in .mp4, .avi, .mpg, .mov, or .mkv format.
Videos must be under 6 hours, or under 5 GB for .avi files.
Note: Info360 Asset will transcode any videos not in an HTML5 standard format and the video will play once transcoding is complete, which may take up to 10 minutes.
Upload Media
When uploading 100 or fewer inspections, you will be automatically redirected to the Edit Media page after you upload the inspection files.
If you want to upload the media later, or if you have uploaded over 100 inspections, follow the steps below.
- From the Inspections List tab, find and select the inspections you want to upload media for.
Tip: You can filter the Status column for 'Missing Media' and you can adjust the rows per page to select up to 100 inspections.Important: Do not use the option to "Select all inspections" if it appears above the table, since the Edit Media option is not available when selecting inspections in bulk (even if less than 100).
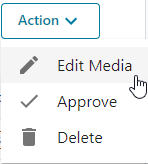
- Select Action
 Edit Media.
- Drag and drop your files into the drop box to begin the upload.
Tip: You can drag and drop all media files; Info360 Asset will only upload the expected media files for the selected inspections.
Once all expected media have been uploaded, the inspection status will change to Ready.
Upload media to inspections with no media referenced
To add media that were not referenced when the inspection was uploaded to Info360 Asset, the inspection must be in Ready or In Review status.
To upload a video:
- Click on the inspection ID.
- Drag and drop the video file into the upload box.
- Confirm the video upload and wait for it to complete.
- Refresh the page.
Note: You may need to refresh a few times until the video has been transcoded and is ready for viewing.
To upload an image:
- Click on the inspection ID.
- Either click on Add Observation or click on the three dots
 beside an existing observation.
- Use the Upload Photo button to upload an image for that observation.
- Or, move the video progress bar to the appropriate point, and then use the Capture Image button.
- Then, save the observation.