A Flow Train or Flow Network is created by clicking on Plan to place items automatically joined by connections. To construct a site you have two ways of placing and joining items:
- Placing items on Plan and then joining them by connections.
- Building a Flow Train where successive items are placed on Plan and automatically joined to the previous item as they are placed.
Starting a Flow Train
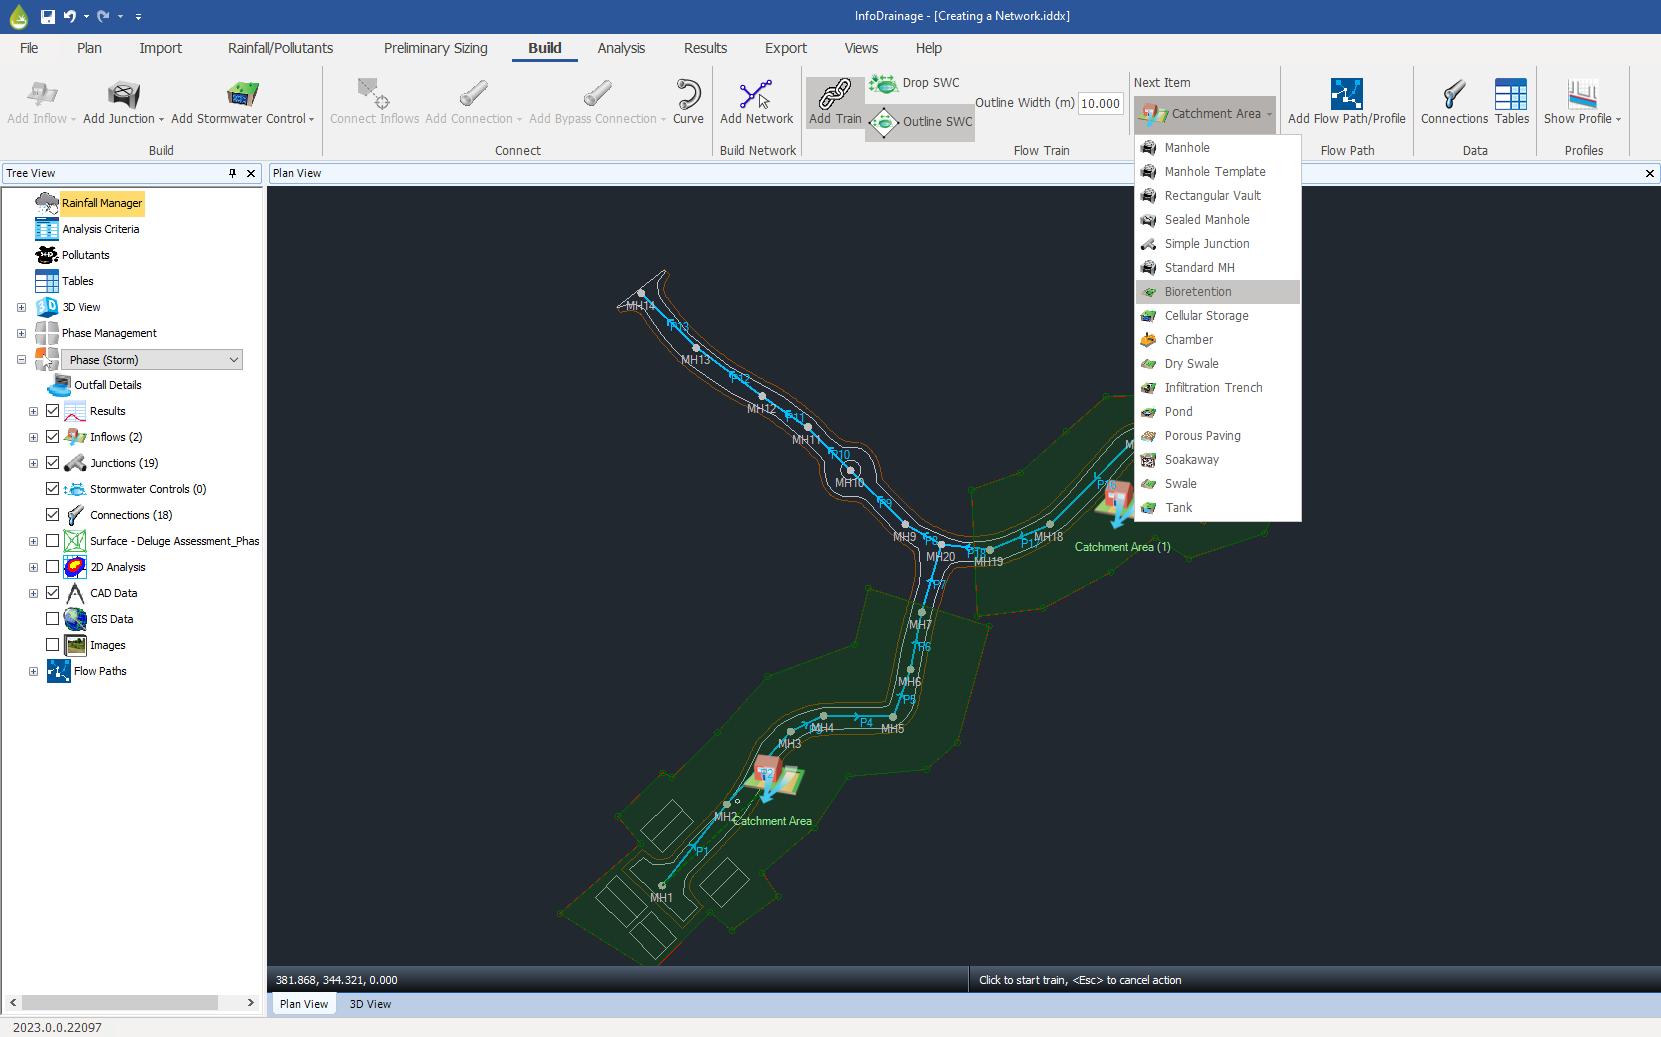
A flow train can be started by clicking Add Train on the Build ribbon. The Add Train will then expand to show you the Next Item that will be placed on Plan.

Your first click on an empty space in Plan will, by default, place an Inflow item. The type of Inflow placed will be the one selected on the Build ribbon (and on the Toolbox) and displayed as the Next Item. At any time before the first click you can select a different Next Item. When an Inflow is placed you will not be asked, or allowed, to draw the Inflow area. The area or value must be added once the train is complete. A different item can be placed first also via the Plan right-click menu, the Build ribbon, or the Toolbox.
Alternatively your first click on Plan can be on an existing item. This will start the train at the existing item (regardless of the next item shown on the Build ribbon) and subsequent clicks will follow the Train sequence of adding Junctions and Stormwater controls (SWC) depending on your selection.

Stormwater Controls are not available in a Sanitary phase.
Starting a Flow Network
A Network can be started by clicking Add Network on the Build ribbon or the toolbox or by right-clicking the Plan and selecting Add Network. The Build ribbon Add Network button will remain clicked until the network is completed. After selecting Add Network, the ribbon will expand to show you the Next Item which will be placed on Plan. The difference between a Flow Network and Flow Train is that Flow Networks are purely for adding junctions and connections, and cannot add inflows or SWC. Therefore, the first item added when starting a Flow Network will be a junction (a manhole, by default).
Developing a Flow Train
Subsequent clicks on Plan will add a junction by default. As junctions do not have an outline associated with them, these are simply placed at the point location at which the click occurs.
You can also select a SWC. How the SWC is added depends on the Drop SWC/Outline SWC selection shown on the ribbon.
Drop SWC
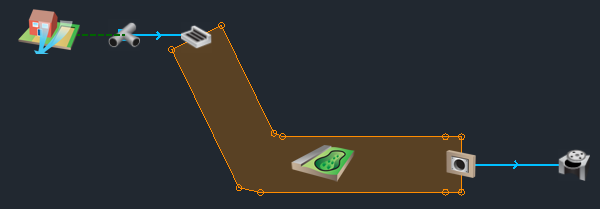
This mode will place a SWC at the location clicked on Plan. Connections are added automatically to connect the new SWC to the previous one using the last selected template on the Build ribbon or Toolbox. This can be updated during the Add Train mode. The figure below shows a simple Train created in this mode.

Outline SWC
This mode will place a SWC at the location clicked on the Plan and show an outline for you to layout the SWC area. Your second click marks the end of the SWC. The figure below shows a Train being created in this mode. The width of the outline, specified by the Outline Width field, can be changed on the Build ribbon. If the next item to be placed is a Junction, Outline SWC mode acts as Drop SWC mode.

Corners are added to Connections, and bends are added to Areas by holding the key when clicking on Plan.
Changing defaults
You can, at any point, change the Next Item that will be placed. You can also change the Connection type that is used to join the items. The default Next Item of each type is shown on the Toolbox, the Build ribbon and the icon of the Next Item to be placed is used as the mouse cursor.
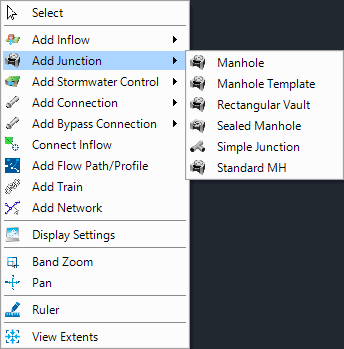
The right-click menu on Plan (below) lists the items available to be placed, this menu changes depending on the valid items that can be placed next in the sequence. You can change the Next Item using this menu, the Build ribbon or the Toolbox. Clicking Add Junction, for example, requests that the next item placed is a junction.

There are two ways to select the Next Item to be placed using the Build ribbon:
- In the Build section of the ribbon.
- The Next Item button that becomes visible when a train is being created. The Next Item button also displays the icon of the next item that will be placed.
Ending a Flow Train/Network
A Train or Network can be ended at any time by clicking Add Train or Add Network again on the Build ribbon or by right-clicking the Plan and selecting End Train if adding a Train or "End Network " if adding a Network. Ending a Train or Network this way will also create a Path and add it to the Path collection on the Tree view.
A Train can be ended by clicking an existing item. This action creates a branch to the existing network so no Flow Path is created. A Network can also be ended this way but the existing item must be a type of Junction.
Pressing will also end the current Train/Network at the last item placed, but will leave Build Train/Build Network clicked so you can start a new Train/Network or branch.