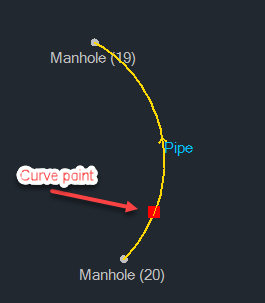
The Curve button allows you to add a curved connection in your network.
Adding a curved connection
- Add junctions on your Plan:
- Go to the Build ribbon.
- Click Add Junction, and then select the junction type from the drop-down menu.
- Click on the Plan to create junctions.
- Add a curved connection:
- In the Build ribbon, select Add Connection and select the type of connection.
-
Click the Curve button.
Note: Alternatively, press Ctrl+C in the keyboard to make the connection a curved one. You can switch to/from curved connections using this method. - Click the first junction, click in between the two junctions to create the curve point, and then click on the second junction.
Modifying the location of a curve point
- Click the curve point that you want to modify.

- Drag the curve point to the desired location.
Modifying a curved connection to make it a straight connection
- Right-click a curved connection on the Plan.
-
Select Convert to Straight.
 Note: Alternatively, you can go the Context Sensitive Ribbons and select the Convert to Straight button.
You can modify a straight connection and make it into a curved connection by following the same steps, and then selecting Convert to Curved.