Known Rainfall allow the flexibility of analyzing unique hyetograph data and historical rainfall gauge data.
Creating a Set
A set of rainfall records is produced using the spreadsheet and buttons provided.
Event

Spreadsheet
Run Time - The length of the analysis that will be run. Typically this will be length of the rainfall record entered, however this can be overruled by entering your own run time manually. Setting the Run Time to 0 will un-tick Use so the event is not run.
Buttons
Add - Adds a new row to the table and displays the rainfall record form ready for the rainfall data to be entered.
Edit - Allows the current selected rainfall record to be edited. The rainfall record form is displayed so that the rainfall data can be changed.
Delete - Deletes the currently selected rainfall record from the table.
Clear All - Clears ALL of the records from the table.
Increase Rainfall
This will scale all rainfall by the amount specified. This can be used to take climate change, or other factors, into account.

Editing Rainfall
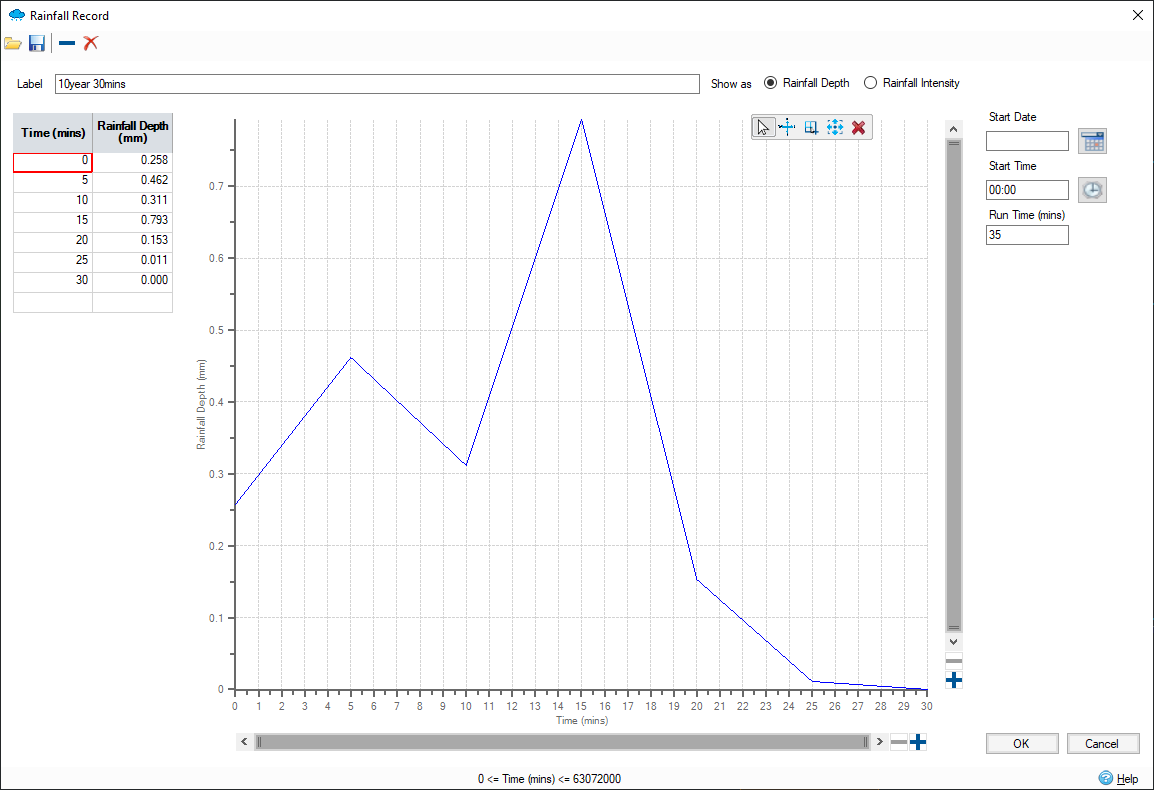
The Rainfall Record form allows a Rainfall event to be entered manually or loaded from file.

The rainfall record can have variable time steps and cover a period of over 100 years, and it can be entered/loaded as Depth or Intensity values. When showing intensity values the time step for a value is taken as the time between the current value and the next.
The following list shows an example data set:
| Time (min) | Depth (mm) | Calculated time Step (min) | Intensity (mm/hr) |
|
00:00 |
1 |
2 |
30 |
|
00:02 |
36 |
60 |
36 |
|
01:02 |
4 |
5 |
48 |
|
01:07 |
4 |
5 |
48 |
If the last value is not zero its time step is taken as the time to the previous value.
Toolbar
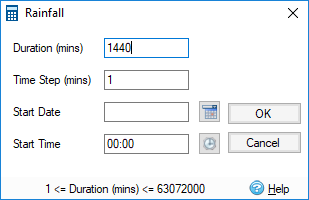
New - Allows a new rainfall record to be created based on a duration and a fixed time step. The following items describe the values that can be entered on the calculator form that appears.

-
Duration - the event duration.
-
Time Step - the record time step. Time Step must be less than or equal to the Duration. If Time Step is not an integer division of the Duration then the longest storm less than the Duration is created. This form can only be used to create fixed interval events.
-
Start Date - Start date of the event. This can be left blank.
-
Start Time - Start time of the event. If Start Date is blank this value is ignored.
Load - Allows a rainfall record to be loaded from file. These include:
-
Rainfall File (.idredx) - The InfoDrainage file format for rainfall records.
- XPDRAINAGE Rainfall File (.xpredx) - The XPDRAINAGE file format for rainfall records.
- Micro Drainage Rainfall File (.redx) - The Micro Drainage file format for rainfall records.
-
Text File (.csv,.txt) - Allows rainfall data to be loaded from comma separate files via the Universal importer.
-
Excel File (.xls,.xlsx) - Allows rainfall data to be loaded from Microsoft Excel format.
-
BoM 6Min Pluviograph (.plu, .txt) - (Australian) Bureau of Meteorology rainfall file.
- UK Rainfall File (.red) - The RED (Rainfall) File Format file format for rainfall records.
Save - Save the current rainfall event to .idredx file so it can be reused elsewhere.
Label
This is the label given to the rainfall record. i.e. 30 minute storm. If the data is created from the New option, the Label is set to the duration. If the data is loaded from a file the Label is set to the data file name.
Spreadsheet
Shows the data in a paged format which can be edited, or as a graph.
Data Table
- Time - Shows the data time value. The time format is adjusted depending on the Duration and Start Date/Time values. The format used is shown at the bottom of the spreadsheet.
- Depth/Intensity - Shows the data value. This can be edited within the range shown at the bottom of the form.
Graph - Shows the current data page as Depth/Intensity against time.
Start Date - Start date of the event. Clicking the Select a date button will show a calendar form.
Start Time - Start time of the event. Clicking the Select a time button will show a time selector form.
Run Time - The event duration that will be used for analysis. By default, this value is set to the event duration. If Run Time is zero the event will not be used by analysis.
Show as - The data can be viewed as Depth or Intensity values. Changing this setting also sets how the data is plotted on the Print form.