To add custom profiles to road and railways styles
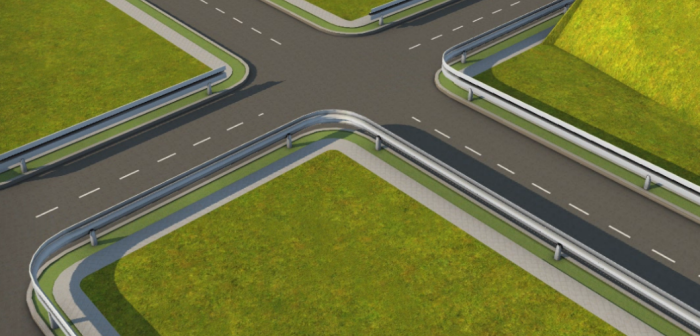
Add 2D profiles to your road and railway styles to visualize linear items such as barriers, guardrails, and fences along your road and railways.
Custom profiles use 2D cross sections in SDF or SQLite format to create and display decorations that smoothly follow the path of road and railway tracks you specify. Custom profiles are especially helpful for placing decorations along curved roads or railways.
Click Manage
 Content
 (Style Palette).
Select the Road or Railway tab in the Style Palette.
Double-click the style you want to edit.
Click
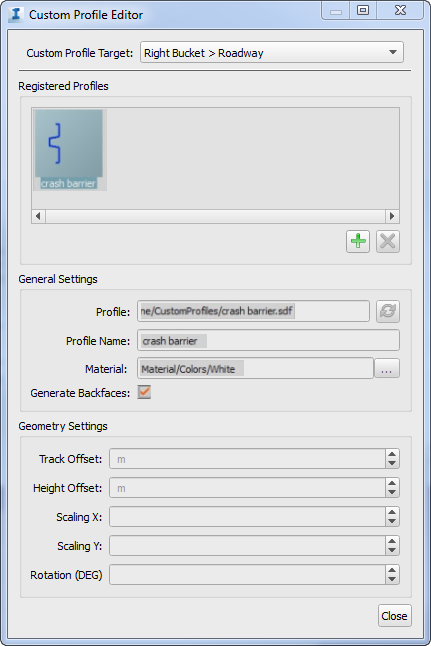
 to open the Custom Profile Editor.
Select the track that you want to attach a custom profile to as your Custom Profile Target.
For example, you can choose to add a custom profile to a road's median, bikeway, curb, greenspace, or sidewalk, and so forth.
Select a profile style from the Registered Profiles pane, or click
 to choose a SDF or SQLite file from your local system to add as a new profile. The custom profile appears in the preview area of the editor.
Specify settings:
General Settings:
- Profile: The filepath for the selected custom profile. Refresh if you have updated the source data.
- Profile Name: Give the custom profile a name.
- Material: Choose a material color or texture for the profile.
- Generate Backfaces: Check this setting to generate front and back faces for the profile, creating closed triangles.
Geometry Settings:
- Track Offset: The horizontal offset of your custom profile, relative to the centerline of the track you specified as the custom profile target.
- Height Offset: The vertical offset of your custom profile relative to the centerline of the custom profile target track.
- Scaling X: Scales the road or railway horizontally relative to the profile points.
- Scaling Y: Scales the road or railway vertically relative to the profile points.
- Rotation (DEG): Rotates (in degrees) the road or railway relative to the profile points.
Click Close in the Custom Profile Editor, then click OK in the Configure Road/... or Configure Railway/... dialog box. Drag and drop your updated road or railway style onto the desired road or railway to display its custom profile.
Note: In the case of intersections between roads that have custom profiles, the custom profiles will connect smoothly around corners if the intersecting roads are using the same style. However, railways do not support custom profiles for intersections.