To publish civil structures to Autodesk Revit
Use the Publish Civil Structures command to send your bridge or tunnel models to Autodesk Civil 3D or Autodesk Revit.
Requirements
- You must have Autodesk Revit 2016 or a more recent release installed before you can send an InfraWorks bridge to Autodesk Revit.
- You must have the correct release version of the Autodesk Revit InfraWorks Updater plugin installed.
- You must use matching versions of Autodesk InfraWorks and Autodesk Revit for this workflow. For example, users of Autodesk Revit 2021.0 will need to use Autodesk InfraWorks 2021.0 and also install the most recent version of the Autodesk Revit InfraWorks Updater.
- The Category Mapping for Revit Add-In is only available in Revit if you have the most recent release versions of InfraWorks and Revit installed on your local system. See To install Add-ins for Autodesk InfraWorks.
Select a civil structure such as a bridge or tunnel.
Right-click.
Expand the Publish Civil Structures menu options. If you have Autodesk Revit 2016 or newer installed on your local system, you can open your InfraWorks civil structure in an existing Revit model, create a new Revit model for your civil structure, or update an existing civil structure in your Revit model that was previously sent to Revit from InfraWorks.
Note: If you created a new Revit model with this Publish Civil Structures operation, you will be prompted to choose a save location on your local system.If your InfraWorks model uses a geographic or arbitrary coordinate system such as LL84 or XY-M, you may be prompted to change the UCS to a projected coordinate system before you can publish a civil structure to Autodesk Revit. If this happens, follow these steps:
In the Unsupported Coordinate System notification, click Open Model Properties.
In the Model Properties dialog, for the UCS field, click
 to display a list of suggested coordinate systems.
Choose an appropriate projected coordinate system such as a State Plane coordinate system, or input the projected coordinate system of your choice in the UCS field.
Click Apply, then click OK to close the Model Properties dialog.
Right-click on the bridge and click Publish Civil Structures > Create New again.
InfraWorks will send your civil structure to Revit. Processing times may vary depending on the complexity of your civil structure. Autodesk Revit supports rebar detailing on complex objects.
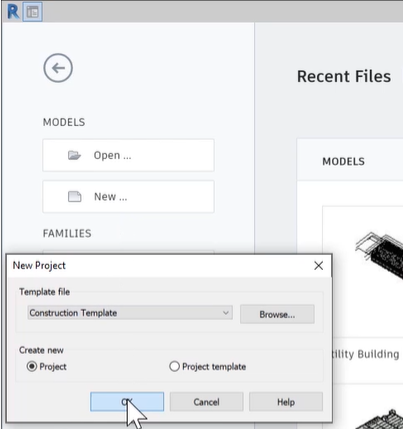
Open Autodesk Revit. Note: (optionally) If you created a new Revit project for this Publish Civil Structures operation, choose a Revit project template file. Customized Revit templates are supported.
Click the Add-ins tab in the Revit ribbon.
Click Import Civil Structures
Import the IMX file that you exported from InfraWorks. Once imported, the project base point for the Revit model be used for the imported civil structure's start station location. However, if the project base point is not already set in the Revit model, Revit will use the start station for the InfraWorks civil structure as the project base point.
Once opened in Revit, use the Category Mapping Revit Add-In to map InfraWorks components to existing categories available within the Revit project.
The specified categories are then applied to the civil structure's model components during the import process.
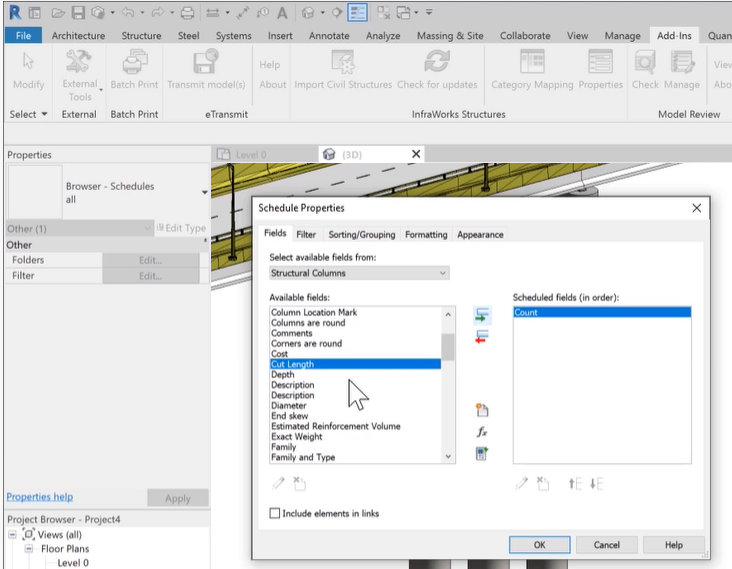
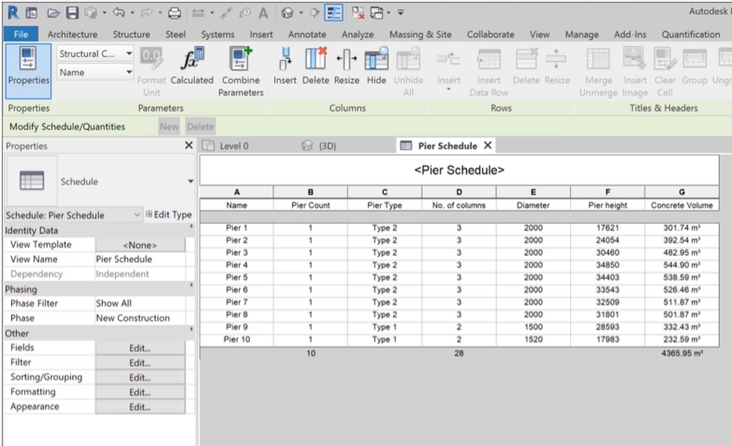
Once the import process is complete, it is then possible to use Revit's scheduling tools to create reports based on the civil structure component parts, with the mapped categories.
Additionally, it is possible to use alignments from the civil structure roadway in Revit.