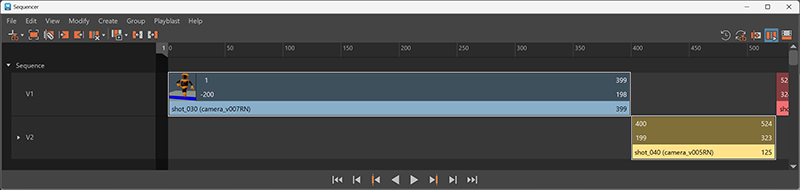
Shots
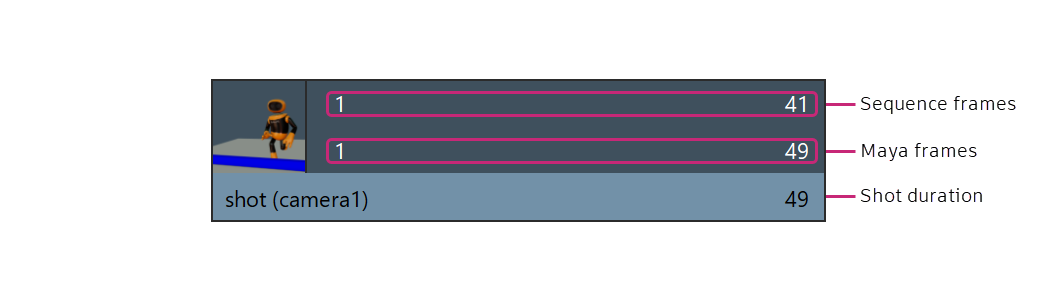
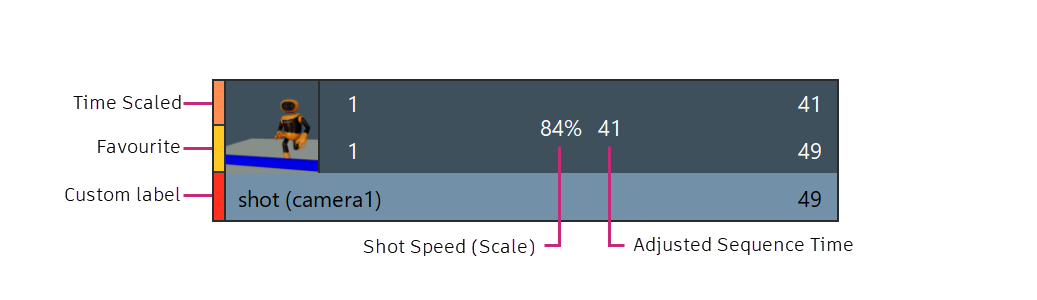
Shots in the Sequencer editor represent the frame ranges during which a specific camera is active. Shots let you control and adjust the timing of each camera within a sequence.
Shots are displayed as rectangular blocks arranged on tracks in the Sequencer editor. You define the order and duration of active cameras by moving, scaling, and trimming shots relative to one another. By adjusting shots, you manage how the scene is sequenced and played back.
Camera shot overview
Assign labels to shots
Labels let you display status information for a shot directly in the Sequencer. You can use labels to quickly identify a shot's production state without opening additional details.
You can assign custom labels to shots in the Sequencer editor to help organize and identify them.
Labels are stored in the scene file and can be reused across shots within that scene. A shot can have multiple labels assigned, with one label designated as the current label.
- Create and assign a label
-
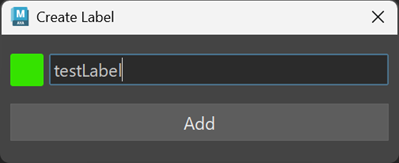
To create a new label and assign it to a shot:
- Select a shot.
- Right-click the shot and choose Assign Label > Create Label.
- In the dialog box, enter a name for the label.
- Choose a color.
- Click Create.
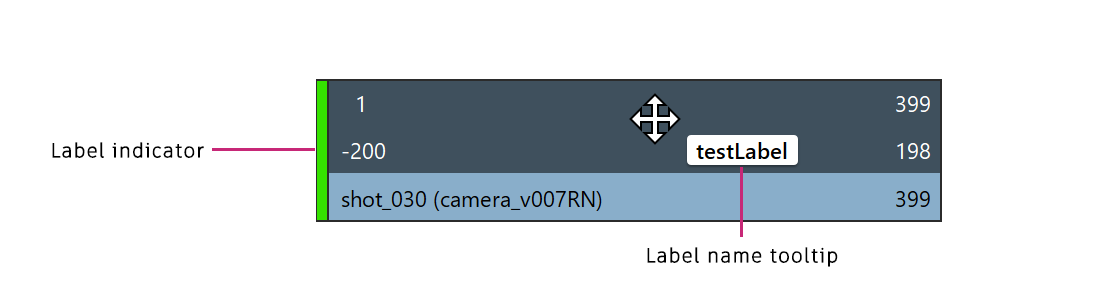
A colored bar appears on the left side of the shot, indicating the assigned label.
When you move the cursor over the shot, the label name appears in a tooltip.
- Assign an existing label
-
To assign an existing label to a shot:
- Select a shot.
- Right-click the shot and choose Assign Label.
- Select the checkbox for the label you want to assign.
If multiple labels are assigned to a shot, one label is designated as the current label.
- Manage labels
-
You can manage labels using the Label Manager.
To open the Label Manager:
- Right-click a shot.
- Select Assign Label > Label Manager.
In the Label Manager, you can:
- Add new labels and define custom colors.
- Delete existing labels using the delete (trash) icon.
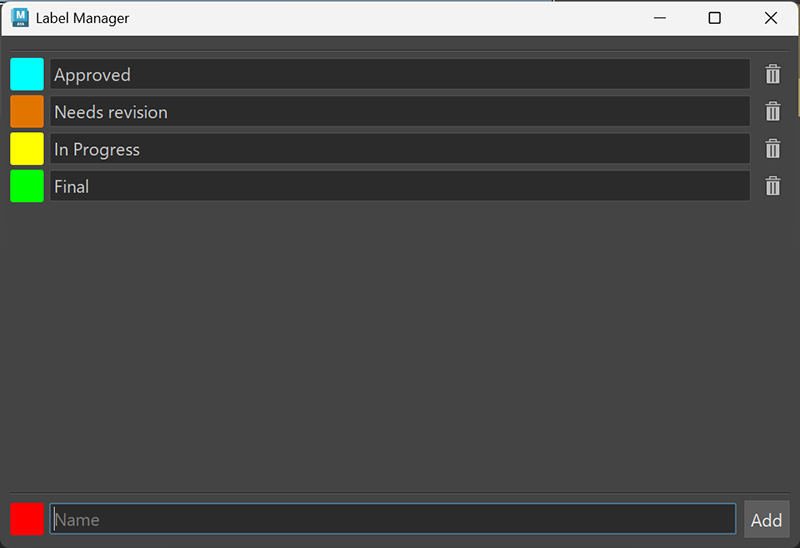
Changes to labels are stored with the scene.
Set shot colors
You can customize the display color of shots in the Sequencer editor.
Setting a shot color changes how the shot appears in the timeline and can be used to visually organize shots within a sequence.
- Change the color of a shot
-
To change a shot's color:
- Right-click the shot.
- Select Set Selected Shots Color.
- In the color picker, choose one of the preset swatches or select a custom color.
- Click to apply the selection.
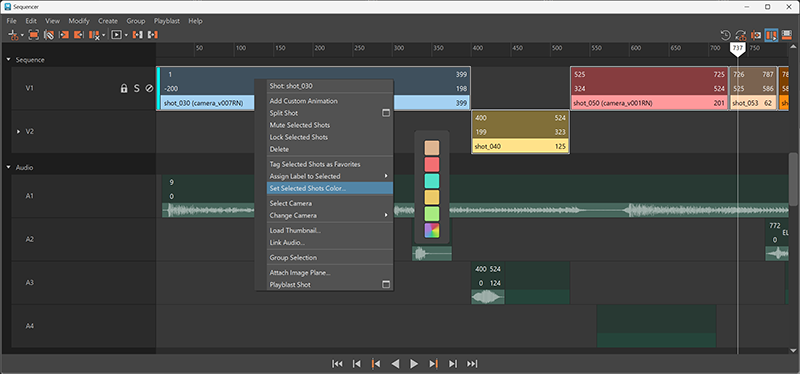
The shot updates to display the selected color in the Sequencer timeline.
Add or remove shot thumbnails
You can assign a custom thumbnail image to a shot in the Sequencer editor. The thumbnail appears in the upper-left corner of the shot and provides a visual reference.
- Add a thumbnail to a shot
-
To add a thumbnail:
- Right-click the shot.
- Select Load Thumbnail…
- In the file browser, select an image file and click Open.
The selected image is displayed as a thumbnail in the upper-left corner of the shot.
If you have playblasted the shot, you can select an image generated from the playblast.
- Remove a thumbnail
-
To remove a thumbnail:
- Right-click the shot.
- Select Remove Thumbnail.
The thumbnail is removed from the shot.
Shot groups
- Groups are drawn in purple to distinguish them from individual shots.
- Each group has one active shot. The active shot's name is displayed on the group node and is the shot used during playback.
- Moving a group moves all shots in the group together.
- You can add shots to or remove shots from a group. Empty groups are deleted.
- Groups can be muted.
Active shots
Each group contains one active shot. The active shot:
- Is displayed in the scene view during playback when View Sequence Time mode is enabled.
- Specifies the audio node, if one is connected.
- Defines the length used to draw the group.
- Provides the name displayed on the group node.
When a group is created, the first shot in alphabetical order is set as the active shot by default.
To change the active shot:
- Right-click the group node and select Set Active Shot, or
- Select the group and choose Group > Set Active Shot from the menu bar.
Select the shot you want to designate as active.