This topic covers all 4
Edit Influences options:
-
>
Add Influence >

-
>
Remove Influence >
- > Set Max Influences...
- >
Remove Unused Influences >
Add Influence options
- Geometry
- Turn Use Geometry on if you want the influence object’s shape as well as its transform attributes (translation, rotation, and scale) to influence the skin’s shape. Turn Use Geometry off if you only want the influence object’s transform attributes (translate, rotate, and scale) to influence the skin’s shape. Default is Use Geometry on.
- Dropoff
- Specifies the rate at which the influence of the influence object’s position drops as the distance from the influence object increases. Specify values between 0.1 and 100. Default is 4.0.
- Polygon Smoothness
- Specifies how accurately the smooth skin points follow a given polygonal influence object. The higher the value, the more rounded the deformation effect. Set values between 0.0 and 50.0. Default is 0.0.
- NURBS Samples
- Specifies the number of samples used to evaluate the influence of a NURBS influence object’s shape. The greater the number of samples, the more closely the smooth skin follows the influence object’s shape. Set values between 1 and 100. Default is 10.
- Weight Locking
- Specifies that you want to prevent the influence object’s weights from being changed indirectly, typically because of weight normalization during weight painting and editing (see Lock smooth skin weights). Instead, Maya holds the weights to the Default Weight. Default is off.
- Default Weight
- Specifies the default holding weight if Weight Holding is on. Default is 0.000.
- Skin Cluster
-
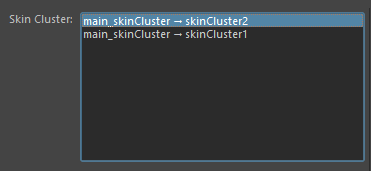
The Skin Cluster list contains all the skin clusters associated with the currently selected geometry
- The Skin Cluster area lets you select individual skin clusters on geometry that have more than one or more skin cluster applied.
-
- Skin Cluster list
- Skin clusters on the selected geometry appear here.
Note: If no skin cluster are found this list remains empty. Select geometry to update the list.
- The most recently added skin cluster appears at the top of the list.
Remove Influence options
Removes the current influence object’s influence from the skin. Remove Influence does not delete the current influence object from the scene.
- Skin Cluster
-
The Skin Cluster list contains all the skin clusters associated with the currently selected geometry
- The Skin Cluster area lets you select individual skin clusters on geometry that have more than one or more skin cluster applied.
-
- Skin Cluster list
- Skin clusters on the selected geometry appear here.
Note: If no skin cluster are found this list remains empty. Select geometry to update the list.
- The most recently added skin cluster appears at the top of the list.
Set Max Influences...
- Max Influences
- Specifies the number of joints and influence objects that can influence each skin point on your smooth skin geometry. You can also limit the range of joint influence by specifying a Dropoff/Falloff Rate.
- Use slider to select values from 0 to 30. The default is 5, which produces good smooth skinning results for most characters.
- Skin Cluster
-
The Skin Cluster list contains all the skin clusters associated with the currently selected geometry
- The Skin Cluster area lets you select individual skin clusters on geometry that have more than one or more skin cluster applied.
-
- Skin Cluster list
- Skin clusters on the selected geometry appear here.
Note: If no skin cluster are found this list remains empty. Select geometry to update the list.
- The most recently added skin cluster appears at the top of the list.
Remove Unused Influences options
Disconnects all joints and influence objects with skin weights of 0 from their smooth skin. See Remove unused influences from a smooth skinned surface.
- Skin Cluster
-
The Skin Cluster list contains all the skin clusters associated with the currently selected geometry
- The Skin Cluster area lets you select individual skin clusters on geometry that have more than one or more skin cluster applied.
-
- Skin Cluster list
- Skin clusters on the selected geometry appear here.
Note: If no skin cluster are found this list remains empty. Select geometry to update the list.
- The most recently added skin cluster appears at the top of the list.