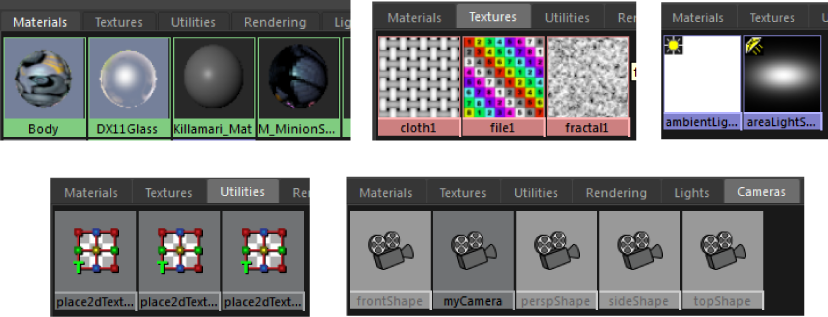
In the Hypershade Browser are tabs containing the rendering components that contribute to the current scene; for example, your materials, textures, lights and cameras.
In every Hypershade tab, each rendering node is displayed as a node icon (a swatch) that visually represents the characteristics of the node. When you edit a node’s attributes or assign textures or special effects, the swatch updates in the Hypershade.

Pause materials and textures swatch generation
If you have a lot of materials and textures in your scene, you can increase the efficiency of your workflow by toggling on
 and off
 swatch generation in the following areas. This helps you to avoid waiting for swatches to render:
- Materials and Textures tabs in the Hypershade Browser
- Attribute Editor
- Nodes in the shader graph in the Hypershade work area
The Material Viewer is not affected by this setting.
When swatch generation is toggled off, you can enable swatch rendering for a specific node in your shader graph by right-clicking and selecting Refresh Swatch from the marking menu.
Customize swatches in the Hypershade Browser
You can customize the way your swatches are displayed in the Browser, for example, the size or order of the swatches. See Customizing the Hypershade Browser.
Create additional Hypershade tabs
You can add additional tabs to the Hypershade Browser to sort the render nodes in your scene. For more information, see Customizing the Hypershade Browser.
Filter nodes in the Browser
To filter nodes by type, click Show > Objects in the Browser toolbar and select from the available filters.
To filter nodes by name, enter the filter text in the text box. Use * as a wildcard.

To clear filters, click
 . When no filters are applied, the icon appears as grey
 . See
Hypershade Browser toolbar.
Projects tab
The Projects tab displays the contents of the default projects directory.
If you keep projects elsewhere, create a new disk tab pointing to the directory in which you keep your projects. See Customizing the Hypershade Browser.
For example:
- Windows
drive:\Documents and Settings\username\My Documents\maya\projects
- Mac OS X
/Users/username/Documents/maya/projects