- To access the Sweep Mesh options, with a curve mesh selected, click the sweepMeshCreator tab in the Attribute Editor

Default Poly, Rectangle, Line, Arc, Wave, and Custom sweeps created from a simple diagonal line
Sweep Mesh lets you generate a polygonal mesh from a simple curve shape.
The following are descriptions of the settings for the Sweep Mesh from Curve tool. For instruction on how to use Sweep Mesh, see Create a mesh from a curve with Sweep Mesh.
Sweep Profiles

The Sweep Profiles section lets you set the curve sweep shape. Each Sweep Profile type has settings specific to the profile type. Sweep Profile attributes that are common to all profile types are at the end of this section.
Poly sweep profile

- Type
- Choose from Circle or Star.
- Inner Radius
- (Available only with Star type.)
- The interior size of star profile.
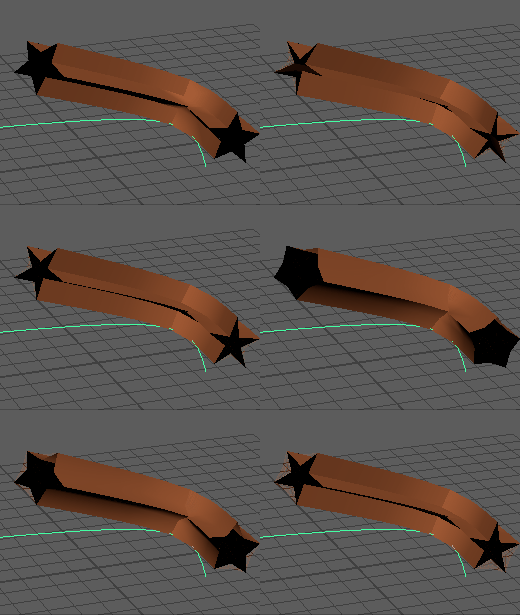
- Sides
- The number of subdivisions for convex or star profile shape
- Cap
- Enable to fill holes at beginning and end of sweep mesh.

Rectangle sweep profile

- Width/Height
-

- The width or height of the rectangular profile.
- Corner Radius
-

- The radius of bevel at rectangle profile corners.
- Corner Segments
- The number of divisions at rectangle profile corners.
- Corner Depth
- The roundness of corners (a value of 0 flattens at 45º and negative value rounds inward).
- Cap
- Enable this option to fill holes at beginning and end of sweep mesh
Line sweep profile

There are no specific settings for the Line Sweep Profile. For the Distribution, Alignment, Transformation, Interpolation, Normals and UV settings, see Common Sweep Attributes, after these sections.
Arc sweep profile

- Angle
-
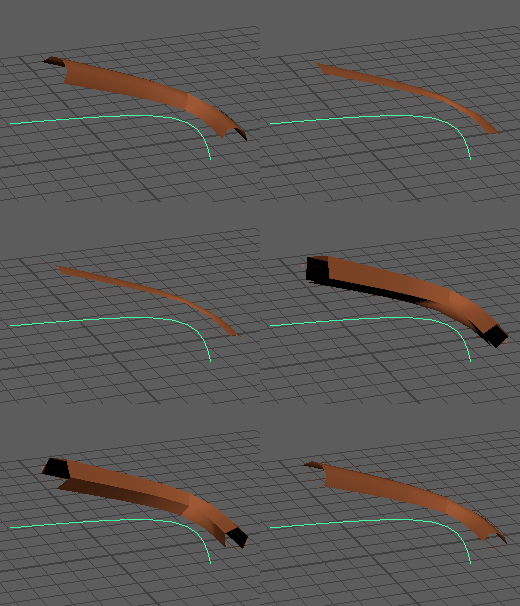
- The angle of the arc between 0º and 360º.
- Segments
- Define number of arc shape subdivisions.
Wave

- Amplitude
-
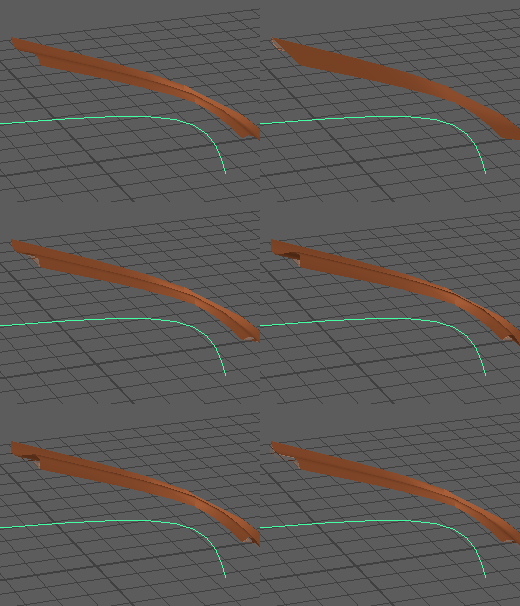
- The wave height.
- Cycles
- The number of waves.
- Offset
- Moves the wave pattern along width of profile.
- Segments
- The number of subdivisions along wave width.
Custom

The following settings are available for Custom Sweep Profiles. For information on how to use these settings, see Create a custom mesh with Sweep Curve.
- Cap
- Enable to fill holes at beginning and end of sweep mesh.

- Custom
- When you click Custom Sweep Profile, a dialog appears to let you choose how you want the custom mesh to appear.
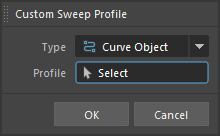
Custom Sweep Profile dialog
- Type
- Select Curve Object, Poly Object, Poly Face or Poly Edge.
- Profile
- Select the shaper in the viewport or outliner for the custom profile.
Common Sweep attributes
These settings are available for every Sweep Profile type.
Distribution
Activate the Enable option to expose controls for the spread of the sweep profile pattern.
- Distribution
-

- Set to circle, square or line to control how pattern is repeated.
- Number of Instances
-

- Define the number of times the profile is repeated.
- Scale Instances
-
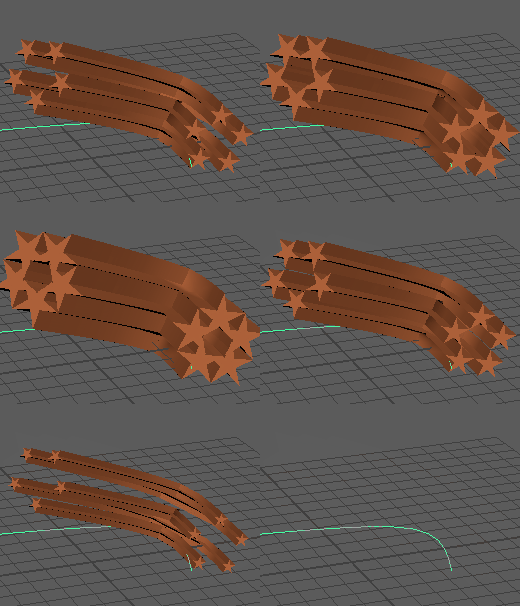
- Define the size of each element within the pattern (this is a multiplier of the Scale Profile setting).
- Rotate Instances
-

- Define orientation of repeated elements around the path.
- Coverage
-

- Define the spacing of the repeated elements around the path (a value of 1 results in full coverage).
Alignment
Activate the Enable option to expose controls for the location of the mesh relative to the path
- Horizontal
- Set to Left, Center or Right to align profile along horizontal direction, relative to path.
- Vertical
- Set to Top, Center or Bottom to align profile along vertical direction, relative to path.
- Horizontal Offset
- Adjust spacing of profile relative to Horizontal Alignment option.
- Vertical Offset
- Adjust spacing of profile relative to Vertical Alignment option.
Transformations
- Scale Profile
-
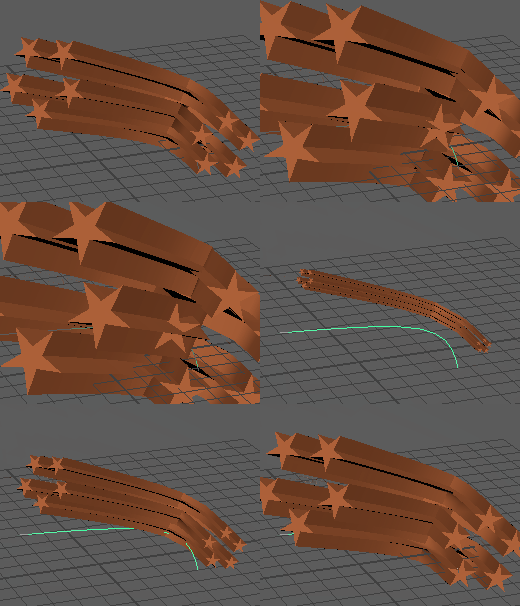
- Define the width of the profile relative to the path.
- You can set specific widths for the x or Y axes of the profile if you turn off Profile Uniform Scale in the Settings section, below.
- Rotate Profile
-

- Define the orientation of the profile relative to the path.
- Twist
-
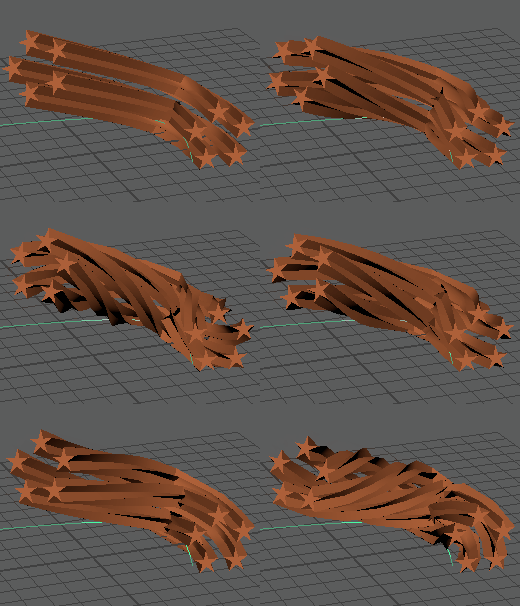
- Define the number of times the profile is rotated around the length of the path (a value of 1 is a full 360º rotation).
- Taper
-
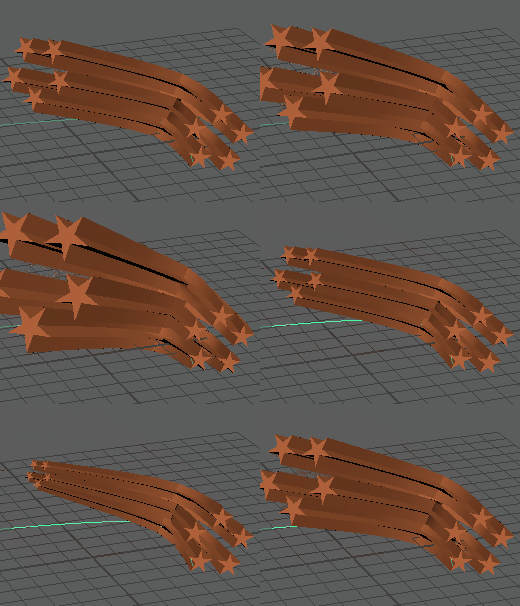
- Increase or decrease the scale of the profile along the path relative to starting scale profile value (value of 0 will scale down to a point at the end of the path).
- Taper Curve
-

- Add control points in the Taper Curve ramp UI to create a variable taper along the length of the sweep path. A multiplier of the attributes Scale Profile.
Interpolation
- Mode
-

Modes switching through Precision, tart to End, EP to Ep, and Distance,
- The method used to determine number of subdivisions along the path.
- Distance
- Set the subdivisions relative to the world space length of the path (this can be set on multiple Sweep meshes to maintain consistent, uniform divisions regardless of curve topology or length)
- Precision
- Algorithm uses a range of 0 to 100 to determine amount of detail (100 is the maximum setting resulting in the highest density)
- Start to End
- Set the exact number of subdivisions along the full length of the path
- EP to EP
- Set the exact number of subdivisions within each span of the path (the subdivisions are set between each edit point of the curve)
Normals
- Reverse
-
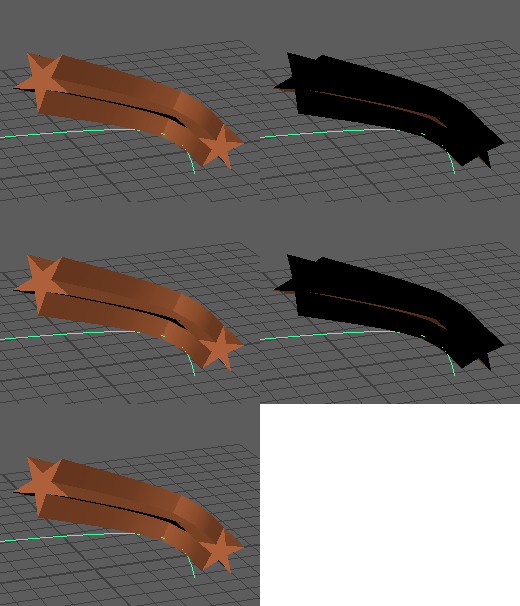
- Reverses the direction of the face normals.
- Smoothing
- Soften/harden edges based on face angle.
UV
- None
- Disable automatic creation of UVs (this can be used to temporarily improve performance while iterating on complex or dense sweep meshes).
- Uniform
- Create uniform UVs without concern for texture distortion
- Unfold
- Create UVs that are proportionally distributed to closely match the topology of the sweep mesh (minimal texture distortion).
Advanced Settings
- Flow
-
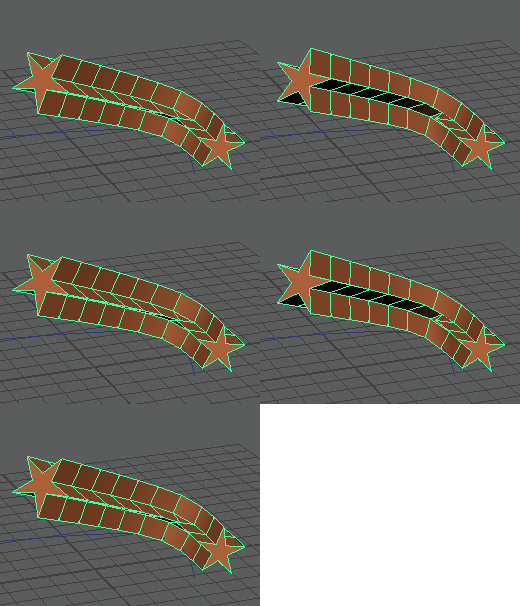
- Set the manner in which the profile follows the path:
-
- Natural: inherent twisting and rolling determined by the path flow.
- No Roll: forces the profile to maintain a consistent orientation relative to the path
- Uniform Profile Scale
- Disable to separate Scale Profile into unique X and Y attributes.
- Uniform Instance Scale
- Disable to separate Pattern Scale Elements into unique X and Y attributes.
- Relative Instance Orientation
- Disable auto orientation algorithm for pattern elements (on by default).