You can store sculpted detail on one or more sculpt layers. Sculpt layers store edits to the mesh and let you create and edit sculpted features, keeping the edits separate from one another, and let you blend sculpted detail between layers. You view and manage layers using the Layers window.
To sculpt using layers
- Click the Layers tab in the upper-right corner of the Mudbox interface to display the Layers window.
- To create a new sculpt layer, first set the display button at the top of the Layers window to Sculpt, then click the Layers window menu (
 ) and select New Layer from the list (or click the New Layer icon
  ).
). 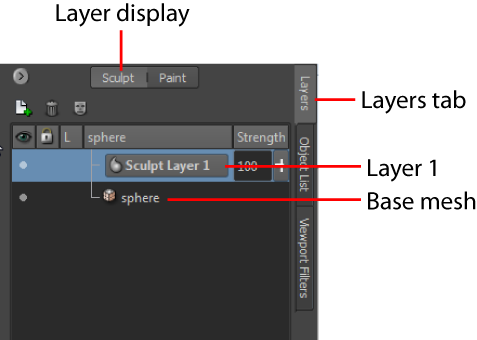
A new layer called Sculpt Layer 1 is created and becomes the active layer. Mudbox stores everything you sculpt on this layer until you select another layer or change subdivision levels.
- In the 3D View, sculpt on the sphere while Sculpt Layer 1 is selected.
- To sculpt on the original base layer (Sphere), click the Sphere layer in the Layers window to select it.
- Turn off the display of Sculpt Layer 1 by clicking the visibility icon (a dot in the Visibility column
 ).
). The details you sculpted on Sculpt Layer 1 disappear when the layer is invisible.
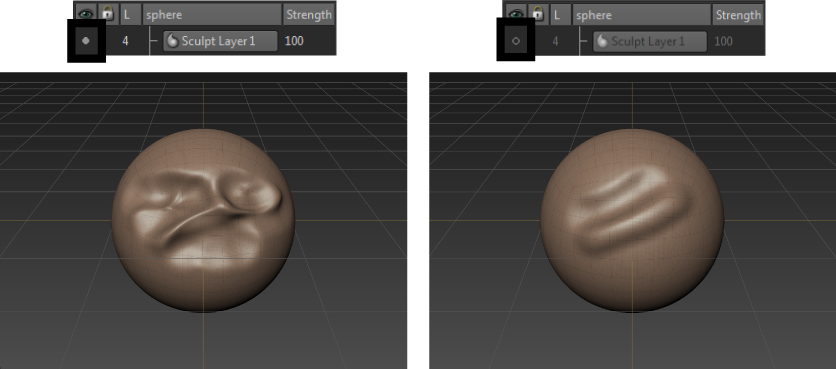
You can lower the Strength setting (next to the layer name) to non-destructively (temporarily) fade out the sculpting for the entire sculpt layer. The Strength value also works as a multiplier; you can either amplify or invert the sculpted information on the layer by entering values over 100 or by entering negative values.
If you want to temporarily hide sculpting in localized areas of a sculpt layer, you can paint with the Mask brush to cover sculpted areas. For more information, see Mask sculpting on a layer.
Sculpt using stencils
- From the main menu, select File > New Scene, then click Don’t Save in the New Scene window.
You’ll create a new sphere for your work with stencils in the steps that follow.
- Select Create > Mesh > Sphere.
A new polygonal sphere appears in the 3D View.
- In the 3D View, position the cursor over the sphere, then press Shift + D twice to subdivide the mesh in preparation for the finer detail that this stencil provides.
Some stencils have little effect unless the model is subdivided to a high enough subdivision level.
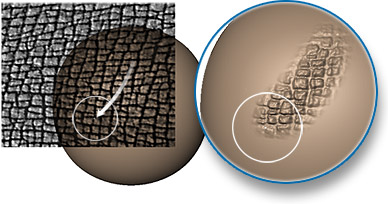
- In the Stencil tray, select the bw_skin08.jpg thumbnail image. (Place the cursor over a thumbnail image to display its name).

The stencil image appears in the center of the 3D View.
Note: Selecting the stencil icon in the Stencil tray or the stencil object in the Object List displays its properties in the Properties window. - Ensure the sphere is positioned directly behind the stencil image in the 3D View.
Use the following hotkeys if you need to reposition the stencil in the 3D View:
To:
(Windows and Linux)
(Mac OS X)
Rotate a stencil S + drag S + drag Move a stencil S + Middle-drag S + Middle-drag Scale a stencil S + Right-drag S + Right-drag 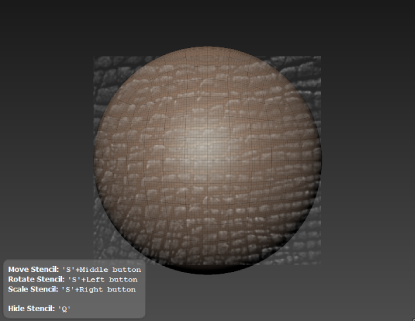
- With the Sculpt tool still selected, stroke across the stencil image and onto the sphere.
The stencil disappears as you stroke to let you view the affected region on the model.
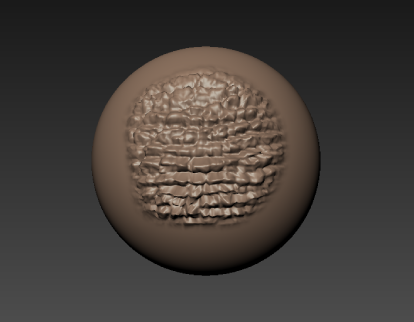
- Click Off in the Stencil tray to turn off the stencil.

 Previous lesson
Sculpt a model
|
Next lesson
Paint a model

|