You can organize sculpt layers by creating groups and moving one or more sculpt layers into each group.
To create a sculpt layer group
- Create sculpt layers. See Create a sculpt layer.
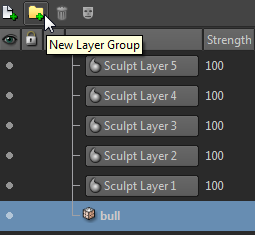
- From the Sculpt Layers menu bar, click the New Layer Group icon.

Alternatively, right-click anywhere on the Sculpt Layers window and choose New Group.
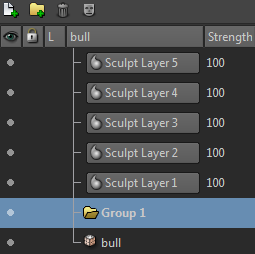
A new group is created.
- (Optional) To rename a group, double-click on the group name and enter a new name. Note: You cannot change the strength of the sculpt layer group.
- Select each sculpt layer, drag, and drop it on the new group. The sculpt layers are added to a level below the group.

You can create as many groups you want, and organize sculpt layers according to your workflow.
Toggling the visibility of sculpt layer groups
By default, all groups and the sculpt layers within them are visible.
To toggle the visibility of sculpt layer groups, click the group Visibility icon. 

This enables or disables the visibility of a group and all the sculpt layers within it.
Note: Even when a group is invisible, you can click the Visibility icon of each sculpt layer under the group to make them visible.
Merging sculpt layer groups
You can merge a sculpt layer group, if necessary. A sculpt layer group must be visible for merging. Click the Visibility icon to temporarily turn off any group you do not want to merge.
To merge a sculpt layer group
- Ensure that the Visibility setting is turned on for each group you want to merge.
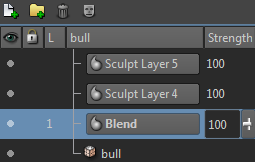
- Right-click a sculpt layer group and choose Merge Group. Note: The Merge Group option is disabled, if you do not select a group or if it is invisible.The selected group and the visible sculpt layers within it are merged. You can change the strength of the merged sculpt group..

Note: You can undo and redo manipulations that you perform on the sculpt layer groups.