Manage User Access for Windows
Navigate to the Admin Section
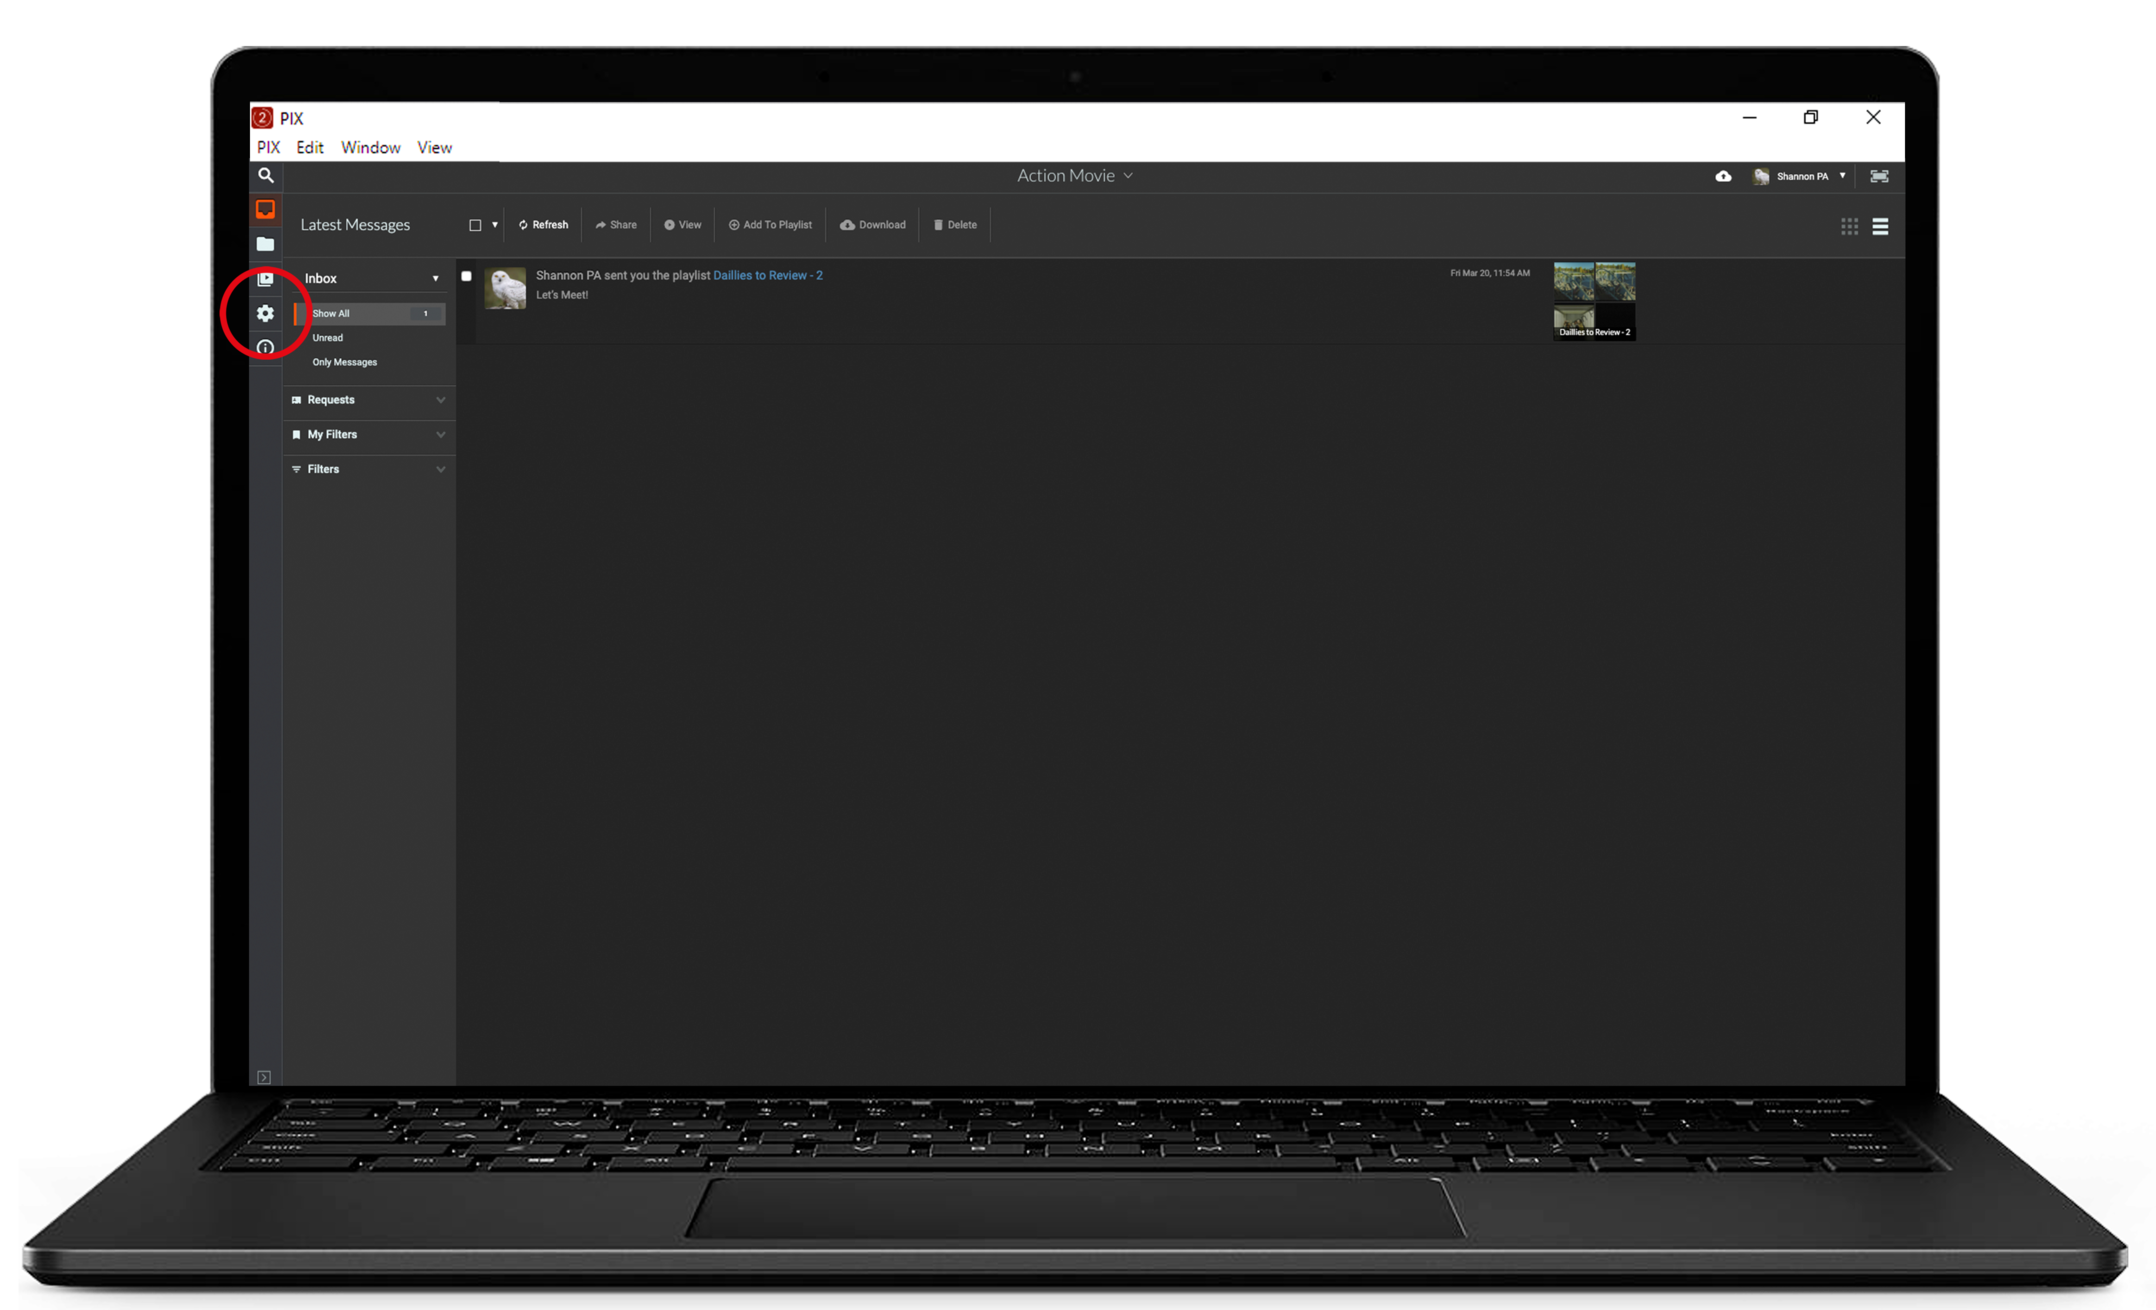
Specially permissioned users can add people to a project through the PIX User Admin Tool. When enabled to add users an Admin button will appear in the left navigation menu.
Click the gear icon to go to the Admin section.
Search enabled and disabled Users
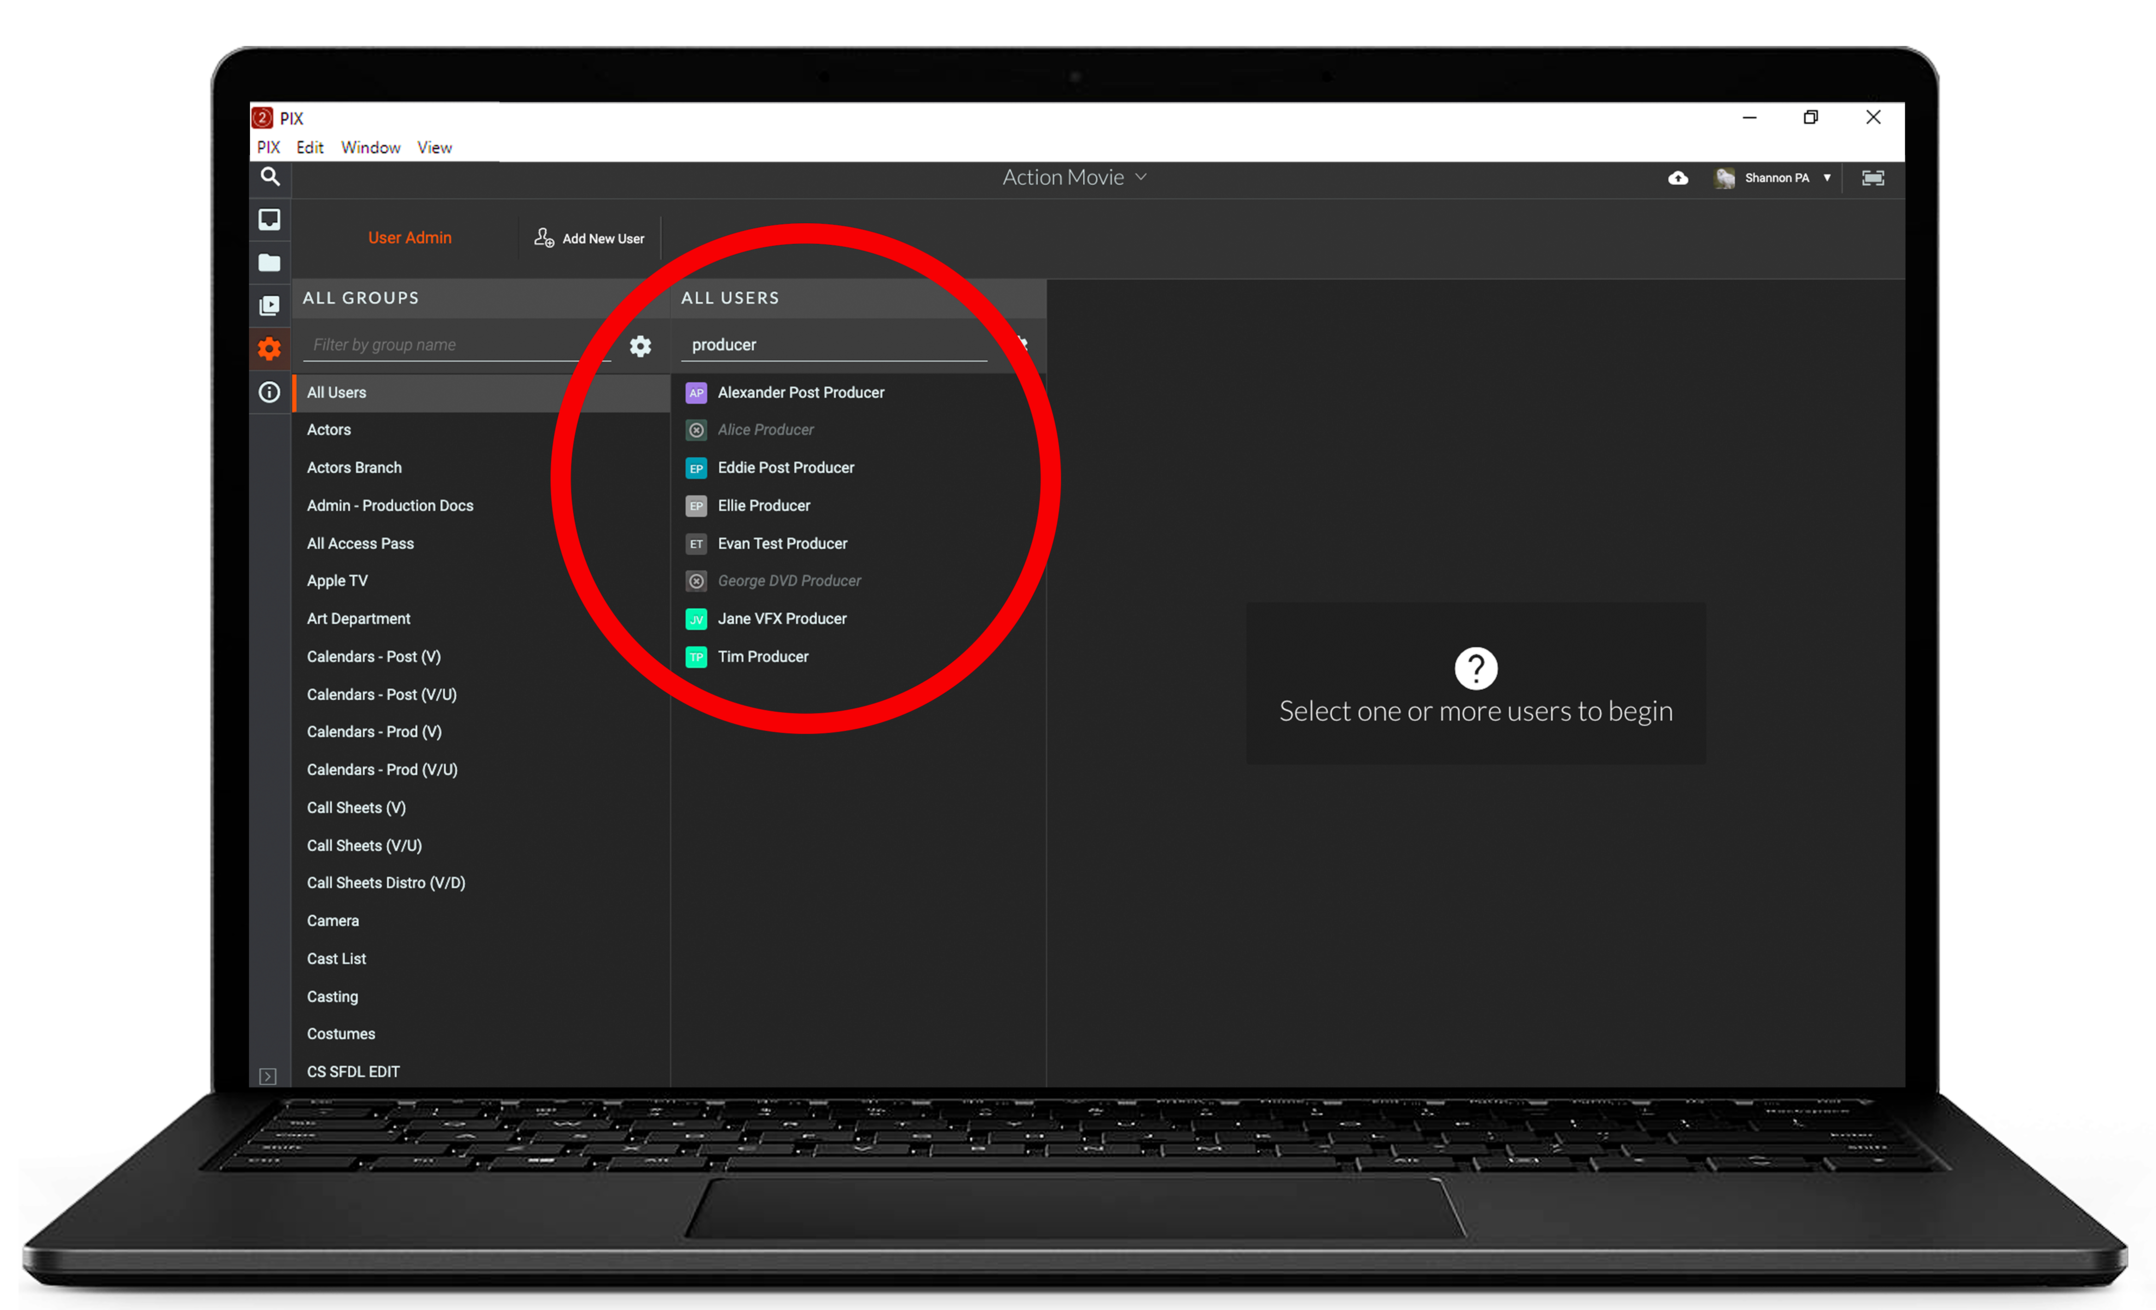
The Admin section lists enabled users on a project as well as Users that have been disabled. Enabled Users are listed in white disabled users in grey are disabled on the project and users in red are deactivated.
Add New Users
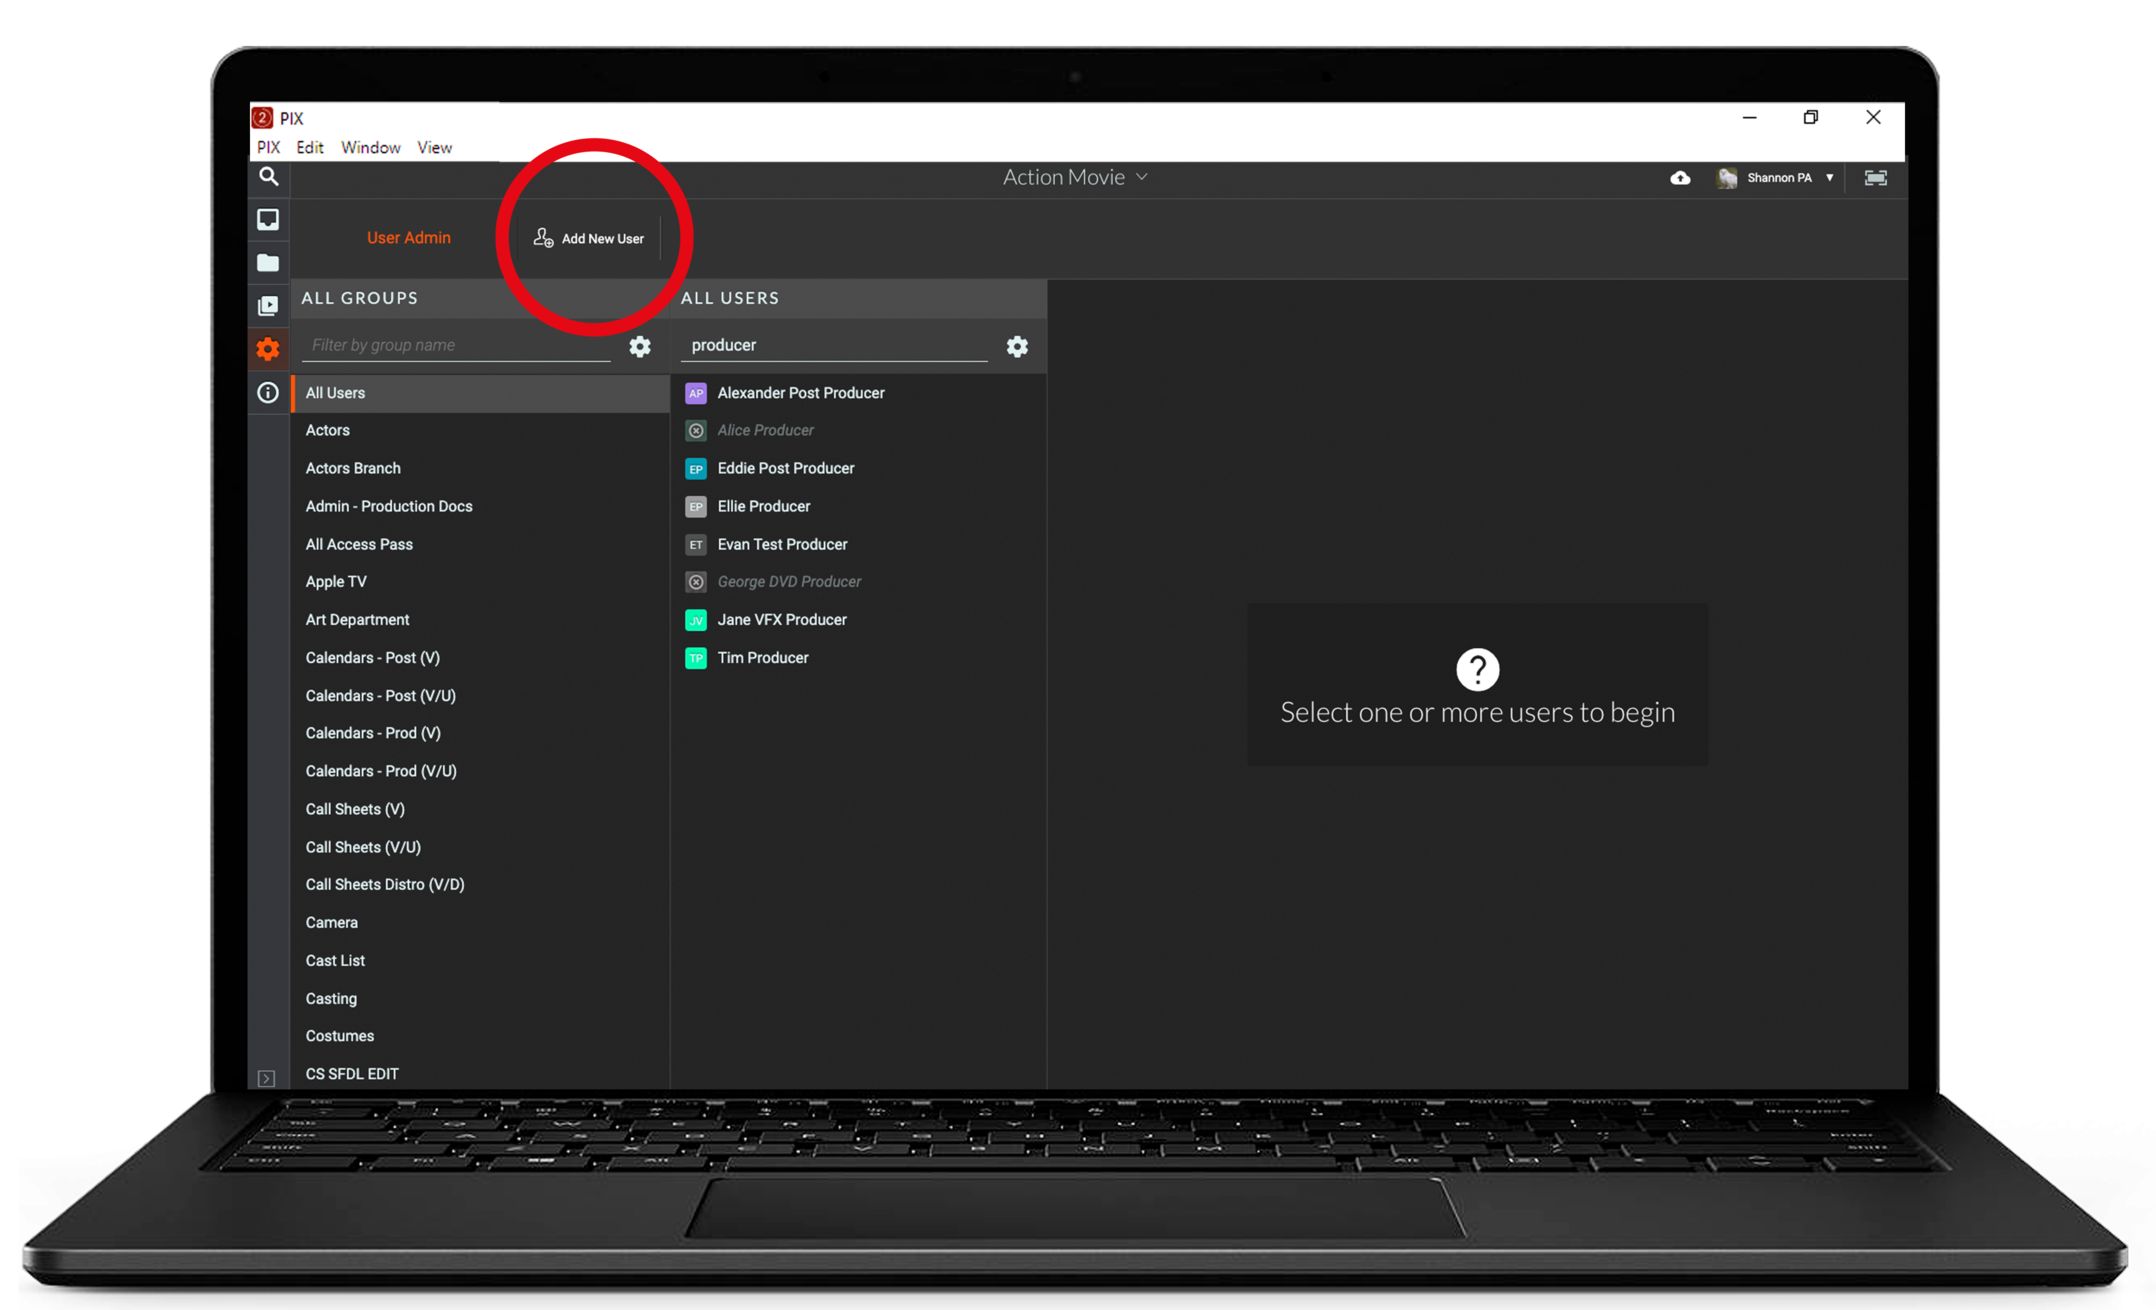
To add a new user to the project click the Add New User button in the top navigation menu. A New User Information window will appear.
Add New User Information
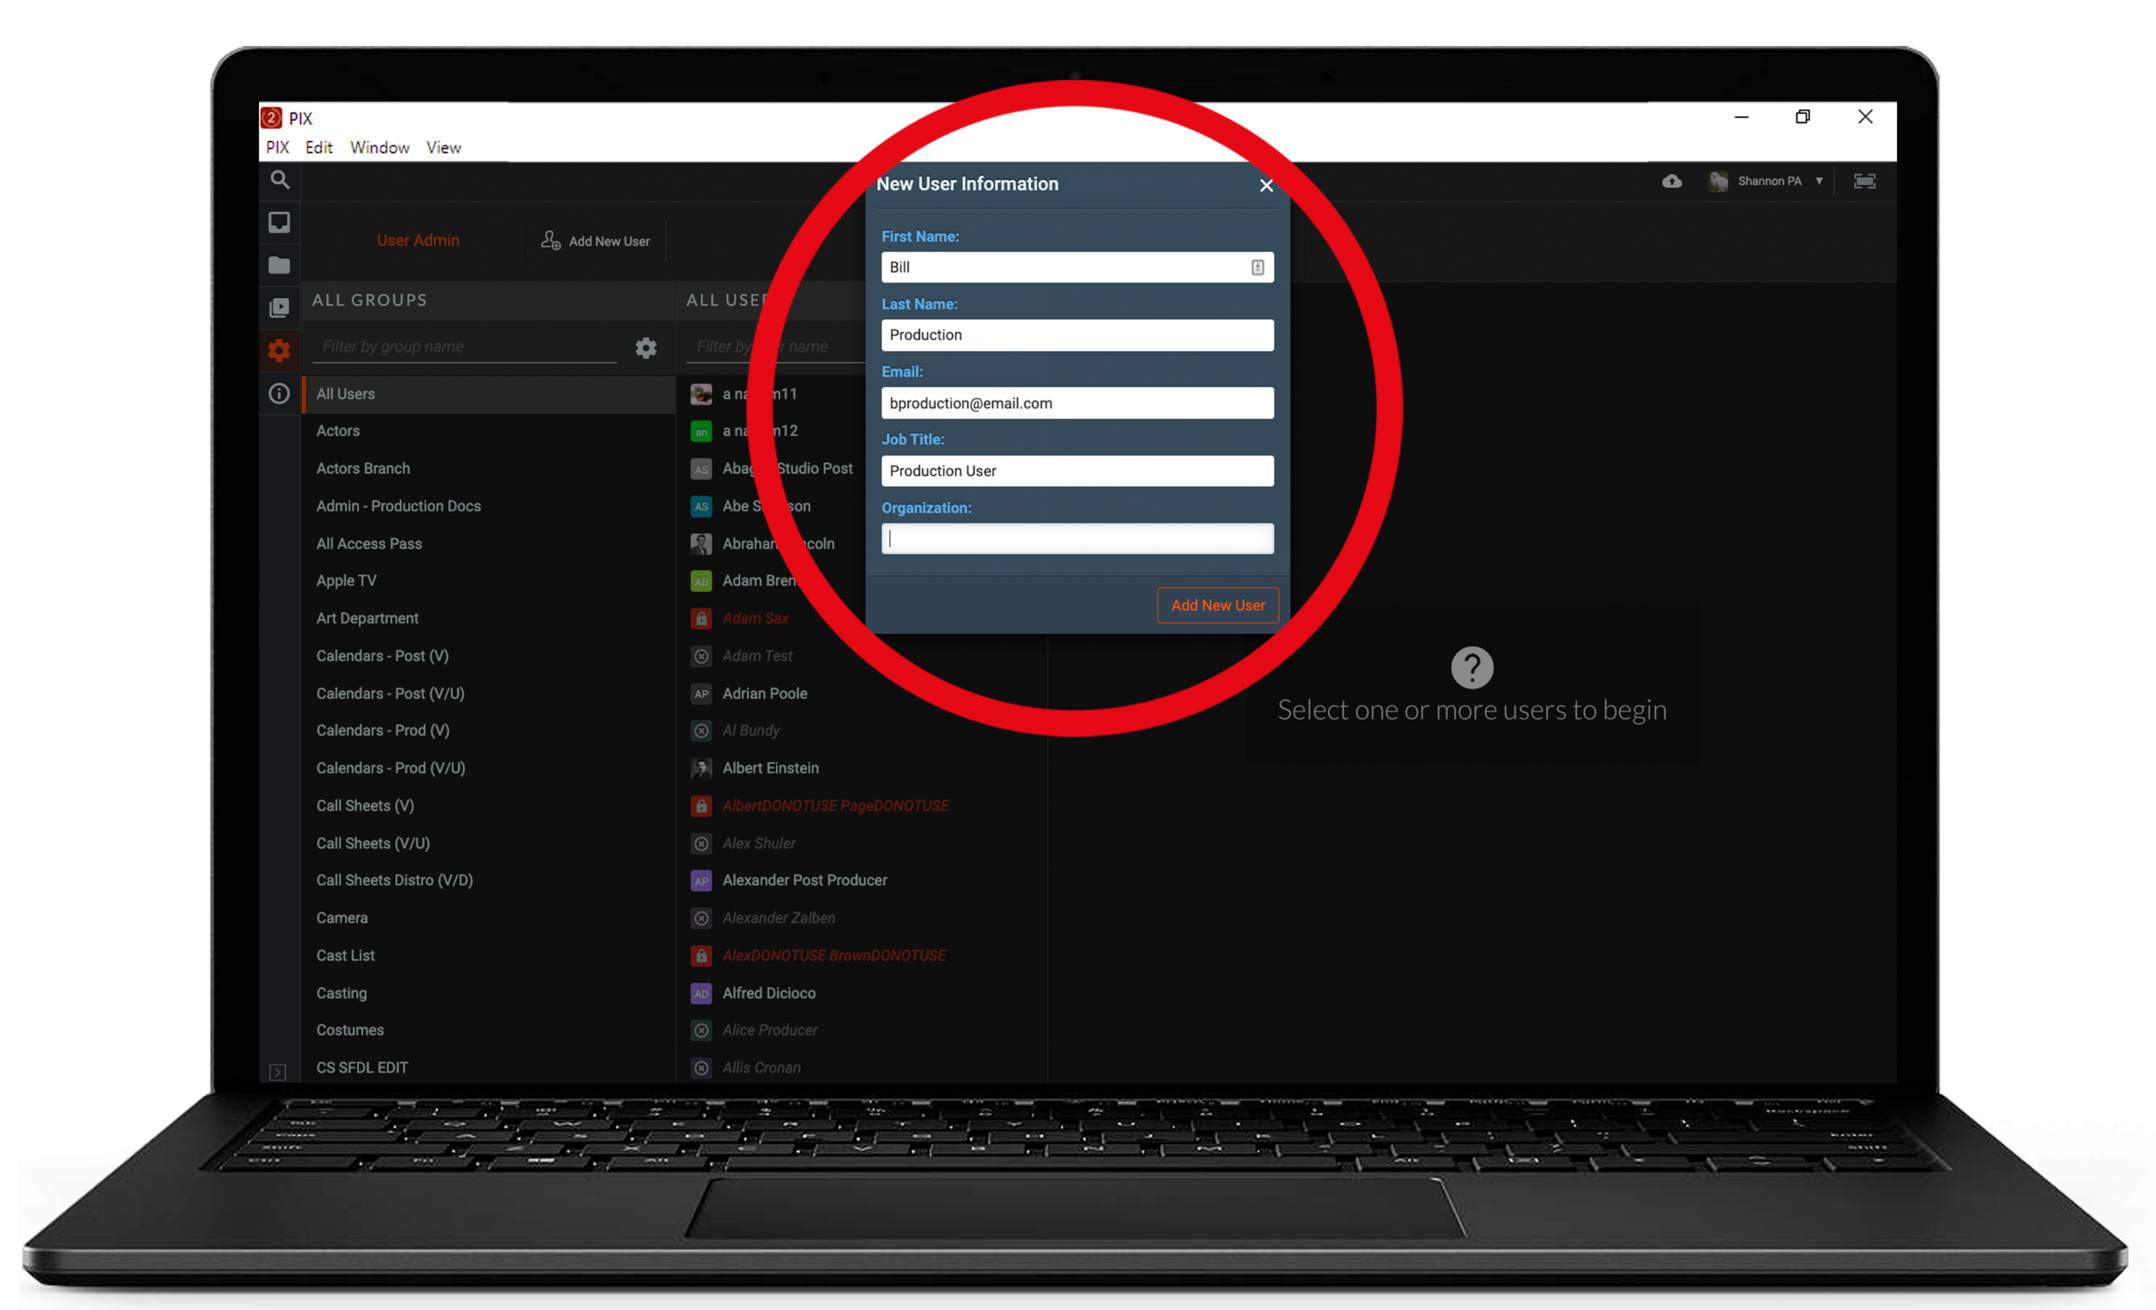
- Add the User's name, email, and job title.
- Click Add New User at the bottom of the New User Information window.
Brand new PIX users receive welcome emails. Users who already exist in the PIX database will NOT receive a welcome email.
If the user is new to PIX they will be sent a welcome email to notify them they have been added to the project and to set up their account. If the user has an existing PIX account they will be added to the project and will receive an email notification when the material is sent to them.
Disable Users
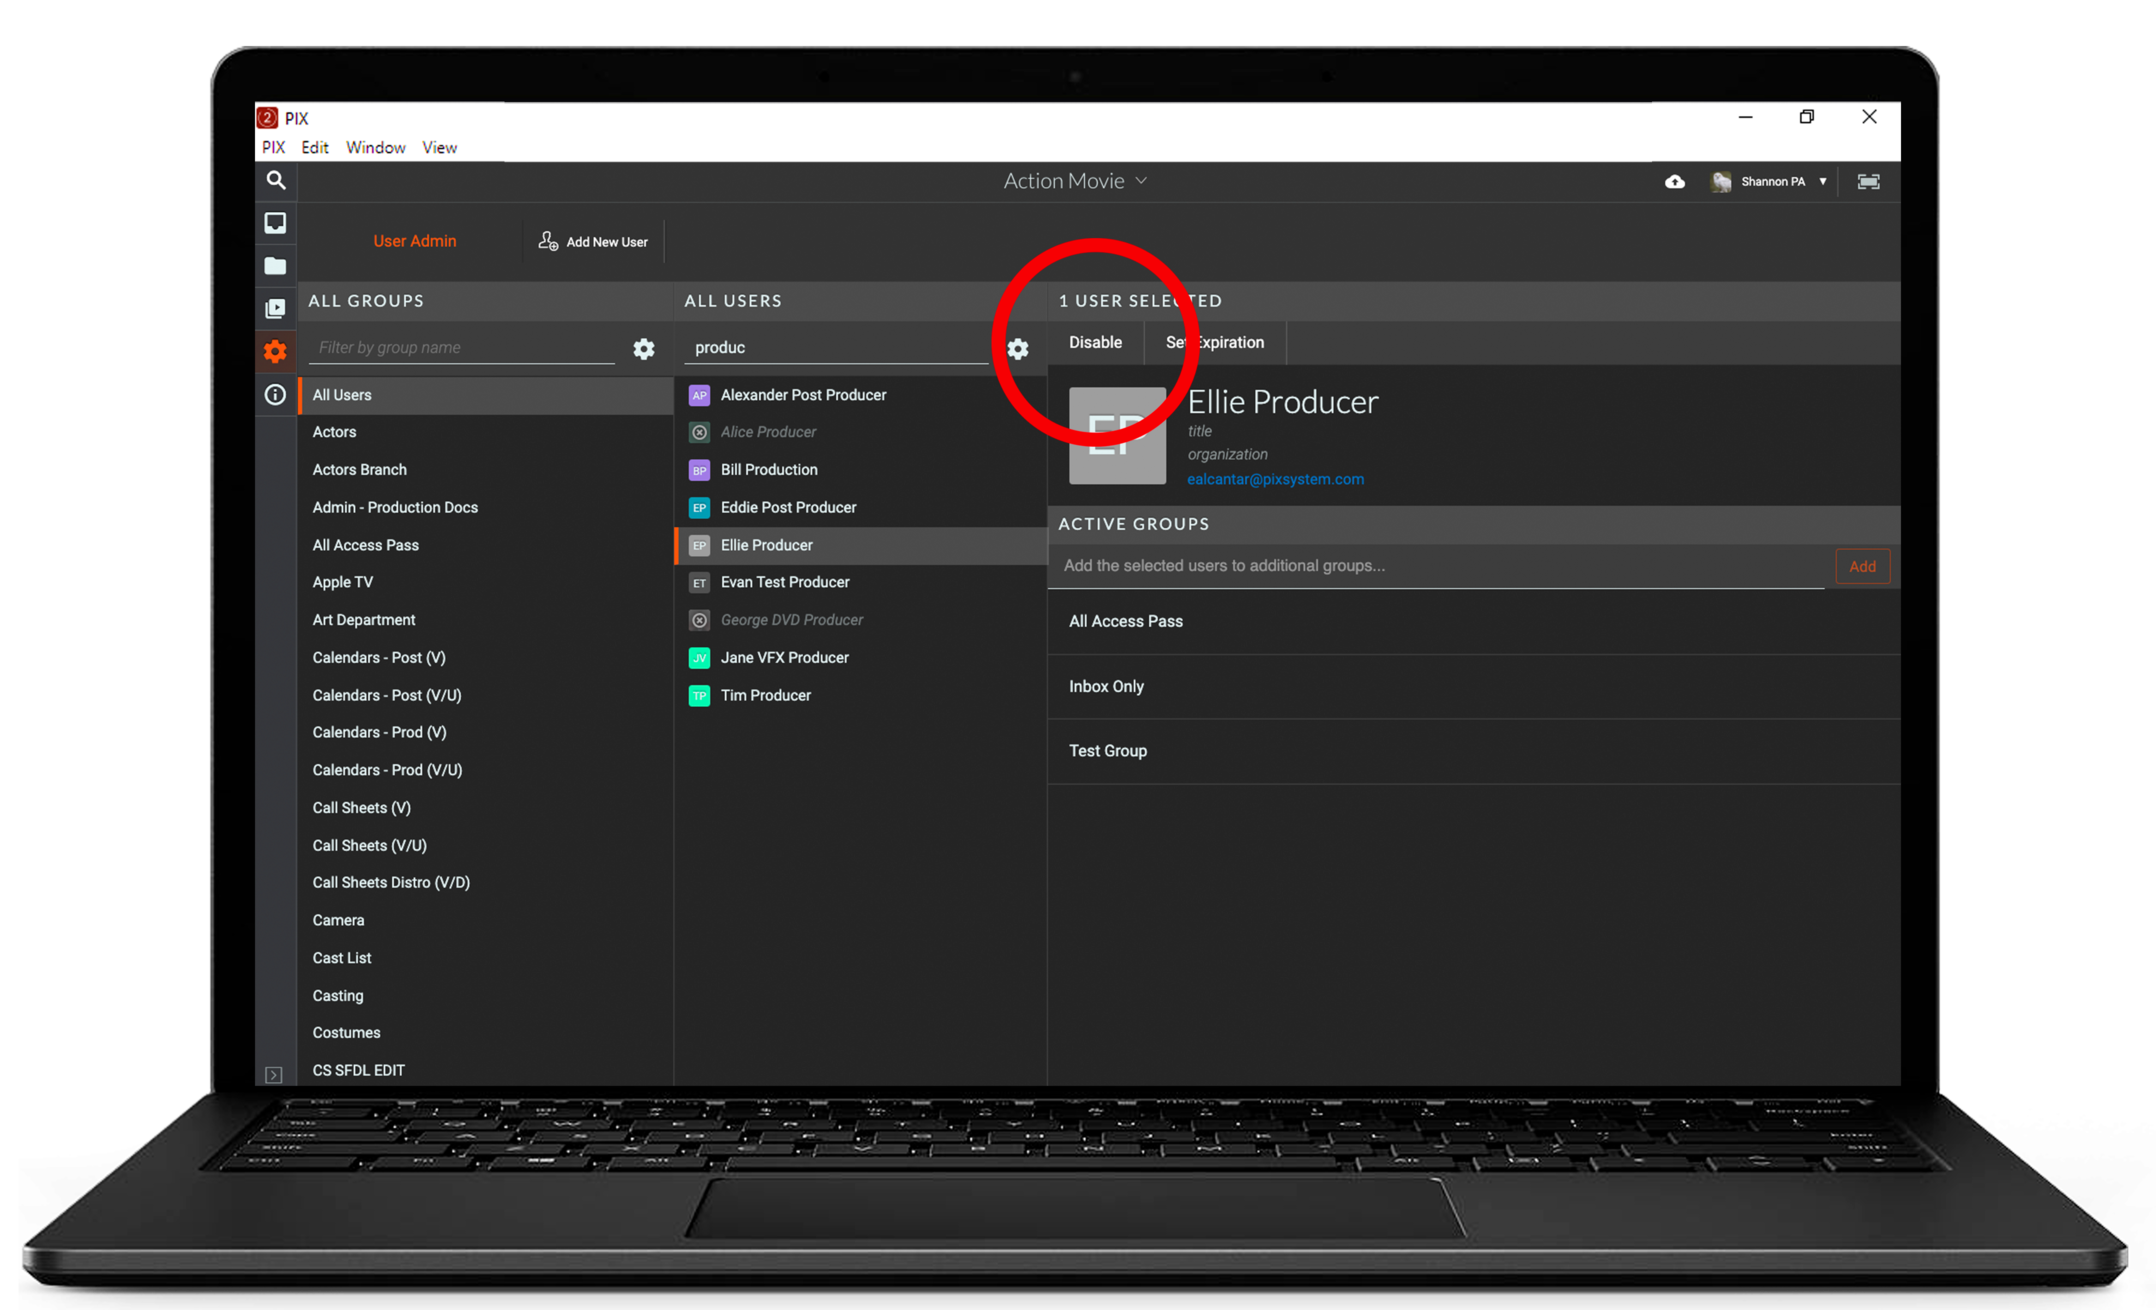
To disable a user on a project select a user from the All Users list then click the Disable button at the top of the user information section.
To disable multiple users at once hold the shift button and select the users then click the Disable All button at the top of the user information section.
Enable Users
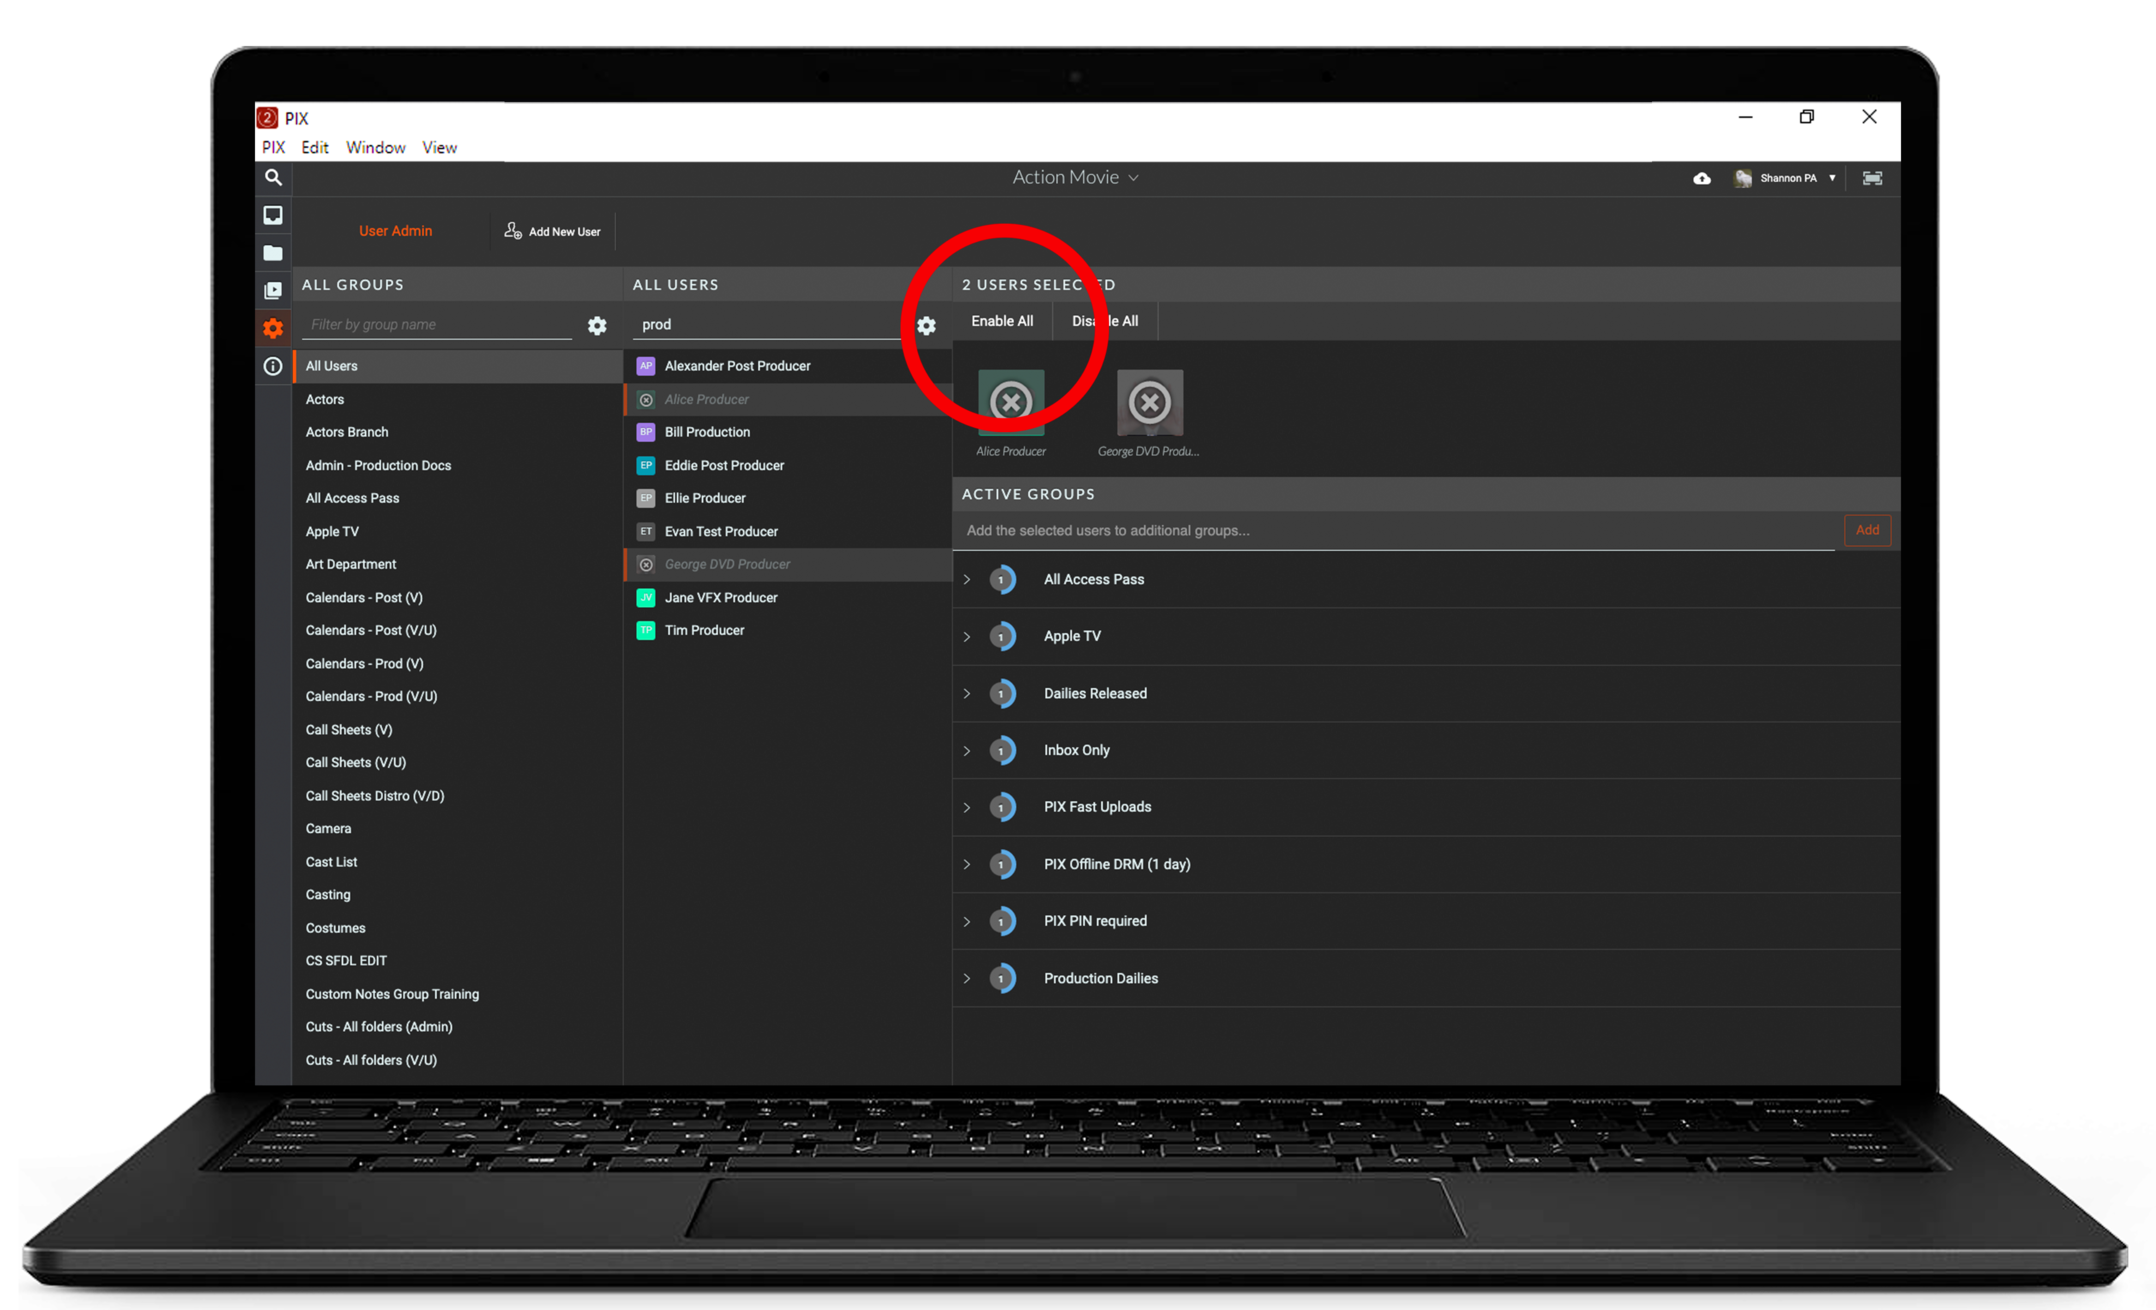
The names of disabled users will appear in grey italics in the All Users list. To enable a disabled user, select a disabled user from the All Users list then click the Enable button at the top of the user information section.
To enable multiple disabled users at once hold the shift button and select the users then click the Enable All button at the top of the user information section.
Set Expiration
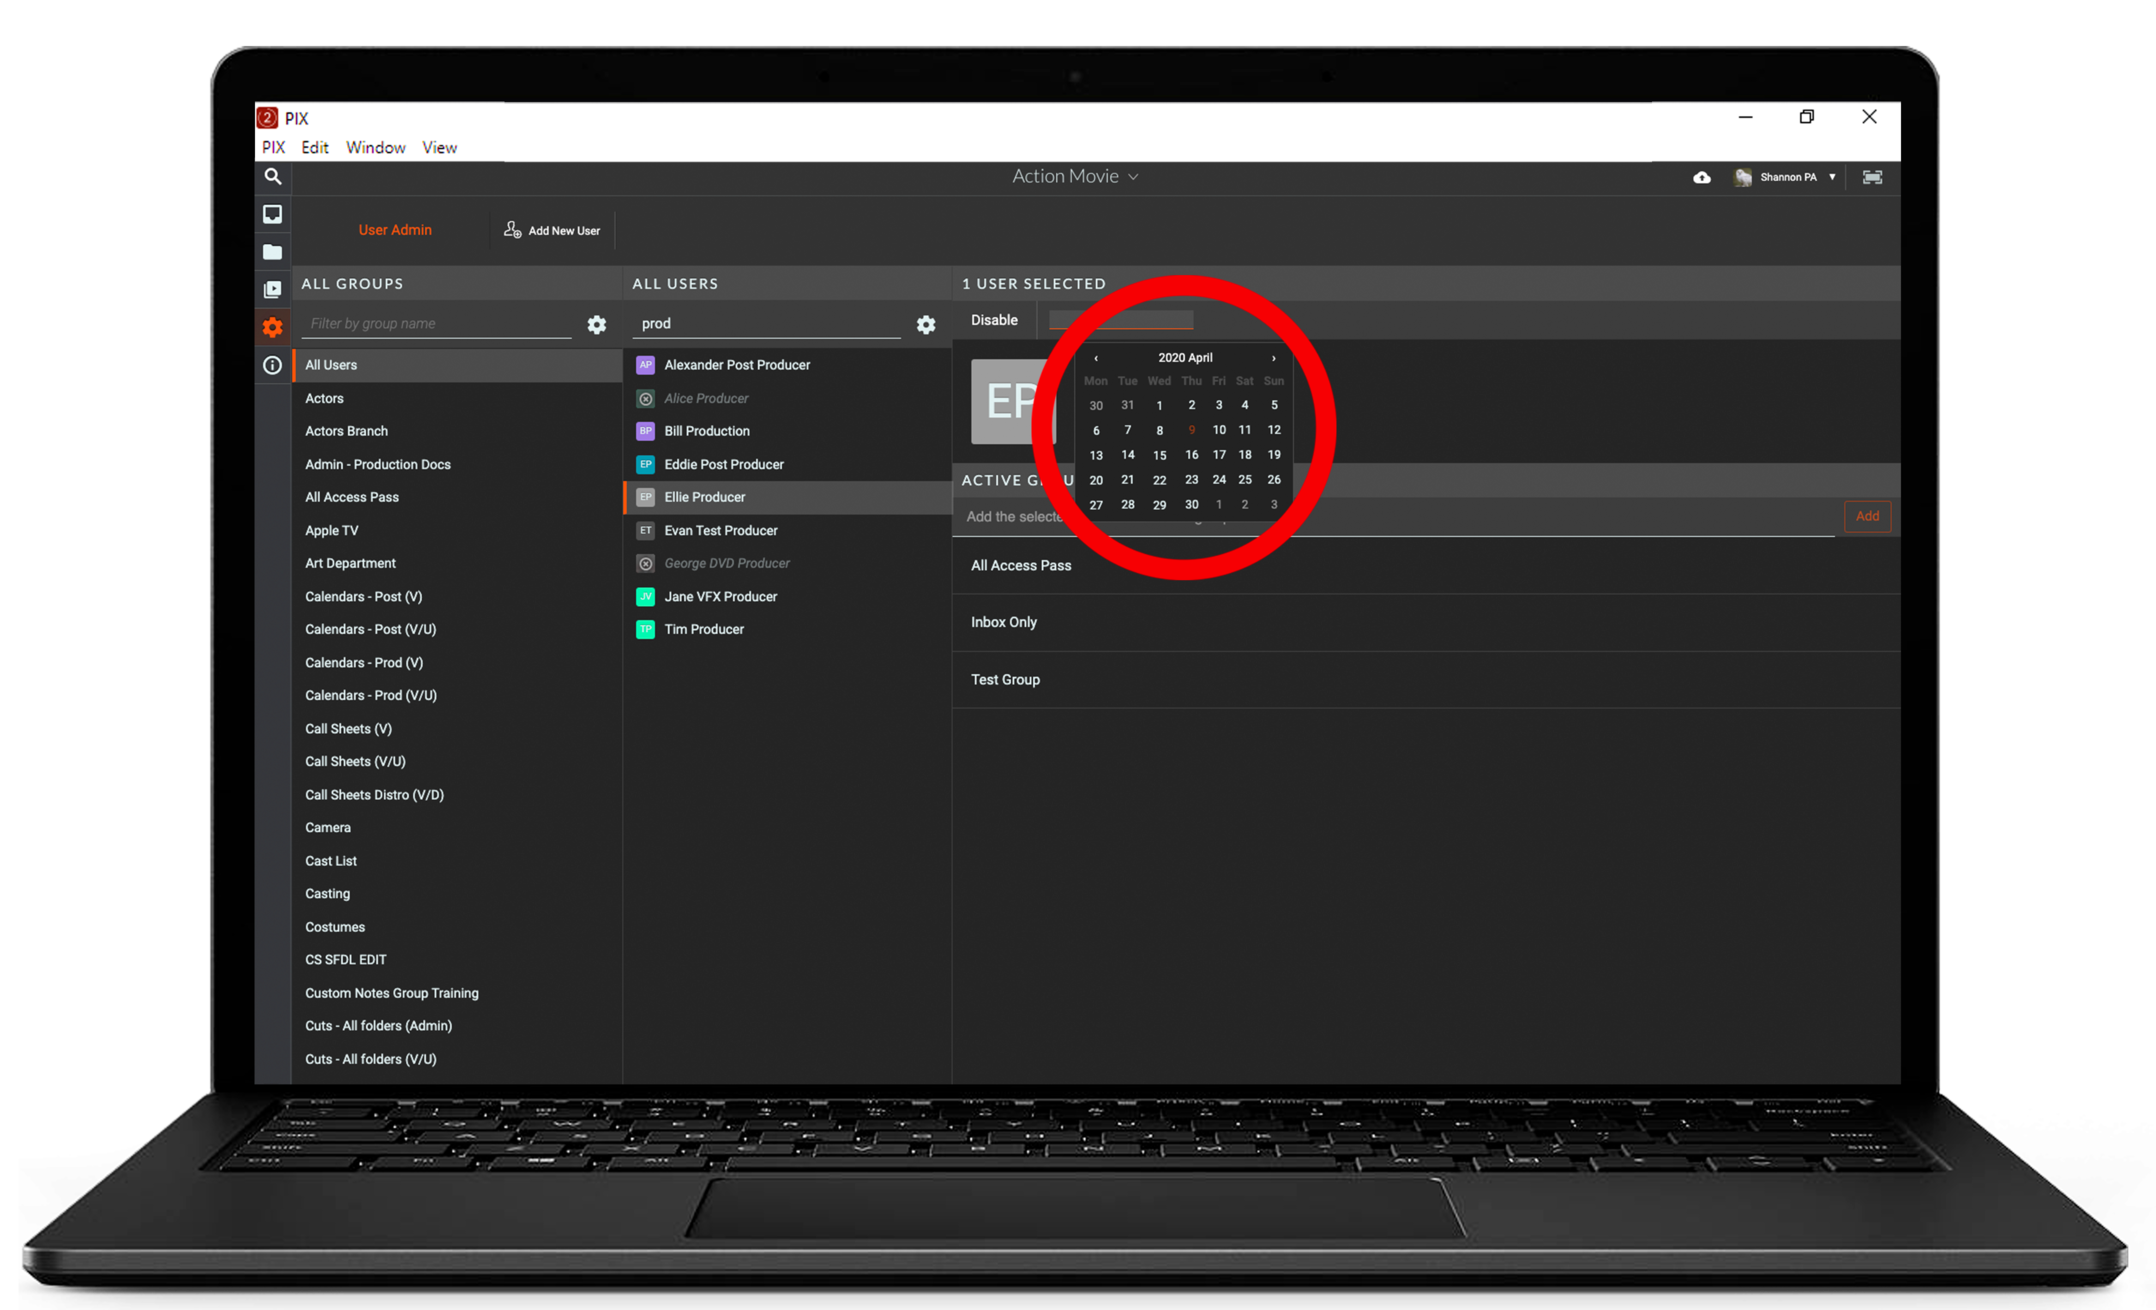
To set an expiration for a user's access to a project select a user from the All Users list and click the Set Expiration button at the top of the user information section.
A calendar panel will appear. Choose the desired expiration date from the calendar and then the desired expiration time.
You will receive an email once the user is disabled on the project. To set an expiration for multiple users at once hold the shift button and select the users then follow the above steps.
Filter groups and Users
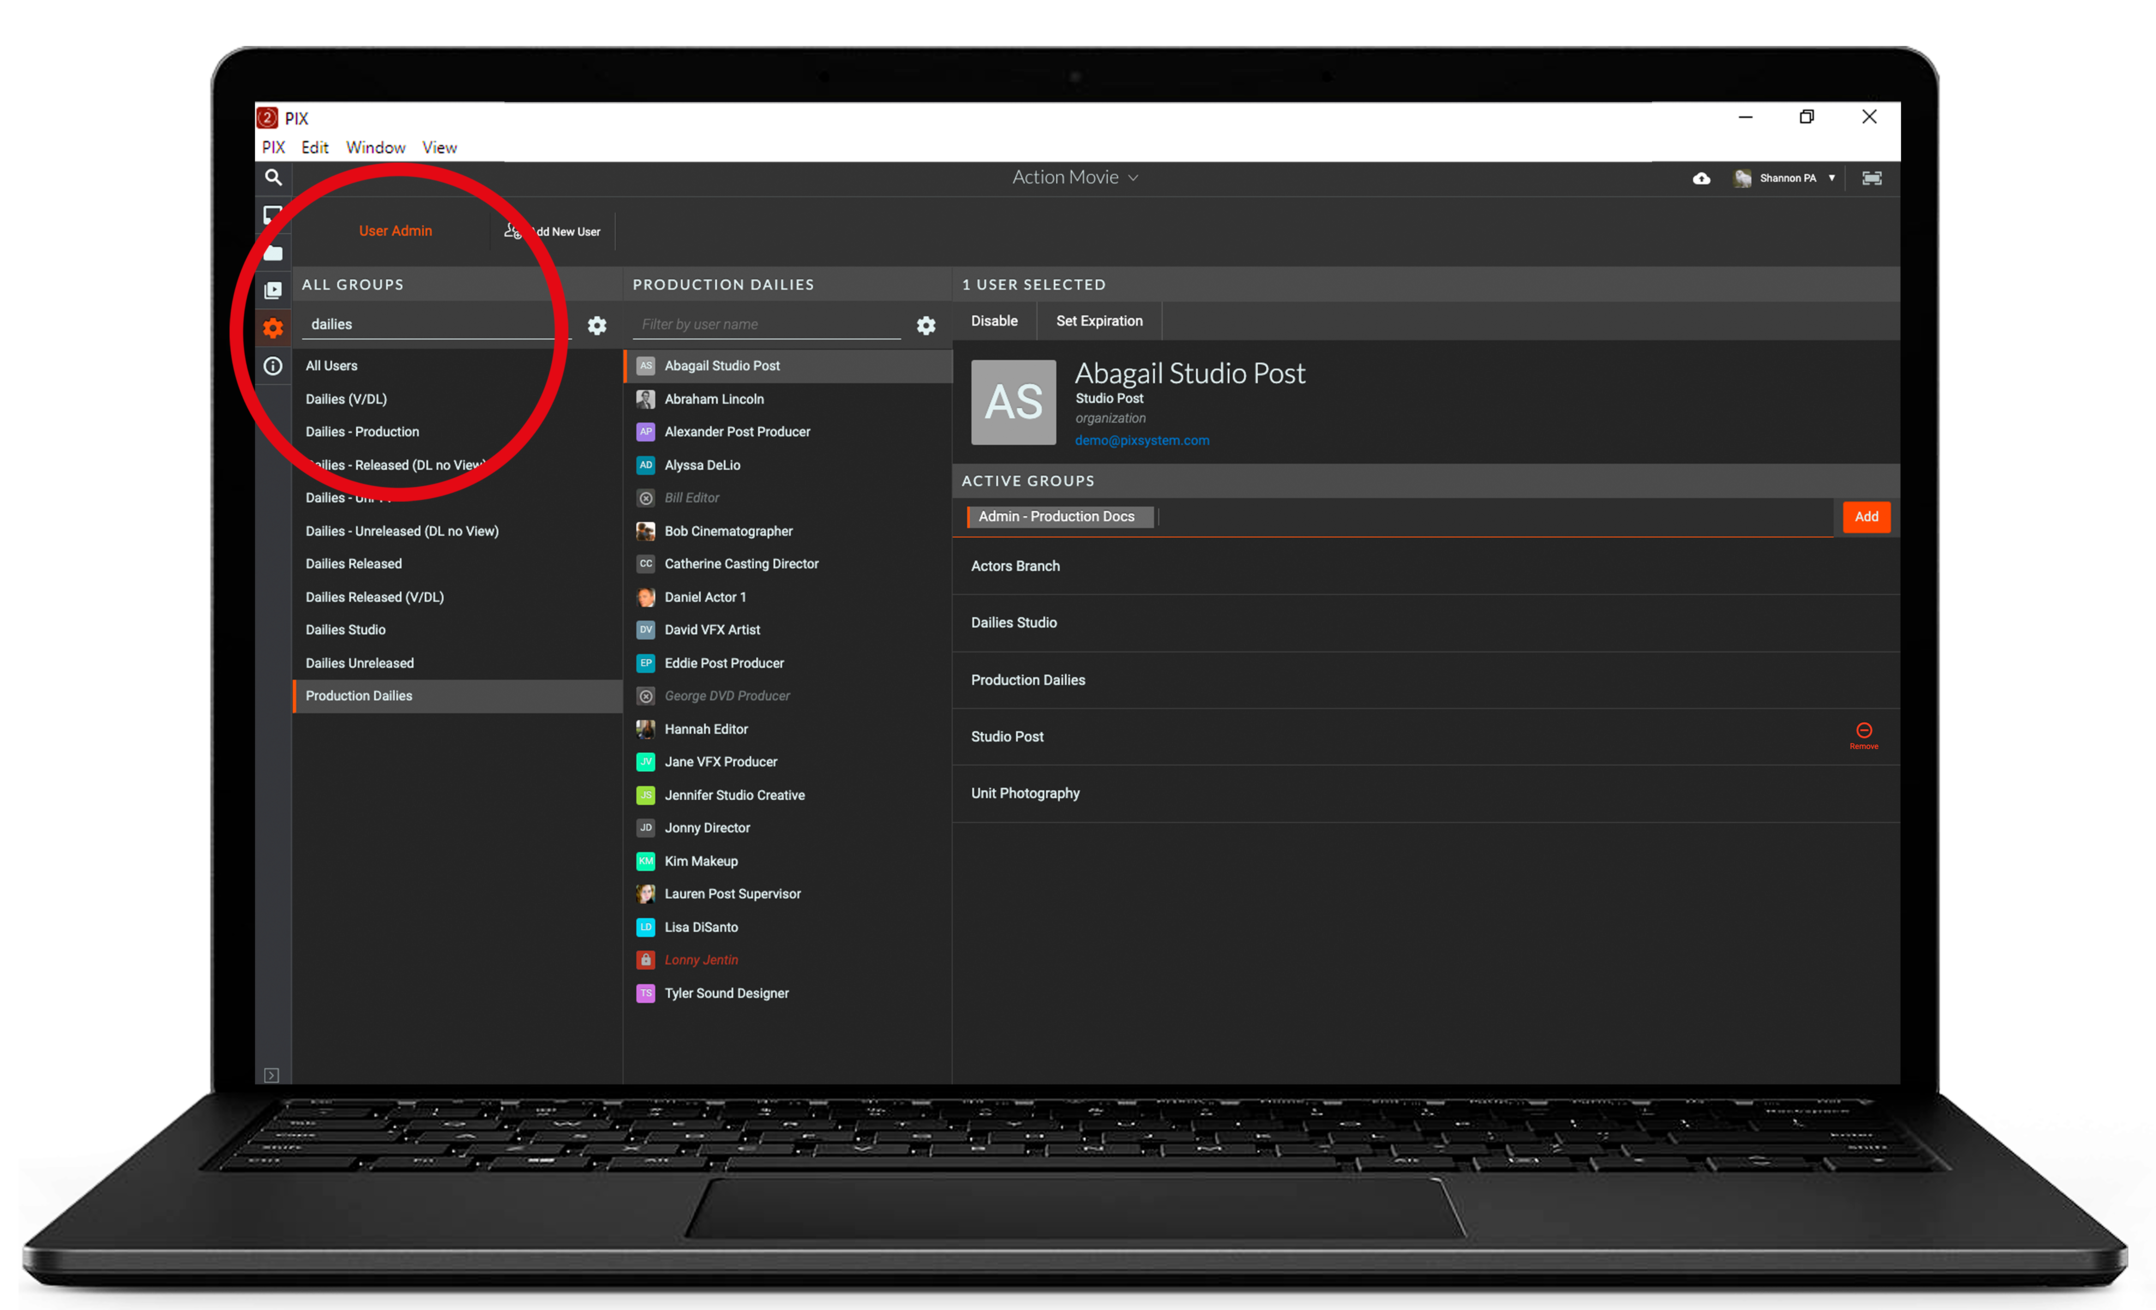
The Admin section lists groups and users in columns. Use the filter to find groups and users within the project. You can also filter users by selecting a group to which they belong in the left column.
Add/Remove a User to a group
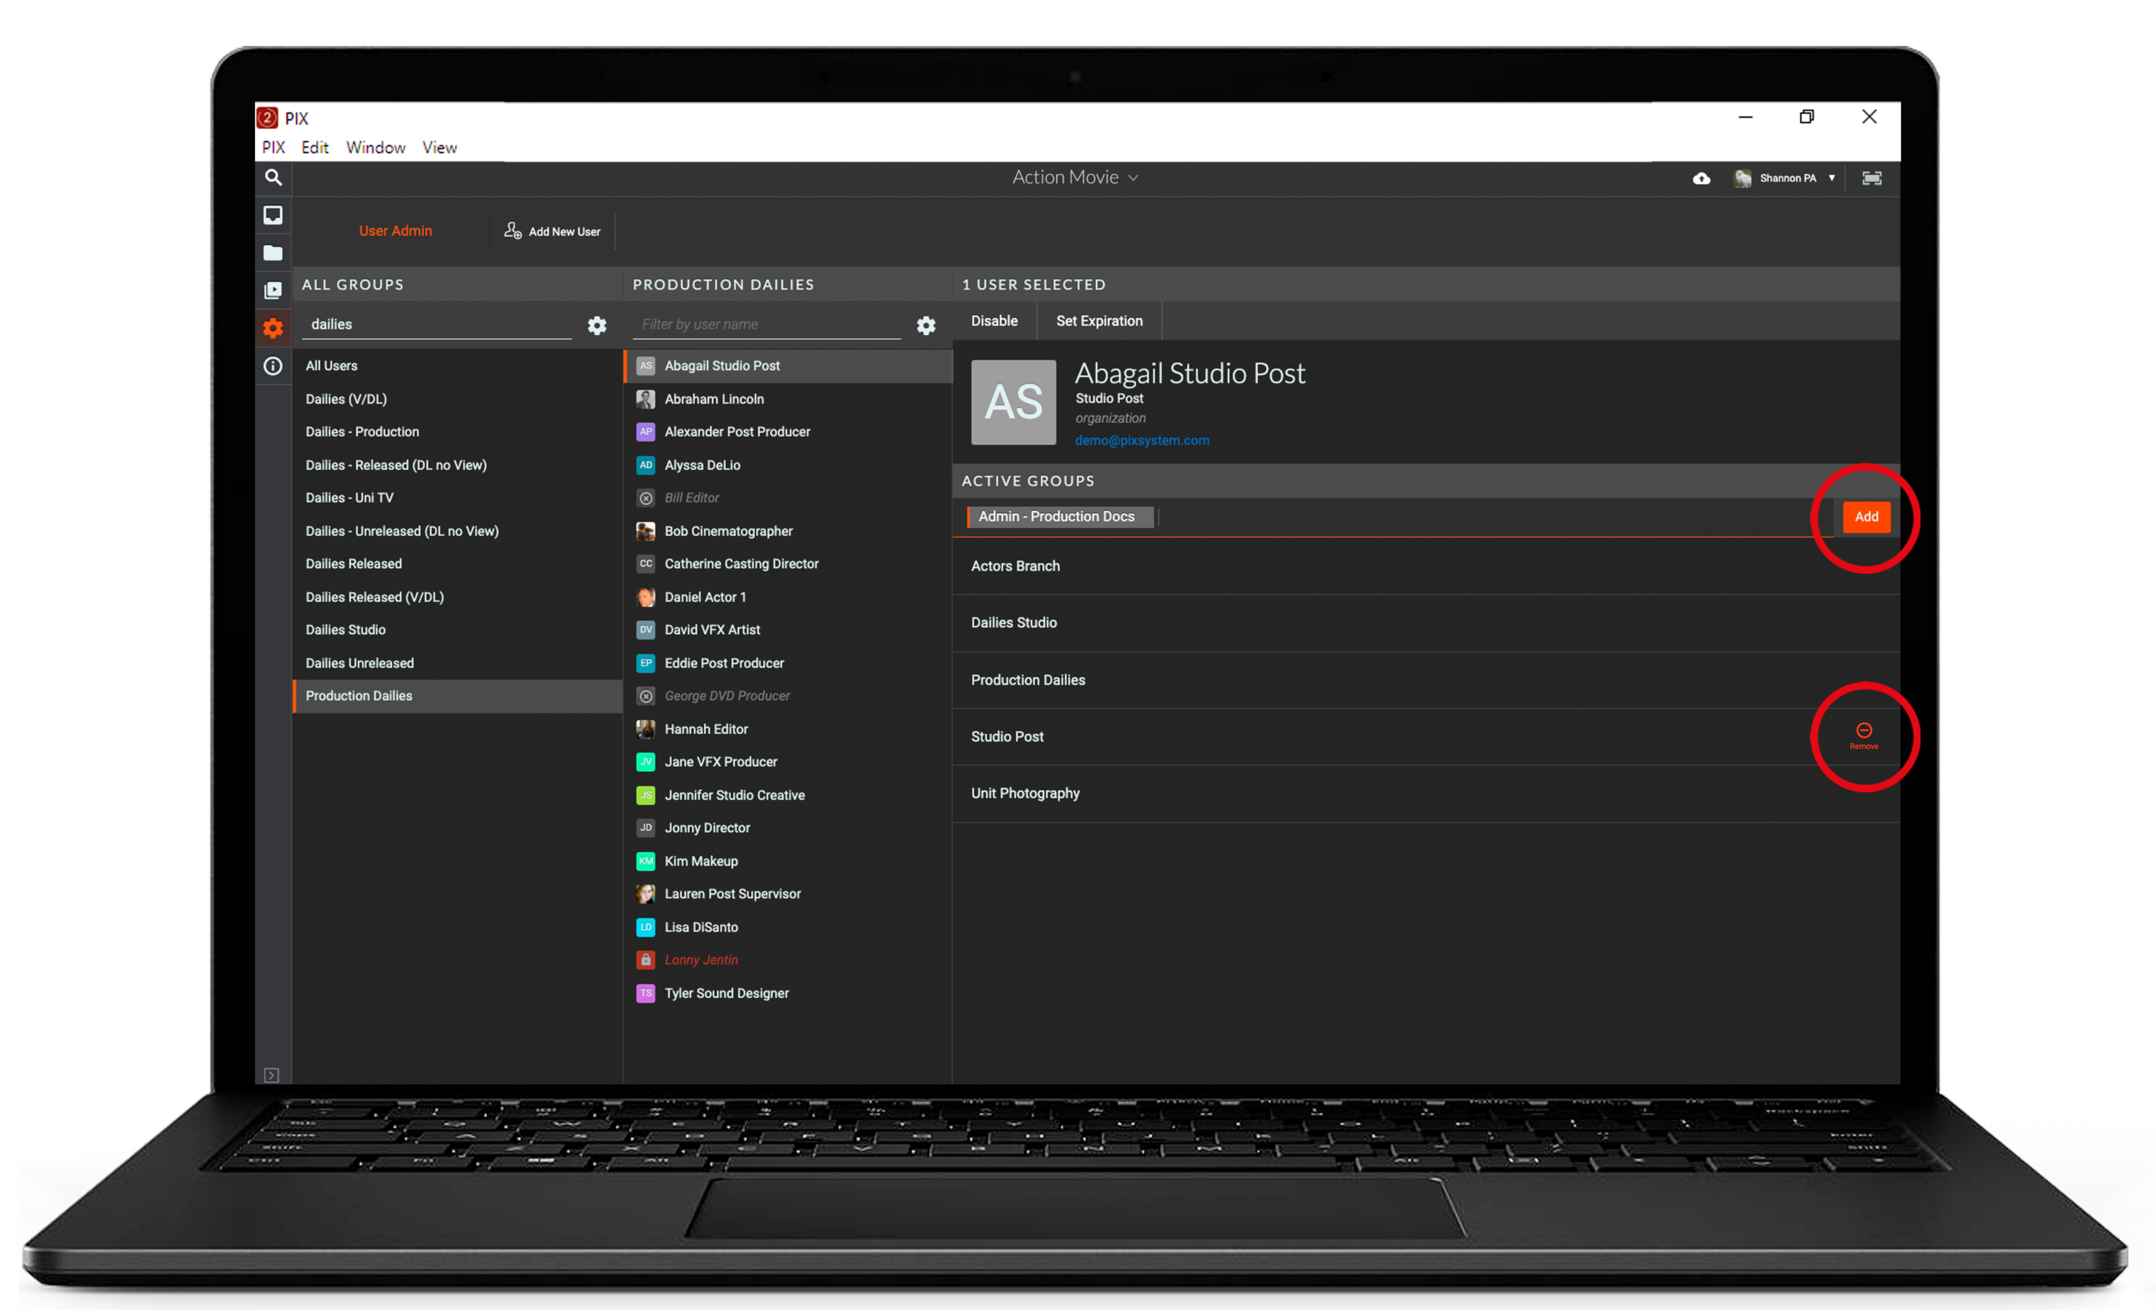
Add
- Select a user. The user will appear in the right column with a list of groups in which they reside below.
- Click Add the selected users to additional groups to expose groups on the project.
- Select the desired groups and hit Add.
Once added to a group users are automatically granted the access and functionality that the specific group provides.
Remove
- Select a user and scroll through the group names that appear under the user in the right column.
- Hover the mouse over the group you wish to remove the user from.
- Select Remove to remove the user from the group.
Manage Multiple Users
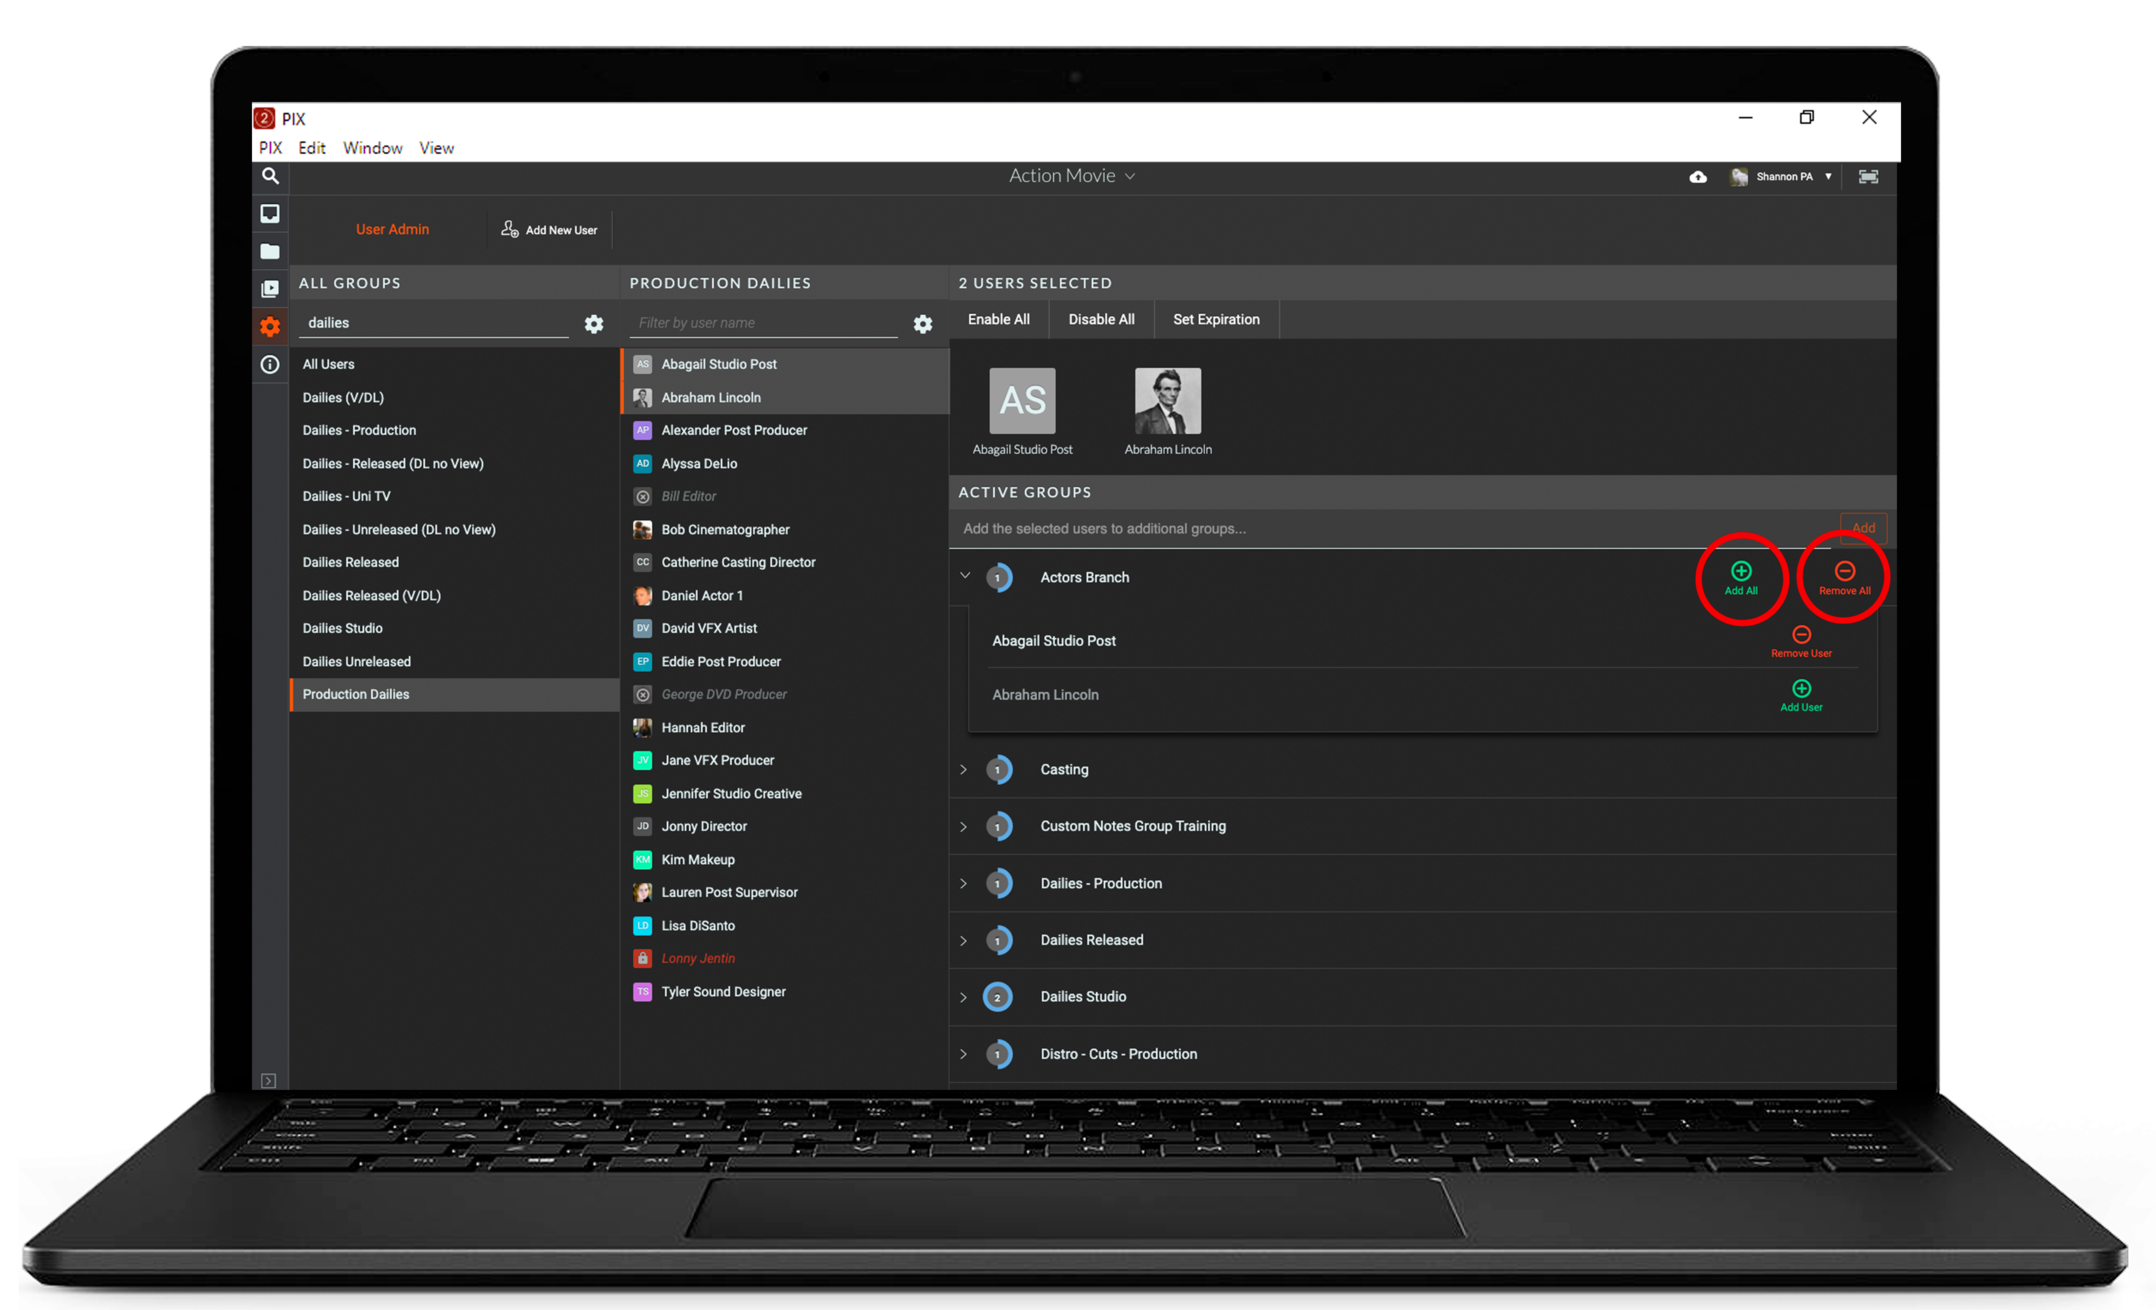
Manage multiple users using the Shift key to multi-select. The selected users' information will appear on the right with their list of groups below.
To add and remove multiple users to groups:
- Select multiple users
- Hover mouse over a group to add or remove
- Hit Add All or Remove All
When multiple users are selected use the white arrows next to each group to expose the users in each group.
Select Add User or Remove User to change access for individual users.