Set up Permissions
Setting up permissions on your Fusion Manage site is a multistep process involving roles, groups, and users. You set up and manage permissions through the Users Groups Roles page.
Set up Roles
Add a Role
On the Administration menu, mouse over Security and click Roles.
On the Users Groups Roles header, click the New Role icon.

Enter a Name for the role. For example, to create a role for viewing and editing items in a Customers workspace, enter Customers [R/W]. A Description is optional.
In the Workspace drop-down list, select the name of the workspace the role applies to (for example, Customers).
Click Create Role and Add Permissions.
Add permissions to the role as shown in the next section.
Add Permissions to the Role
The next step after creating a new role is adding permissions to it through the Managing Permissions for Role page. The list box on the left contains all permissions available in Fusion Manage, categorized by functional area. The list box on the left is blank and is where you add the permissions you want to include in the role.
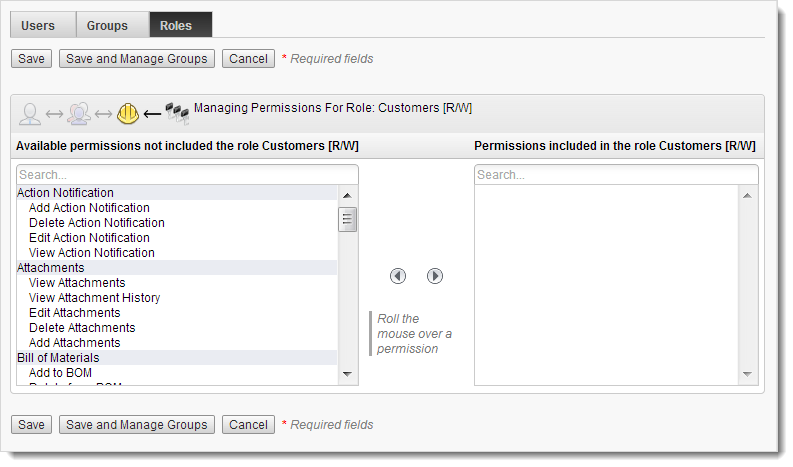
- In the list box on the left, double-click the permission you want to add OR select the permission and click the right-arrow button.
- Click Save and Manage Groups.
- Add groups to the role as shown in the next section.
Add Groups to the Role
The final step in setting up a role is adding one or more groups to it through the Managing Groups for Role page. The list box on the left contains all groups set up on your Fusion Manage site. The list box on the left is blank and is where you add the groups you want to associate with the role. For help on creating groups, see Set up Permissions.
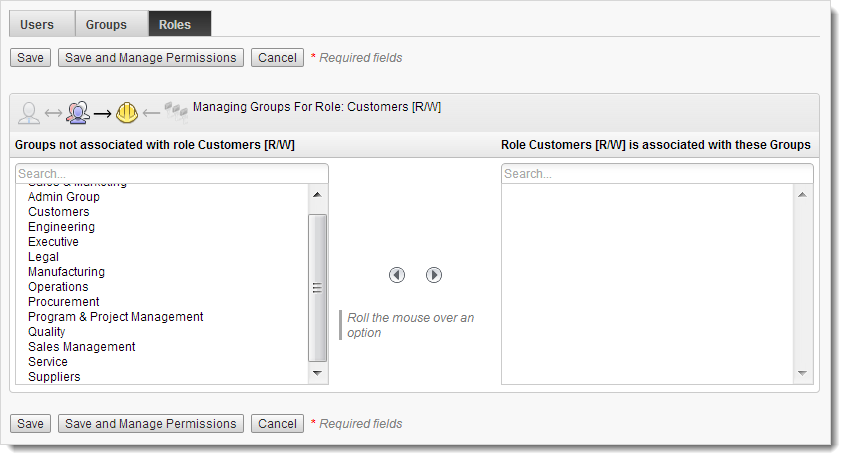
- In the list on the left, double-click the group you want to add OR select the group and click the right-arrow button.
- Click Save.
Set up Groups
Add a Group
On the Users Groups Roles page header, click the New Group icon.
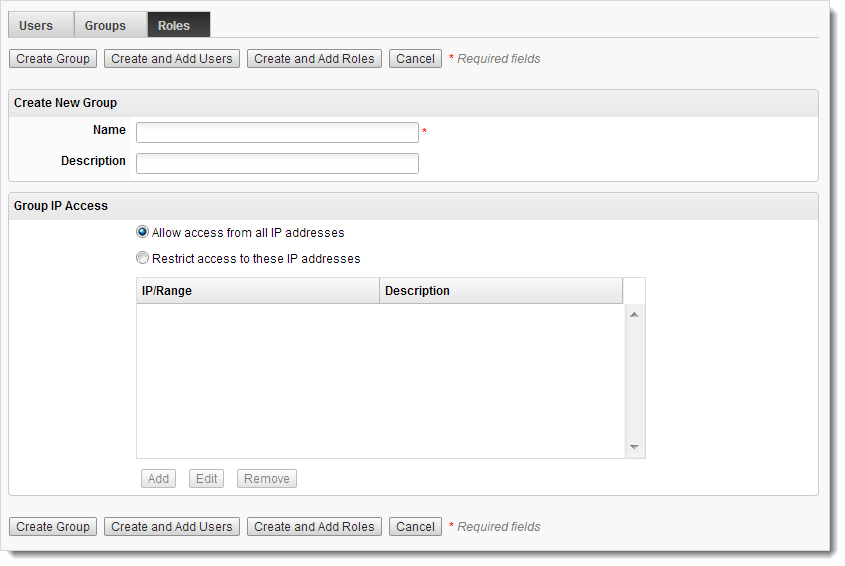
Enter a Name for the group (for example, Sales & Marketing). A Description is optional.
Click Create and Add Users.
Add users to the group as shown in the next section.
Add Users to the Group
The next step in setting up a group is adding users to it through the Managing Users for Groups page. The list box on the left contains all users set up on your Fusion Manage site. The list box on the left is blank and is where you add the users you want to add to the group. For help on creating users, see Set up Permissions.
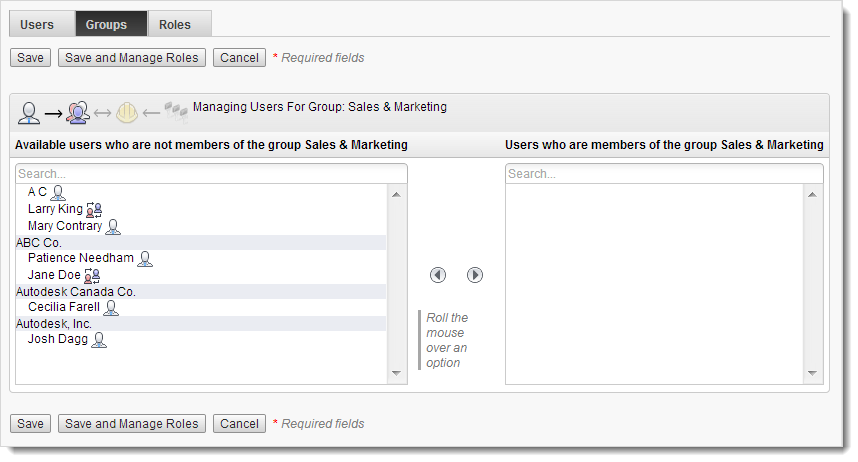
- In the list box on the left, double-click the user you want to add OR select the user and click the right-arrow button.
- Click Save and Manage Roles.
- Add roles to the group as shown in the next section.
Add Roles to the Group
The final step in setting up a group is adding roles to it through the Managing Roles for Groups page. The list box on the left contains all roles set up on your Fusion Manage site. The list box on the left is blank and is where you add the roles you want to associate with the group. For help on creating roles, see Set up Permissions.
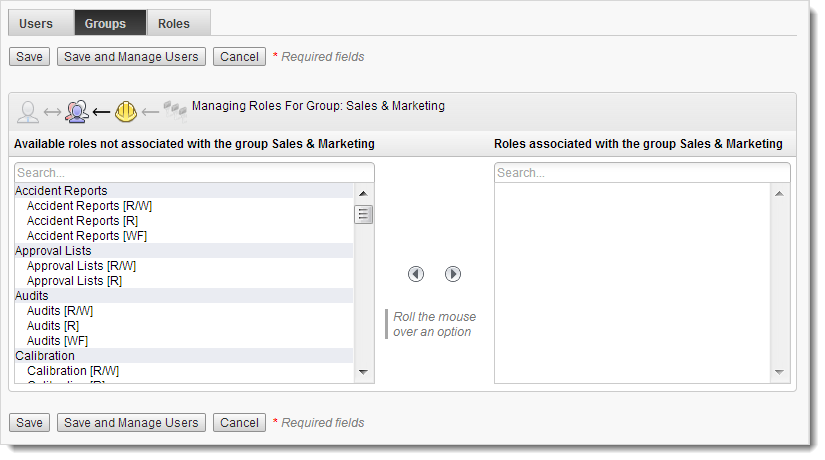
- In the list box on the left, double-click the role you want to add OR select the role and click the right-arrow button.
- Click Save.
Set up Users
Add a User
- On the Users Groups Roles page header, click the New User icon.
Enter the new user's First Name and Last Name.
Enter the Email address associated with the user's Autodesk account.
Important: The email address must exactly match the address associated with the user's Autodesk account. When you save the new user on your Fusion Manage site, the user's account is linked automatically to their Autodesk account and the user can access the site right away using their Autodesk ID (or email address) and password. All new users receive a Welcome email with a link to the site and the email address that must be associated with both accounts. Users who do not have an Autodesk account must create one with this email address before they can access the site.License types are assigned using Autodesk Account user management tools. For more information, see Assign users to products.
Leave Account Status as Active.
Optionally set up the user's preferences for Time Zone, Unit of Measure, and Show Thumbnails for Attachments. The user can change these preferences any time in their Fusion Manage Profile.
Click Create and Add to Groups.
Add the user to groups as shown in the next section.
Add the New User to Groups
The next and final step in setting up a user is adding the user to groups through the Managing Groups for User page. The list box on the left contains all groups set up on your Fusion Manage site. The list box on the right is blank and is where you add the groups to which you want to add the new user. For help on creating groups, see Set up Permissions.
In the list box on the left, double-click the group OR select the group and click the right-arrow button.
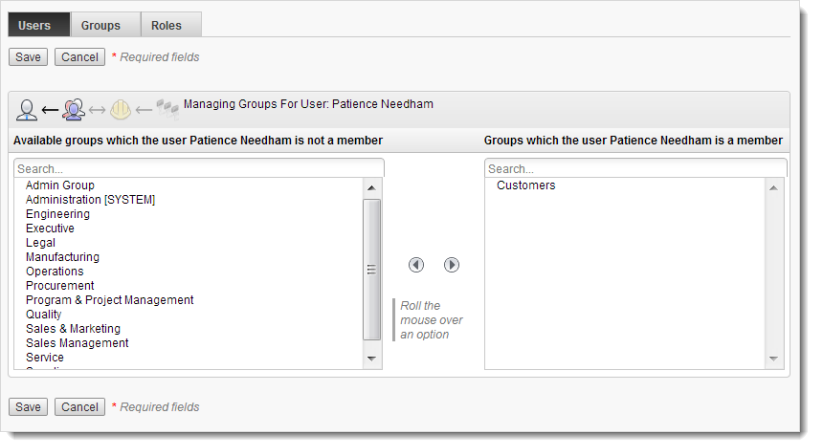
Click Save.