Manage Groups
Add user groups to your Fusion Manage site and manage permissions for groups by associating them with appropriate roles.
View Groups
On the Administration menu, click Users Groups Roles.
On the Users Groups Roles page, click the Groups tab.
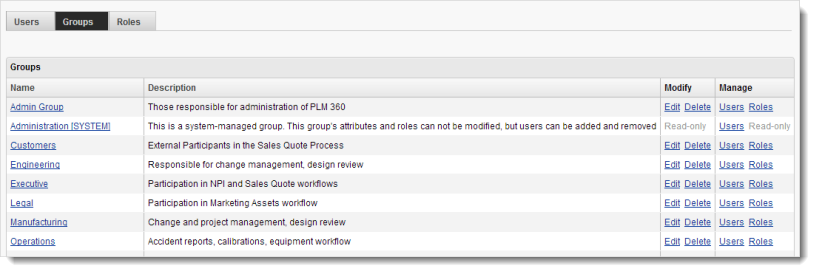
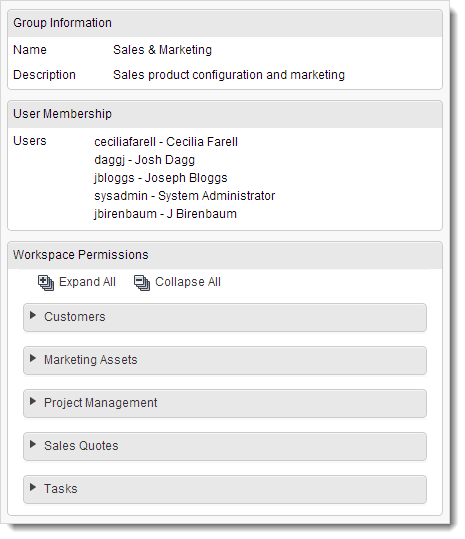
View a group's details, users, and permissions:
In the Groups table, click the group's Name.
Add a User Group
On the Users Groups Roles page header, click the New Group icon.
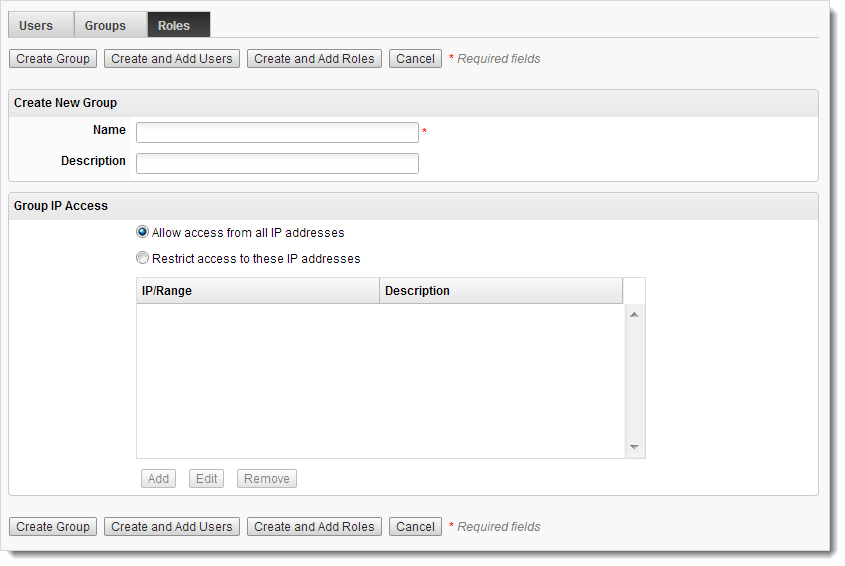
Enter a Name for the group. A Description is optional.
Click Create Group. To add users to the group, click Create and Add Users and go to step 2 in the next section.
Add Users to a Group
In the Groups table, click the group's Users link.
On the Managing Users for Group page, select users in the list box on the left and add them to the list box on the right.
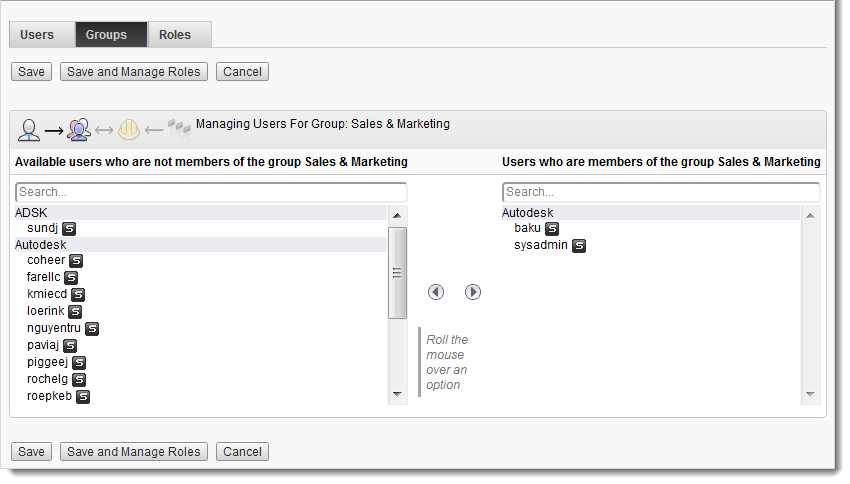
Click Save. To save and add rolres to the group, click Save and Manage Roles and go to step 2 in the next section.
To add more than one user at a time:
- CTRL+Click the users you want to add and then click the right-arrow button.
To remove a user from the group:
- In the list box on the right, double-click the user OR select the user and click the left-arrow button.
To view a description of a user:
- Mouse over the user in either list box.
To filter the user lists:
- In the Search box above the list, enter the first few characters of the user until matches appear in the list.
- To clear the filter, click the
 button.
Add Roles to a Group
In the Groups table, click the group's Roles link.
On the Managing Roles for Group page, select roles in the list box on the left and add them to the list box on the right.
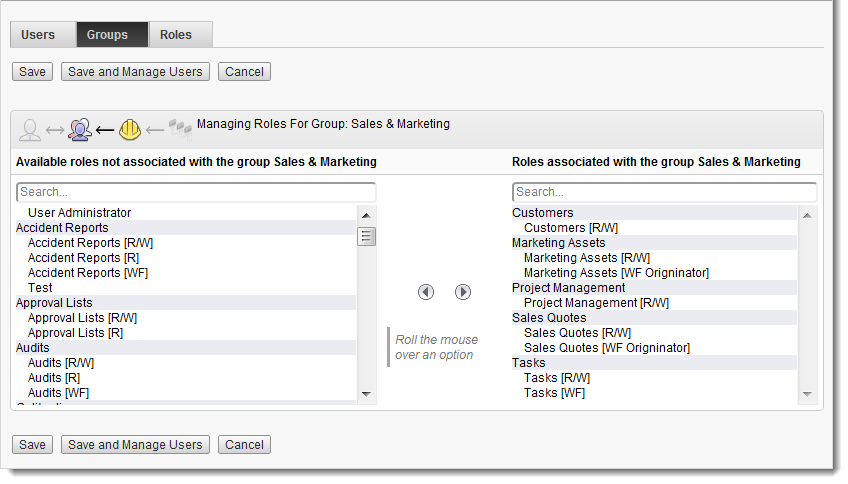
Click Save.
To add more than one role at a time:
- CTRL+Click the roles you want to add and then click the right-arrow button.
To remove a role from a group:
- In the list box on the right, double-click the role OR select the role and click the left-arrow button.
To view a description of a role:
- Mouse over the role in either list box.
To filter the role lists:
- In the Search box above the list, enter the first few characters of the role until matches appear in the list.
- To clear the filter, click the
 button.
Edit Groups
Change a group's details:
- In the Modify column of the Groups table, click the group's Edit link .
- On the Group Details page, modify details and click Save.
Add or change a group's users:
- In the Manage column of the Groups table, click the group's Users link.
- On the Managing Users for Group page, add or change users as shown in the Manage Groups section.
Add or change a group's roles:
- In the Manage column of the Groups table, click the group's Roles link.
- On the Managing Roles for Group page, add or change roles as shown in the Manage Groups.
Delete Groups
To delete a group:
- In the Modify column of the Groups table, click the group's Delete link .
- Click OK to confirm.
Configure Network Access
By default, a group is configured to allow all IP addresses access to the site. Users can access the PLM site from anywhere. Network access can be configured for each group by specifying which IP addresses have permission to connect to the site. For example, you can specify that only IP addresses within your company domain have access preventing users from connecting at home.
If a user belongs to multiple groups and any one group does not allow access from that user's IP address, that user is denied access to the site regardless of the IP access settings for the other groups. For example, if a user belongs to a group that allows access from home and belongs to another group that does not allow access from home, the user cannot access the PLM site from home.
To add IP addresses to the Access List:
- In the Modify column of the Groups table, click the group's Edit link .
- In the Group IP Access section, turn on Restrict access to these addresses.
- Click Add.
- In the Add IP dialog box, enter a single IP address or a range. Remember: the addresses specified are given access to the site.
- Enter a description for the IP address or range of addresses for identifying it in the IP/Range list.
- Click OK. The specified IP addresses and the corresponding descriptions are added to the IP/Range list.
- Click Save.
When configuring IP access for the Administration (System) group, include the current IP address in the list either as an individual address or as part of a range. Only a member of the Administration (System) group can configure IP access for the Administration group.
If you turn Allow access from all IP addresses back on, the specified IP addresses are retained in the list but access is opened to all IP addresses.
To edit an IP address or range:
- In the Modify column of the Groups table, click the group's Edit link.
- In the Group IP Access section, select the IP address or address range.
- Click Edit.
- In the Edit IP dialog box, make the necessary changes to the IP address or range. Remember: the addresses specified will have access to the site.
- Click OK. The specified IP addresses and the corresponding descriptions are added to the IP/Range list.
- Click Save.
To remove an IP address or range:
- In the Modify column of the Groups table, click the group's Edit link.
- In the Group IP Access section, select the IP address or address range.
- Click Remove.
- Click Save.