Manual Classification
Manual classification facilitates in-depth categorization for visual representation and surface refinement. it allows for clean-up of the surface to remove noise after automatic ground classification. It adds detailed classifications for visualization to downstream design applications, similar to how regions work today.
To use this feature, select some points and use the Classification menu to assign the points to the desired class.
To manually assign classifications to points:
Select the points to be classified in the Project Screen.
In the Contextual tile menu, click Classification.
 Note: Previous manual classifications are shown for selection when you hover your cursor ovr the Classification button.
The Assign Classification dialog opens.
Select the designated classification id of the points.
Click Assign to classify the points or Cancel to stop the classification.
Region Conversion
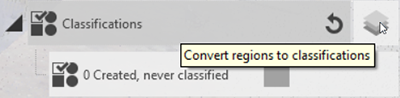
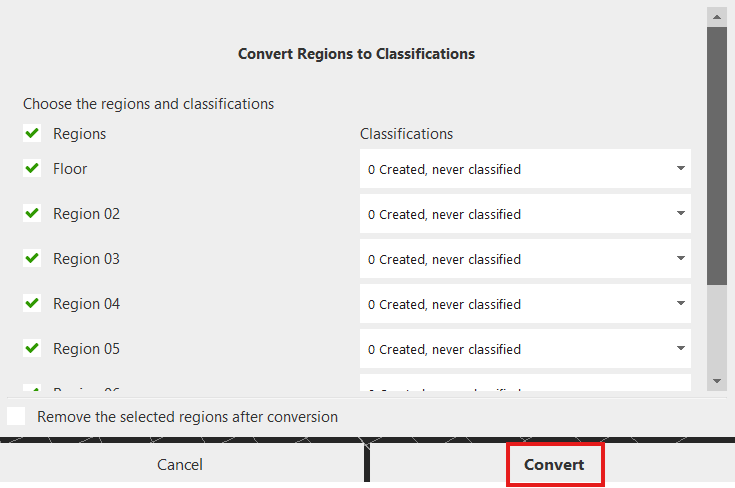
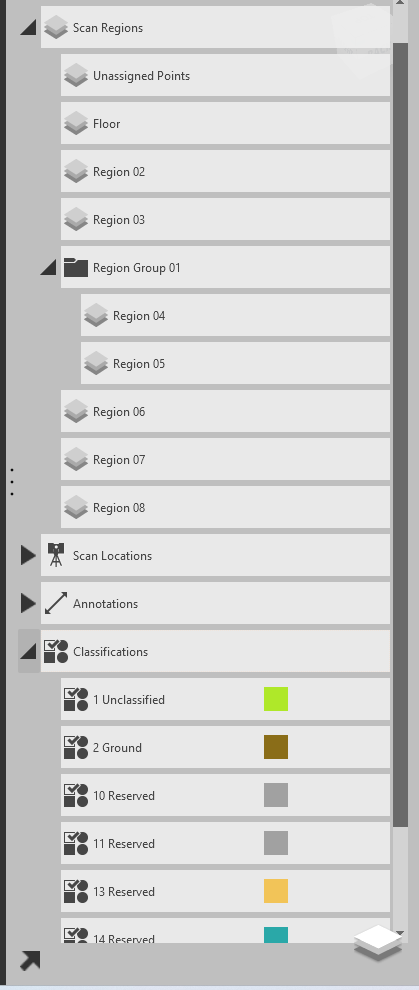
It is recommended to convert any existing regions in your project to classifications. This is quickly done from the Classifications tab on the Project Navigator.
Click the Convert Regions to Classifications button on the Classifications tab of the Project Navigator.
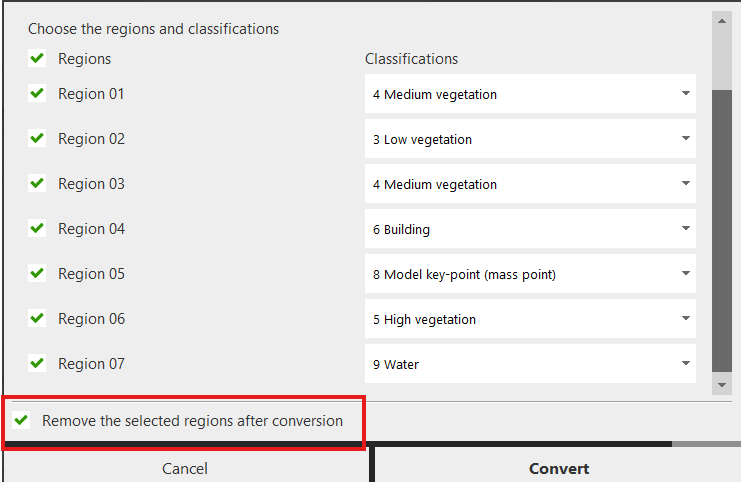
The Convert Regions to Classifications dialog opens.
Select from the existing regions.
Select the desired classification for points in the regions.
Click Convert to classify the region or Cancel to stop the conversion.
Automatically remove Regions after converting to Classifications
ReCap gives you the ability to convert regions into classifications, with an optional setting to automatically remove the original regions after conversion. This enhancement improves classification workflows and helps maintain a cleaner project environment.
This feature allows you to choose whether or not to retain regions after they have been converted into classifications.
Feature location
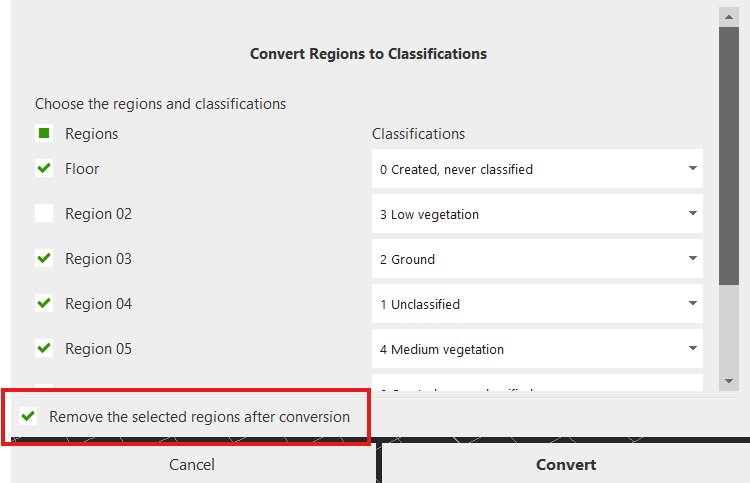
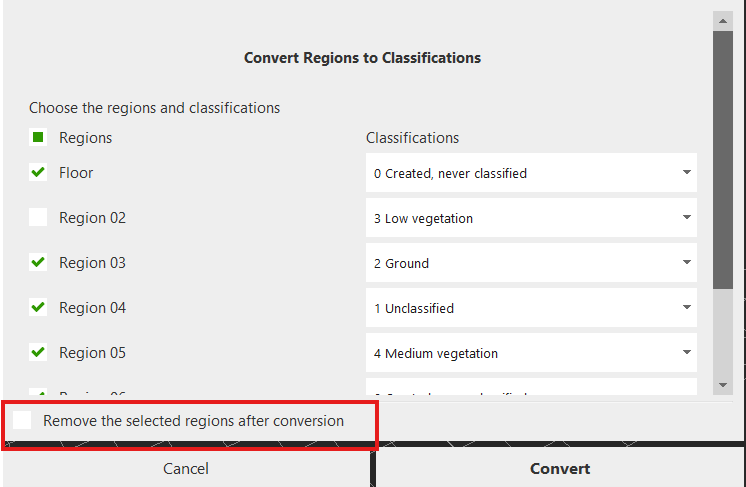
This feature is accessible through the "Convert Region to Classification" dialog. Within the dialog, you’ll find a checkbox: "Remove the selected regions after conversion"
Steps to convert Regions to Classifications
- Select Region(s)
Select one or multiple regions from the Convert Region to Classification dialog.

- Use the "Remove Regions After Conversion" option
In the dialog, check the box labeled "Remove the selected regions after conversion" to automatically delete the original regions after successful classification.
- Checked – The original regions will be removed post-conversion.
- Unchecked – The regions will be retained alongside the new classifications.
- Complete the conversion
Click the Convert button to proceed with the conversion process.
Conversion results
If "Remove the selected regions after conversion" is checked:
- All selected regions are successfully converted into classifications.
- Original regions are removed from the Regions list.

If the Checkbox is Unchecked:
- Regions are successfully converted to classifications.
- Original regions are retained in the project.
Advanced scenarios and behavior
| Scenario | Status | Behavior |
|---|---|---|
| Convert regions inside a group | ✅ | Regions are converted; group is automatically removed |
| Convert hidden regions | ✅ | Hidden regions are converted successfully |
| Convert locked regions | ❌ | Locked regions are not converted |
| Delete a region folder | ✅ | Dialog with “Cancel” and “Remove Folder” appears; all regions in the folder are removed if selected |
| Convert a single region | ✅ | Region is converted correctly |
| Convert multiple regions | ✅ | All selected regions are converted |
| Convert all regions | ✅ | All regions in the project are converted to classifications |
| Undo/Redo (Ctrl+Z / Ctrl+Y) support | ✅ | Undo restores regions; Redo re-applies classification conversion |
Summary
This feature gives users more control over how regions are handled after classification conversion. By enabling the "Remove after conversion" option, you can automate cleanup, keeping projects organized and classification focused.