Your First Project
Goal of this article: Help a new ShotGrid customer setup their first project
Starting your First Project
Previously we kept track of all of our Designs, Themes and Assemblies/Parts using Excel or various other tracking methods. Now we’ll need to get that data into ShotGrid so we can refine our workflow with key people involved.
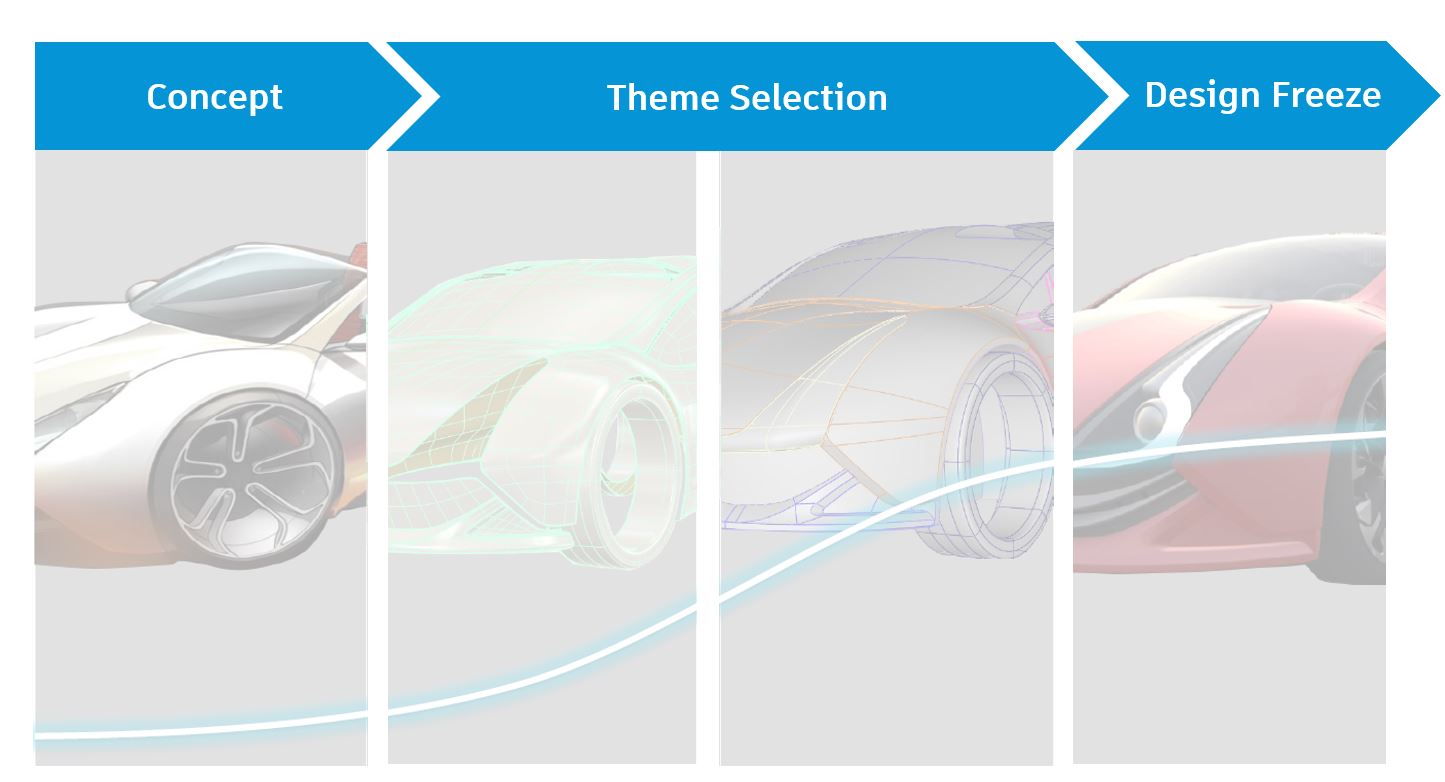
Create a Project
Lets start by creating a new project called Aurora. We will base our Aurora project on the Automotive Project Template because it is formatted to focus on building models digitally and physically (which we will broadly refer to as Assets in ShotGrid ).

Adding Project Details
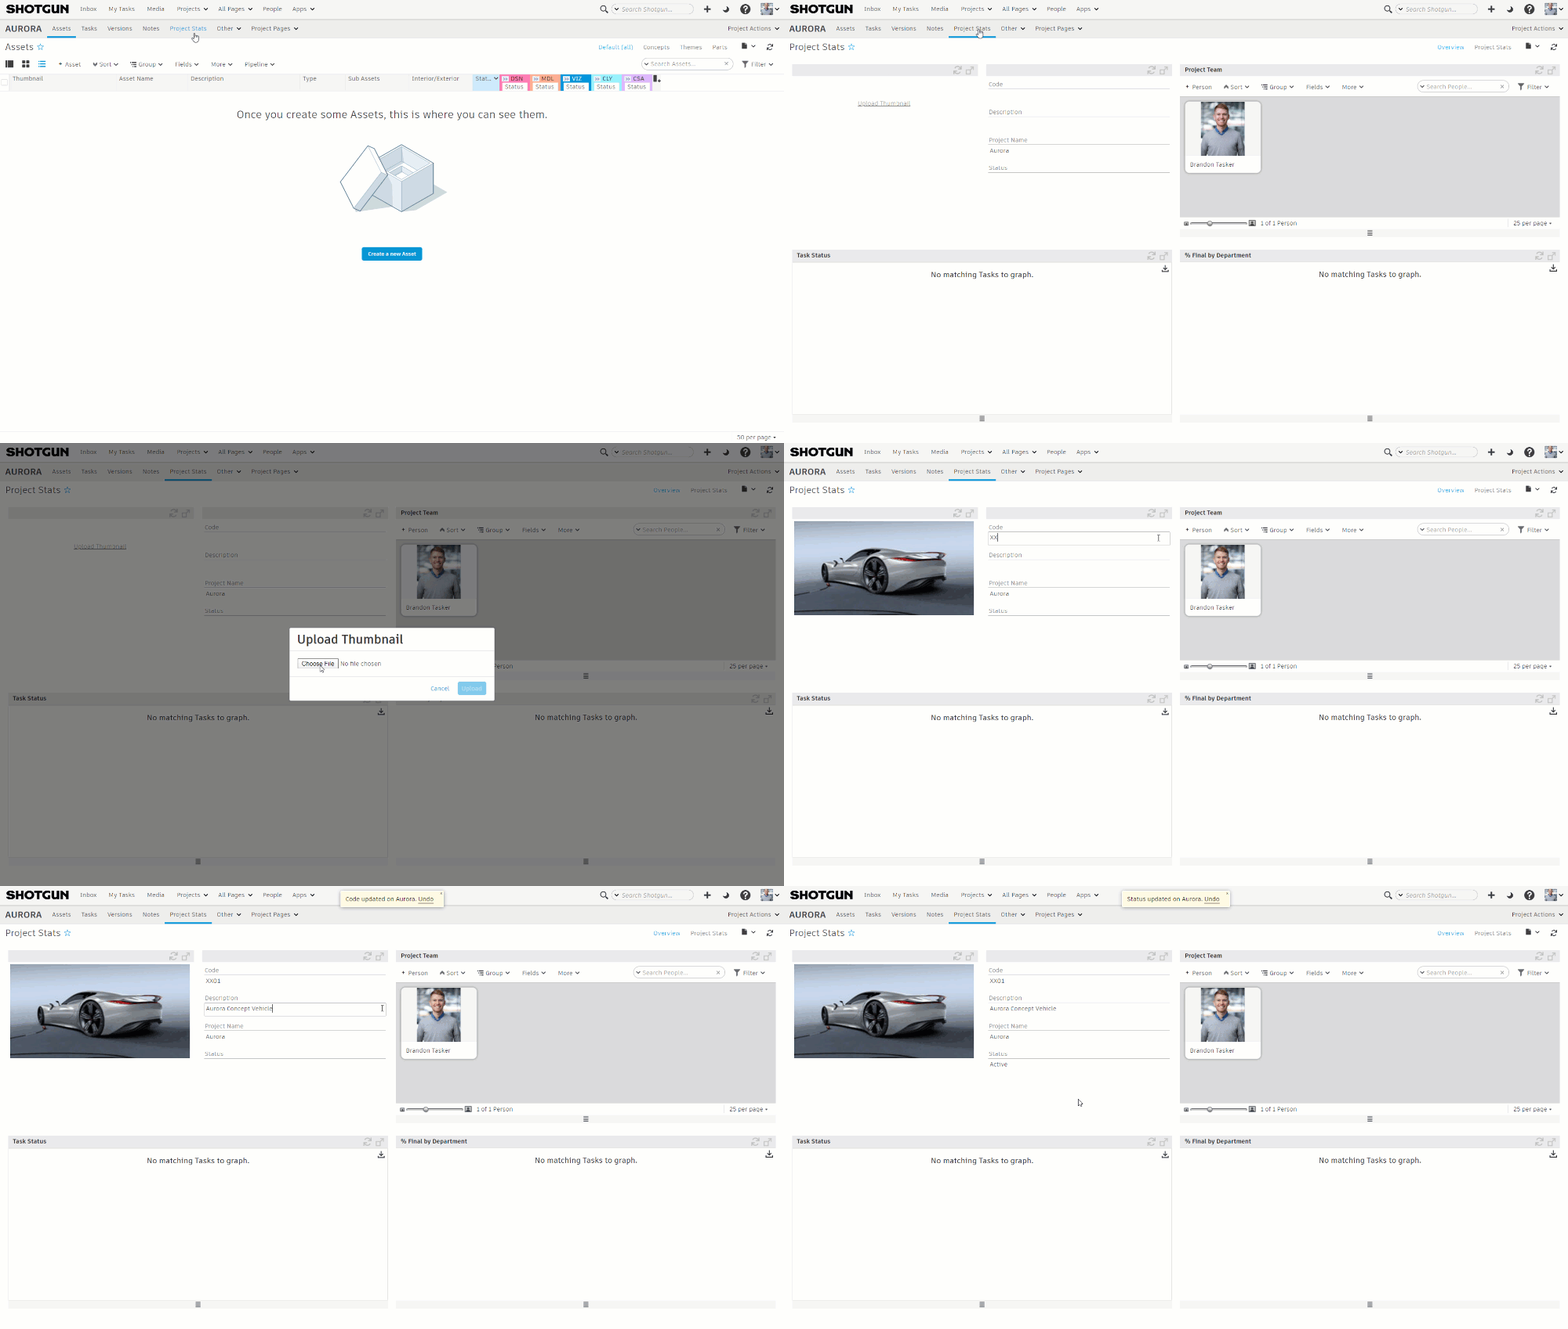
Once we create our project, we’ll land on Project details. Let’s add a project thumbnail and fill in a few key details. All the important things we are tracking in this Project are visible in the Project Nav.
Adding Assets
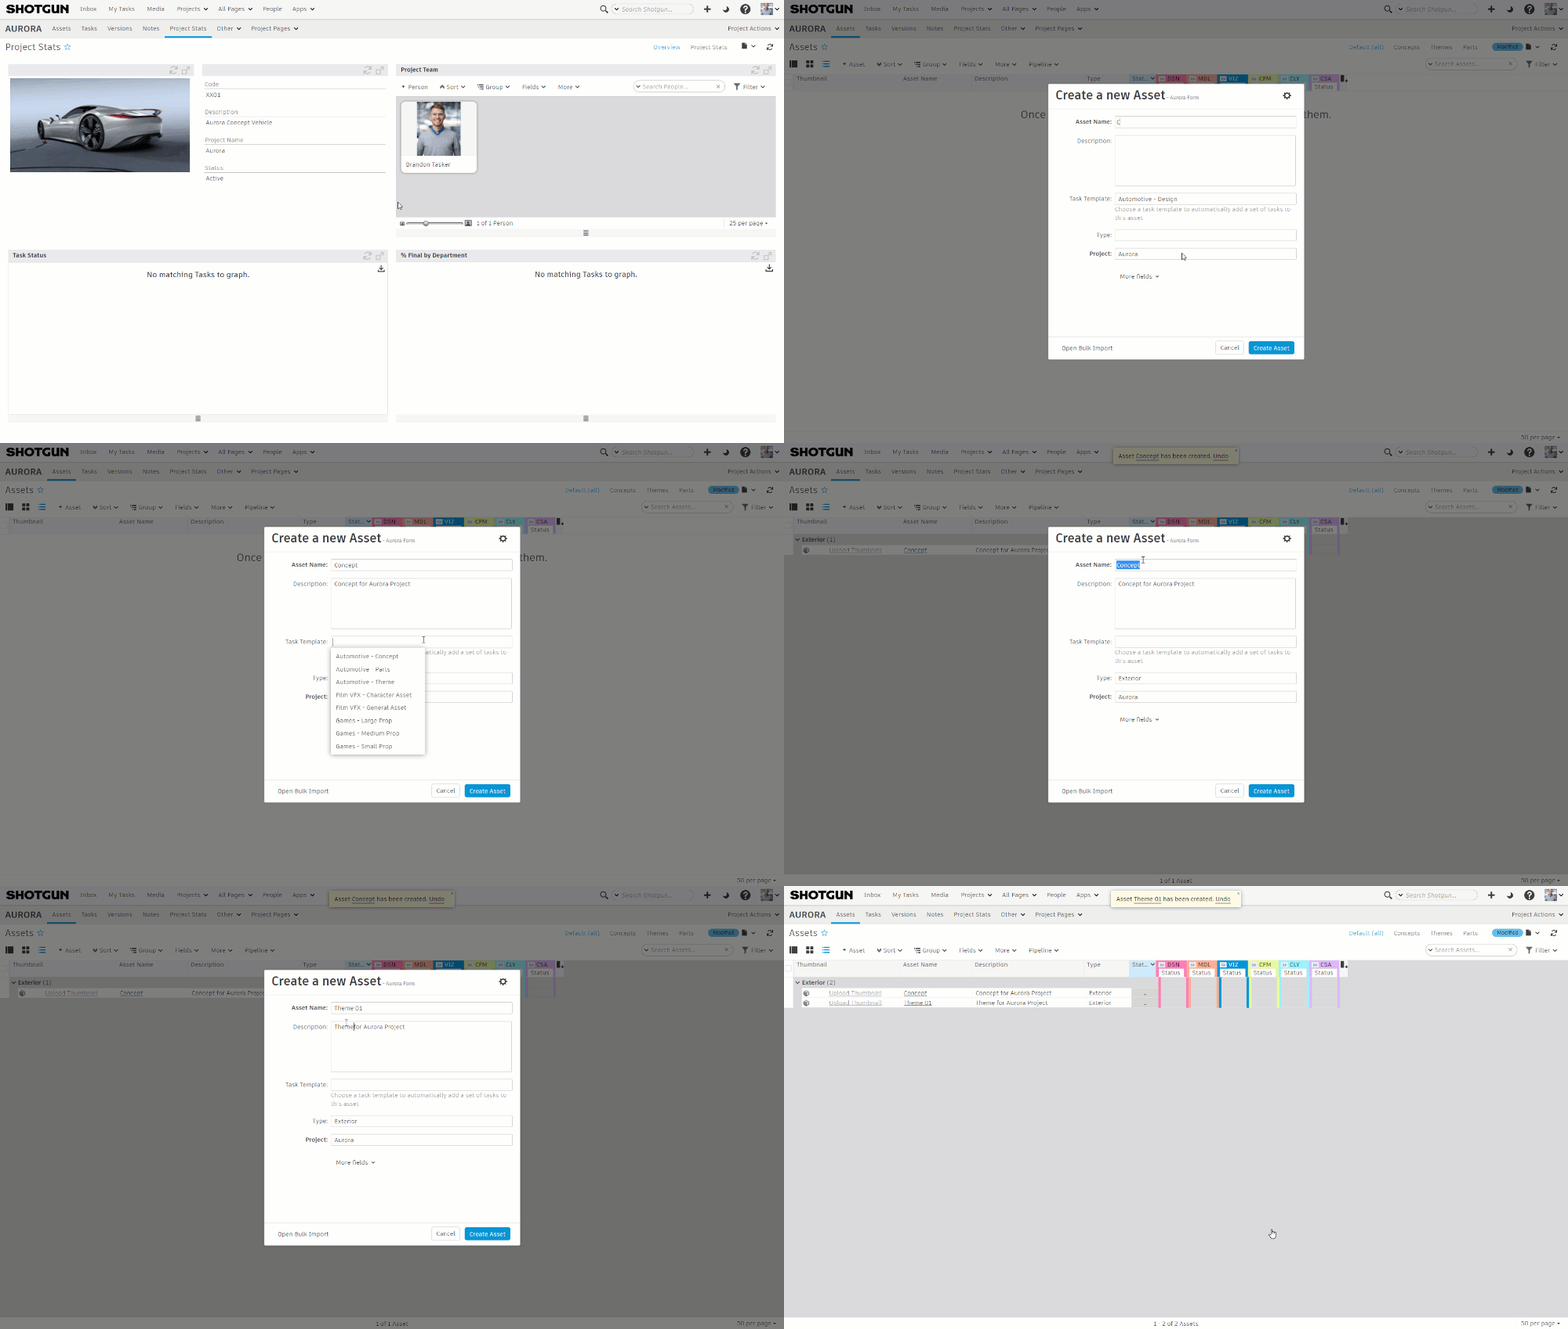
Before anyone begins working we need to define what needs to be built in ShotGrid. Lets do this by creating an Asset. As a quick reminder, a n Asset is the physical objects you will be creating either in 2D or 3D for your project. W e recommend using Asset to cover Concepts, Themes and Parts, and use the meta-data (asset type) to distinguish the difference.
Lets go to the Assets page and let’s make a "Concept" vehicle asset that designers can begin working against. Next lets create a second asset called "Theme Design 1" that will cover the first theme. Notice how there is an option for a Task template. Let’s clear for now as we’ll explore Task templates next. We can hold the option/alt key to create an asset and keep the form values to speed up the process.
Your Workflow & Pipeline
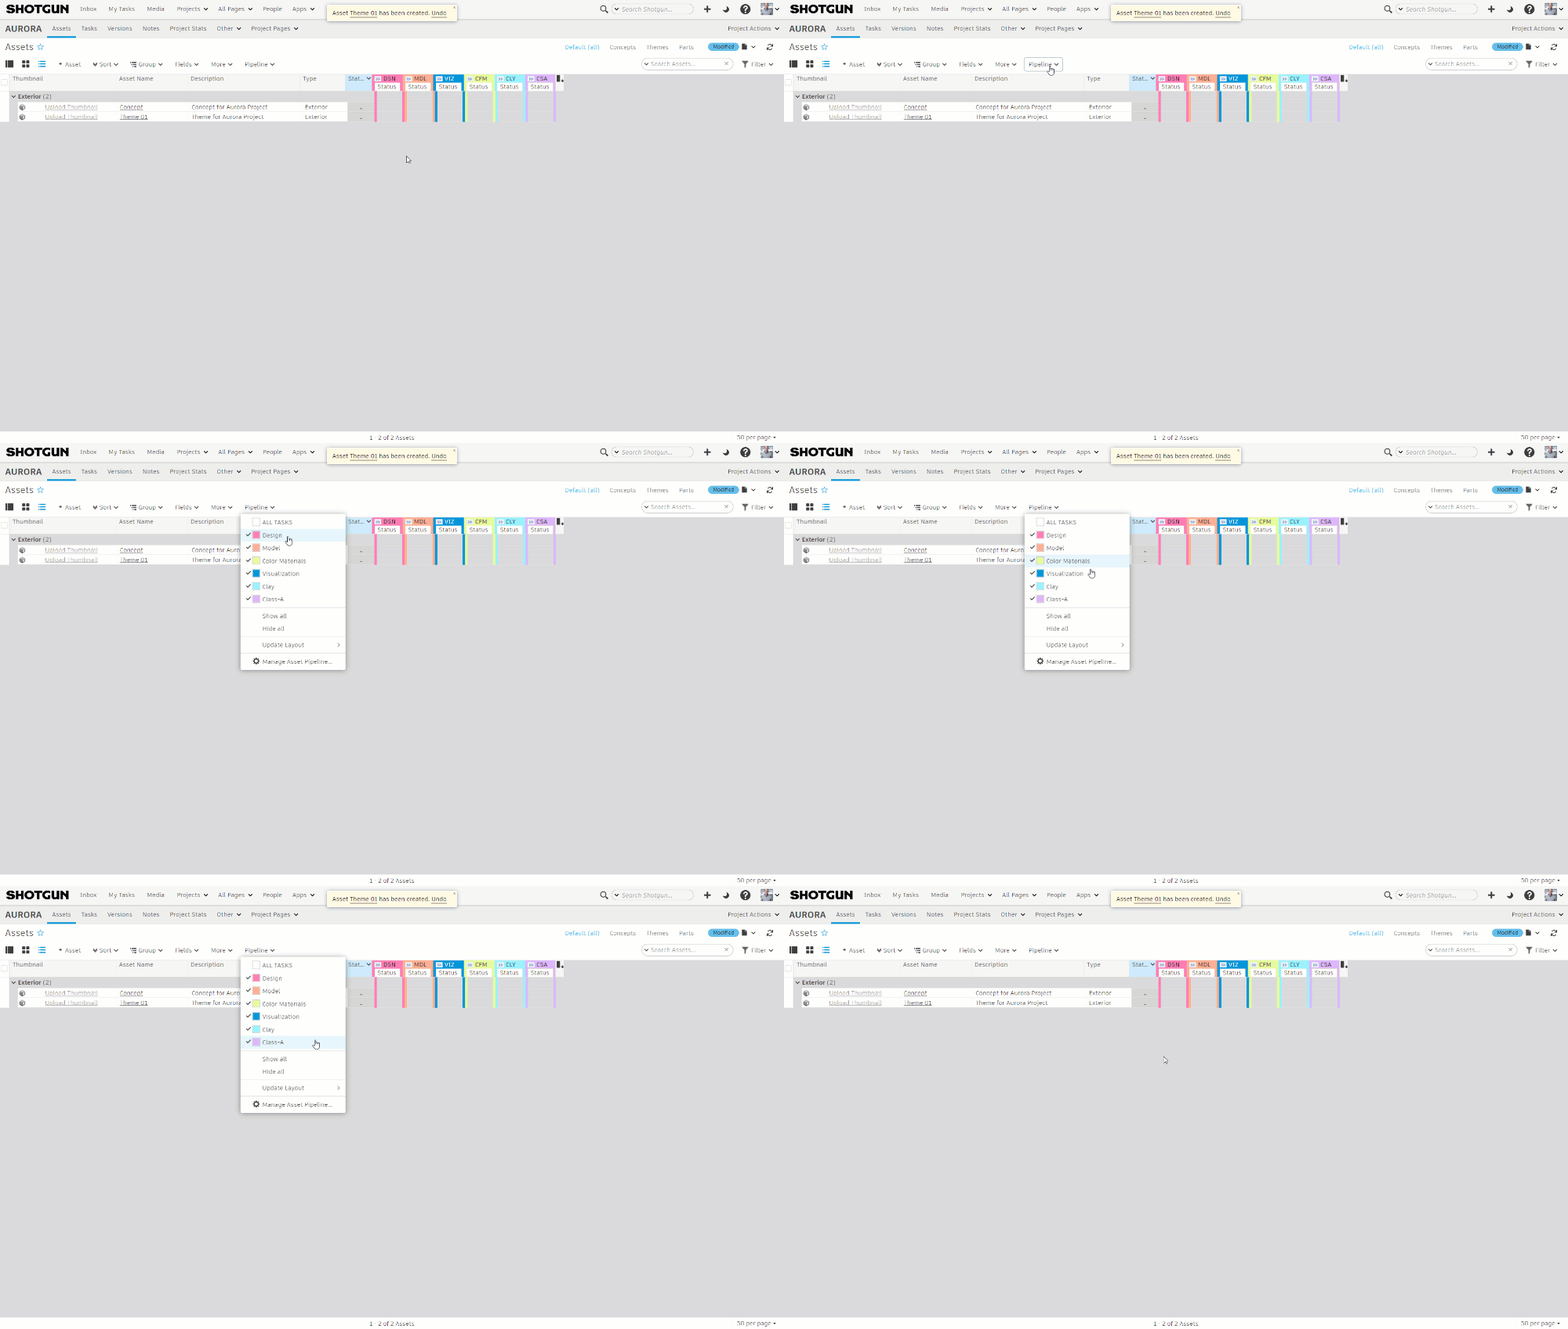
Now that we have some Assets built, let’s think about our process in which different stages/departments need to work on this asset to complete it. Out of the box, ShotGrid has six different steps which we refer to as Pipeline Steps. These are Design, Model, Visualization, Color & Materials, Clay and Class-A but can be modified to account for your workflow.
Creating Tasks
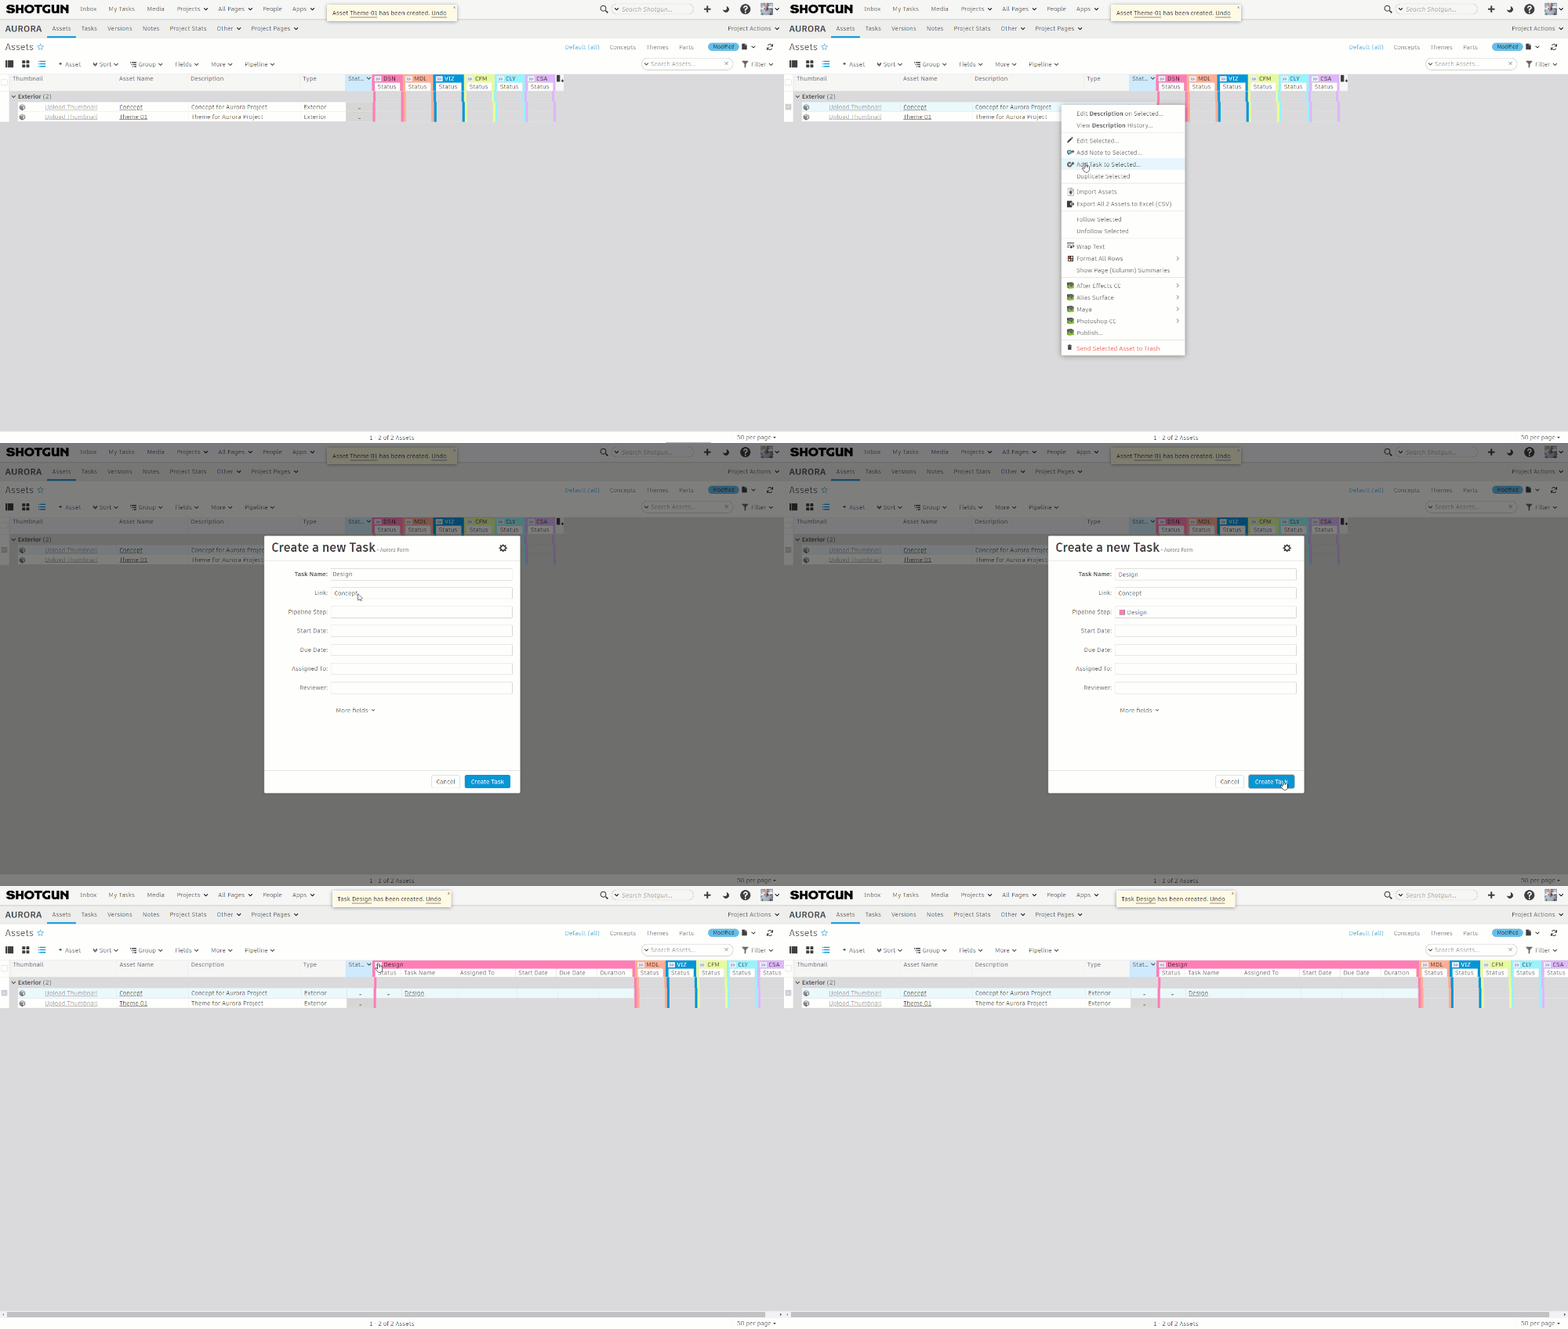
Now that we have these two Assets, let’s create tasks for them. We can start by creating a simple one-off "Design" Task for our "Concept" Asset and again we can hold the option/alt key to keep the form values if we choose.
Using Task Templates
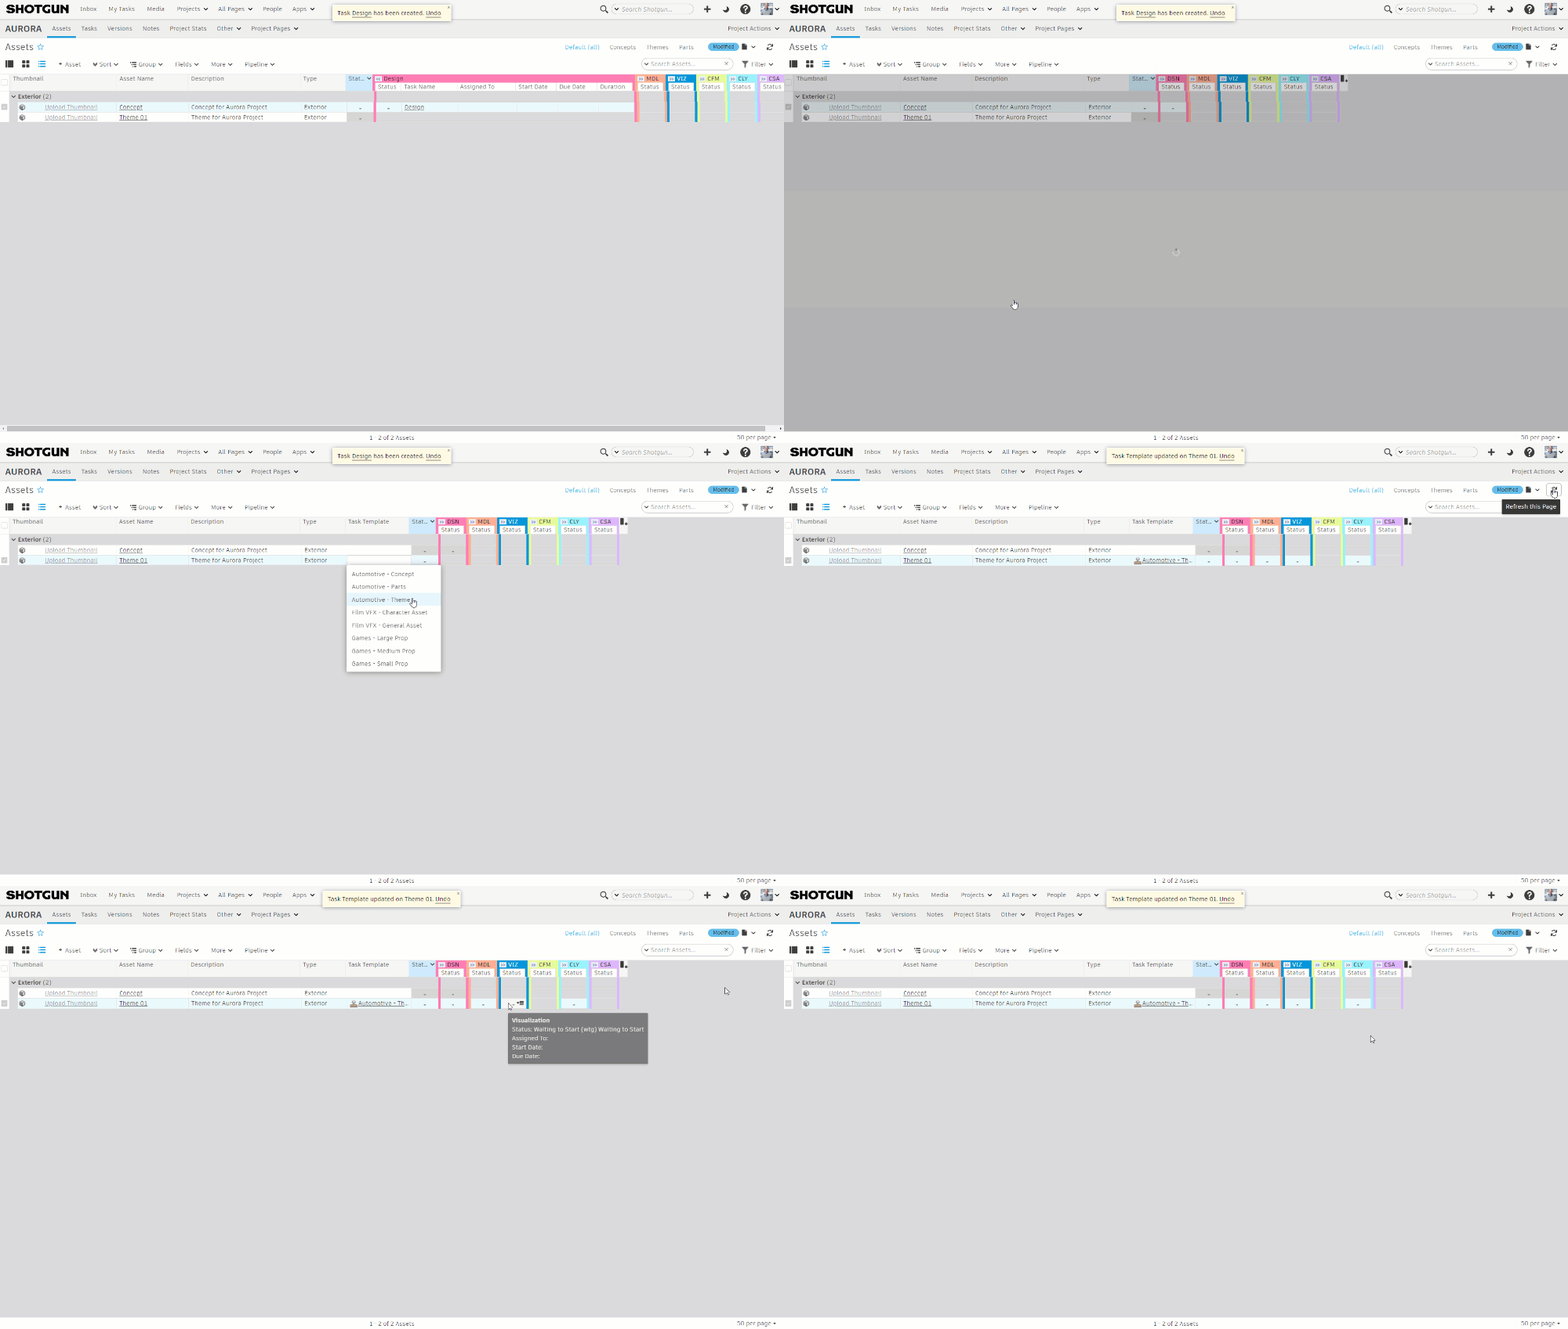
But Since Tasks are typically the same per Asset, we can apply a Task template to multiple Assets to cut down on redundancies. Thus, automating our workflow. Now, on our Asset page, we just expose the Task Template field via the Fields dropdown, select our other Theme Asset, and add the “Automotive Theme” template. And viola, we now have Tasks created on these.
Add Task Details
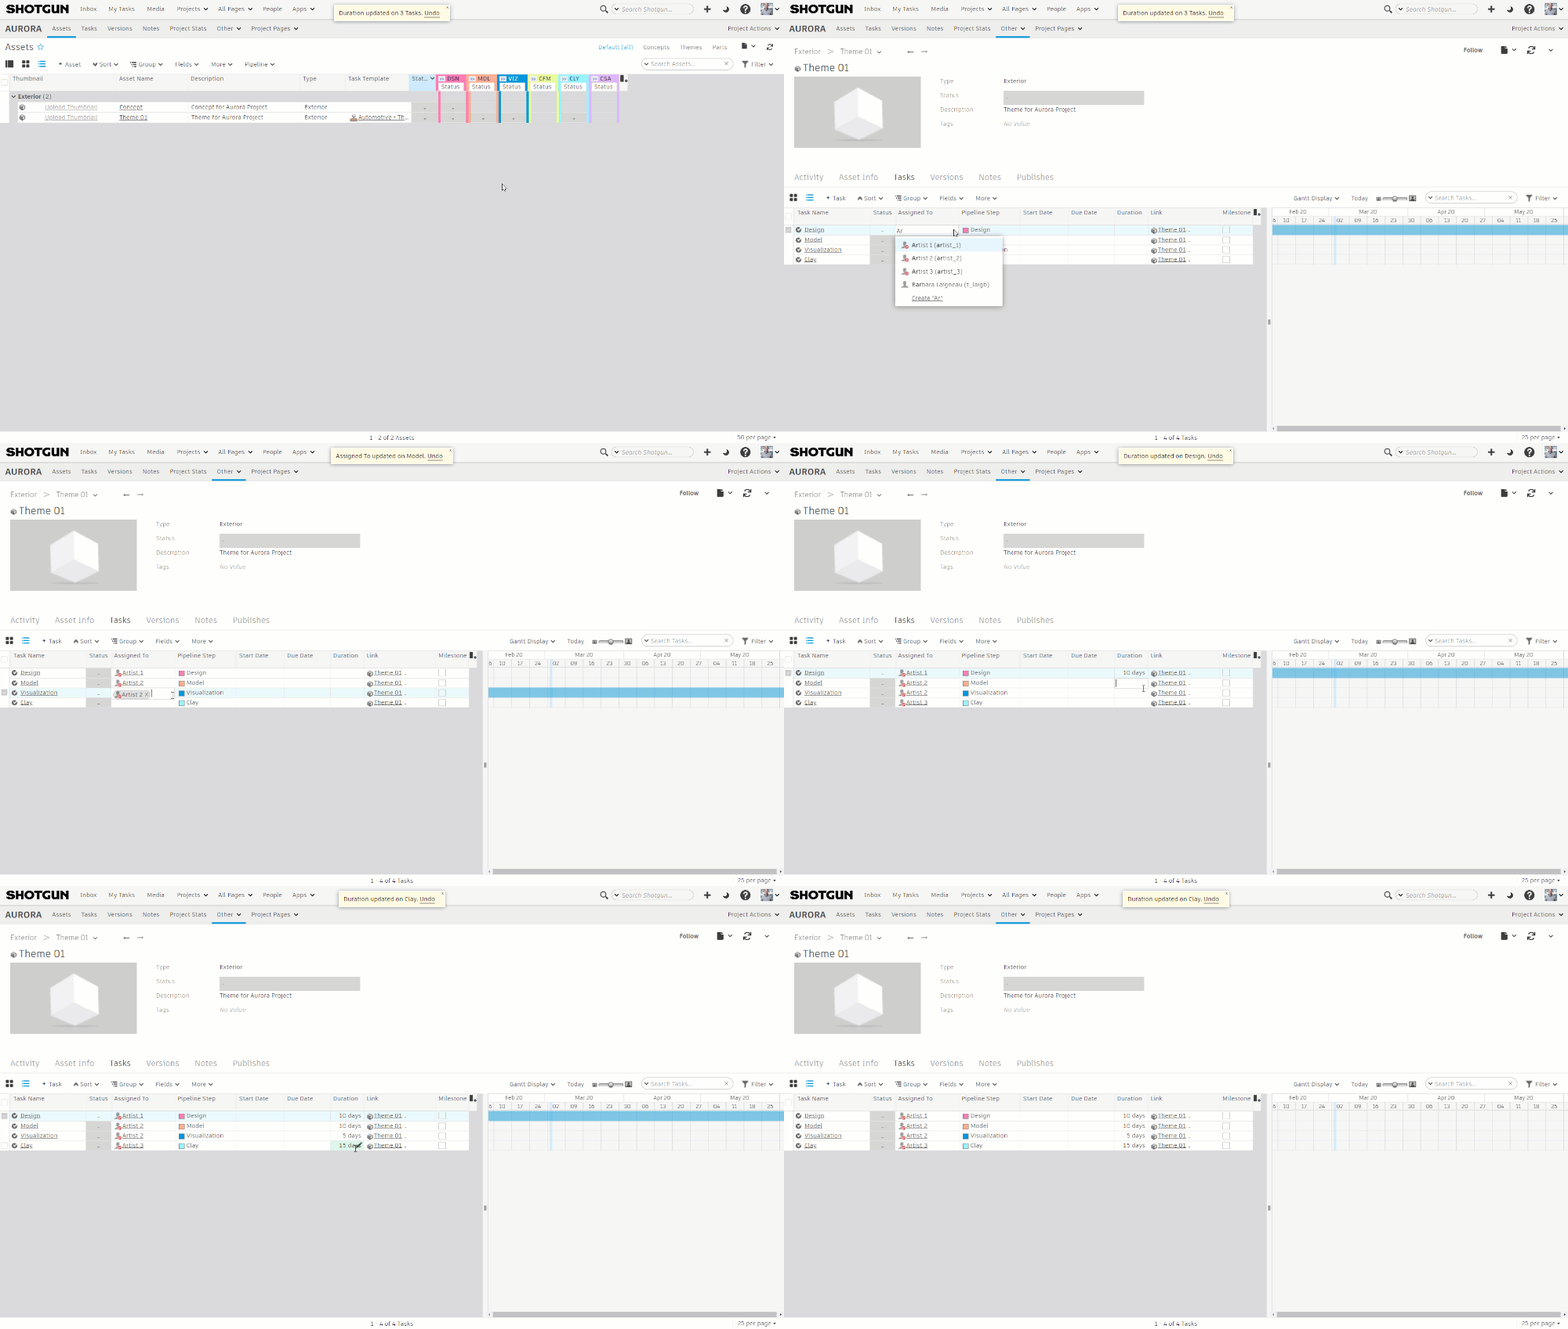
If we want to see more detailed information about the tasks, we can dive into an Asset by clicking on its name. We can see the Tasks' linked to this Asset and we can assign Tasks to Artists and Reviewers, and details like duration information of how long this task should take.
Setting Task Dependencies
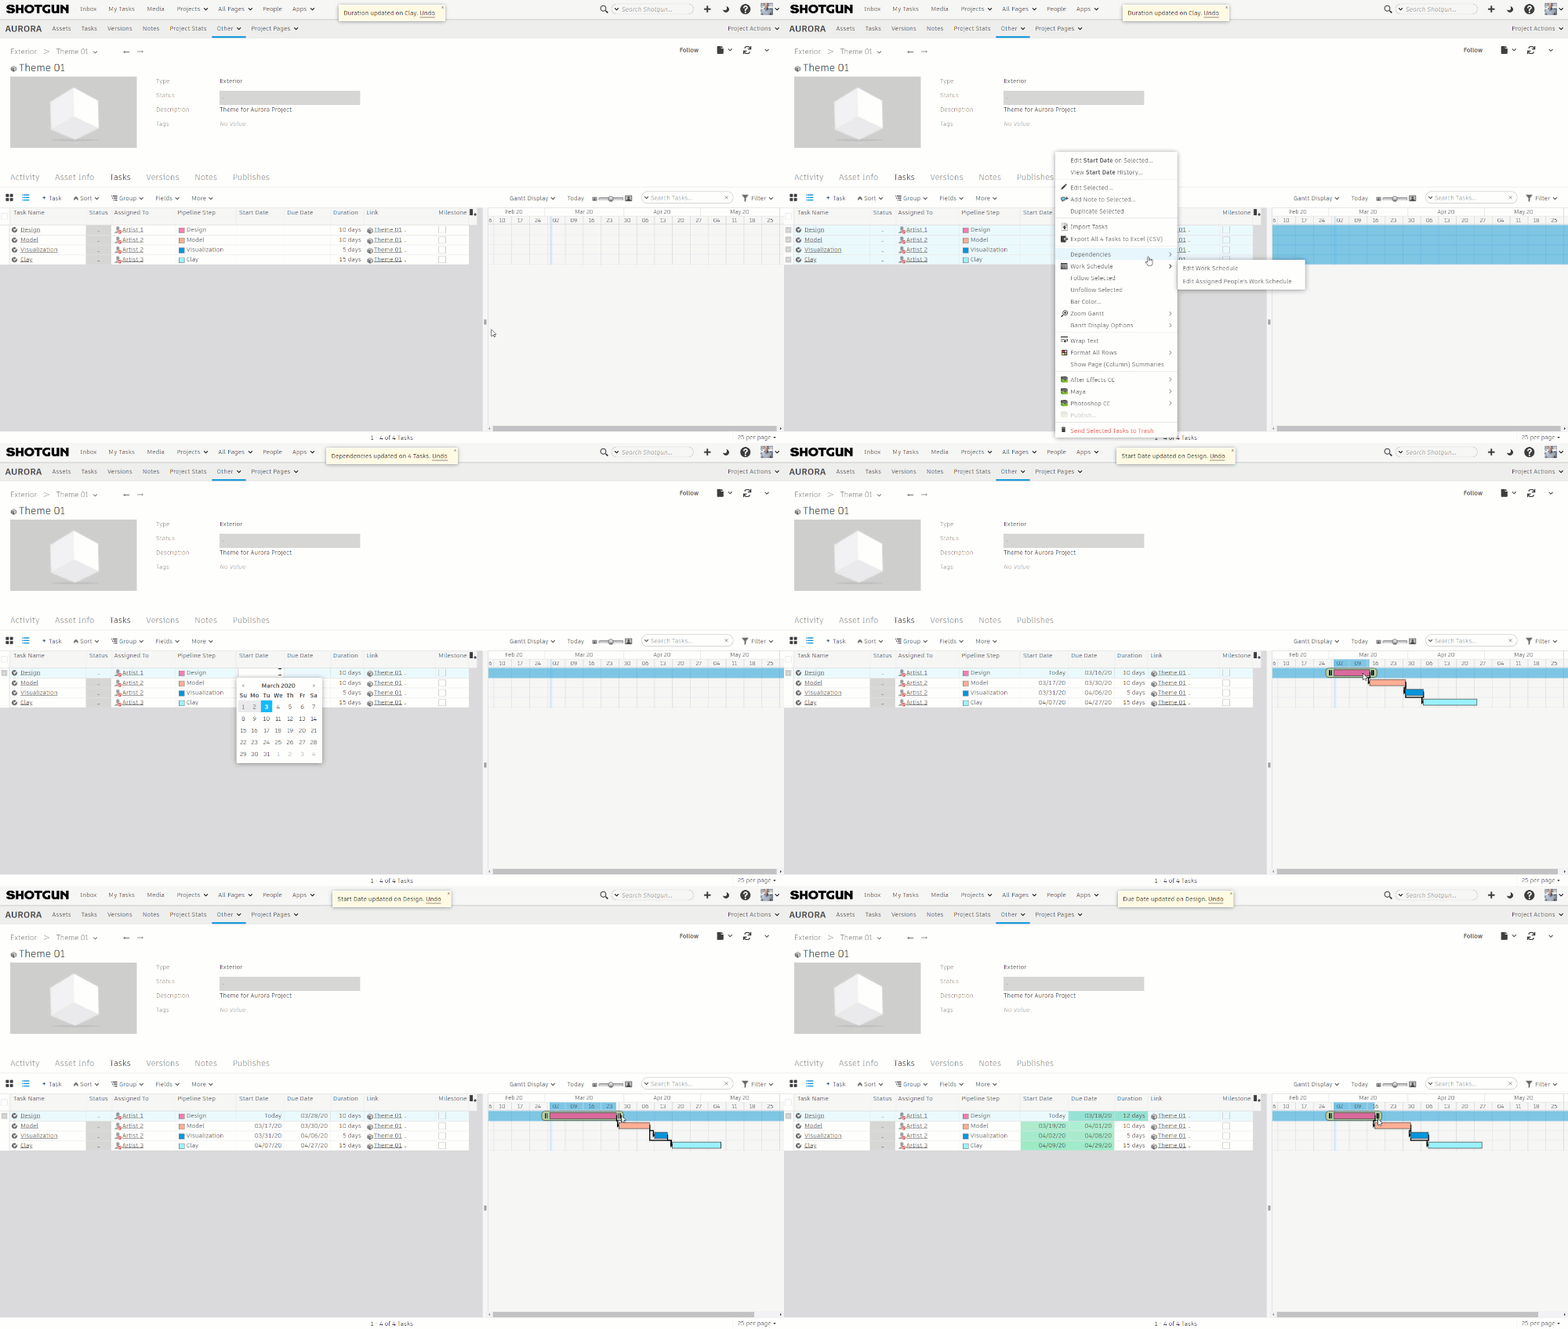
Since these tasks need to be completed in this order, let’s create a Task Dependency chain. Now, if we enter a start date on the first Task in the chain, others will cascade after. And, if one Task shifts in the schedule, others downstream will follow.
Other Ways to Create Assets & Tasks
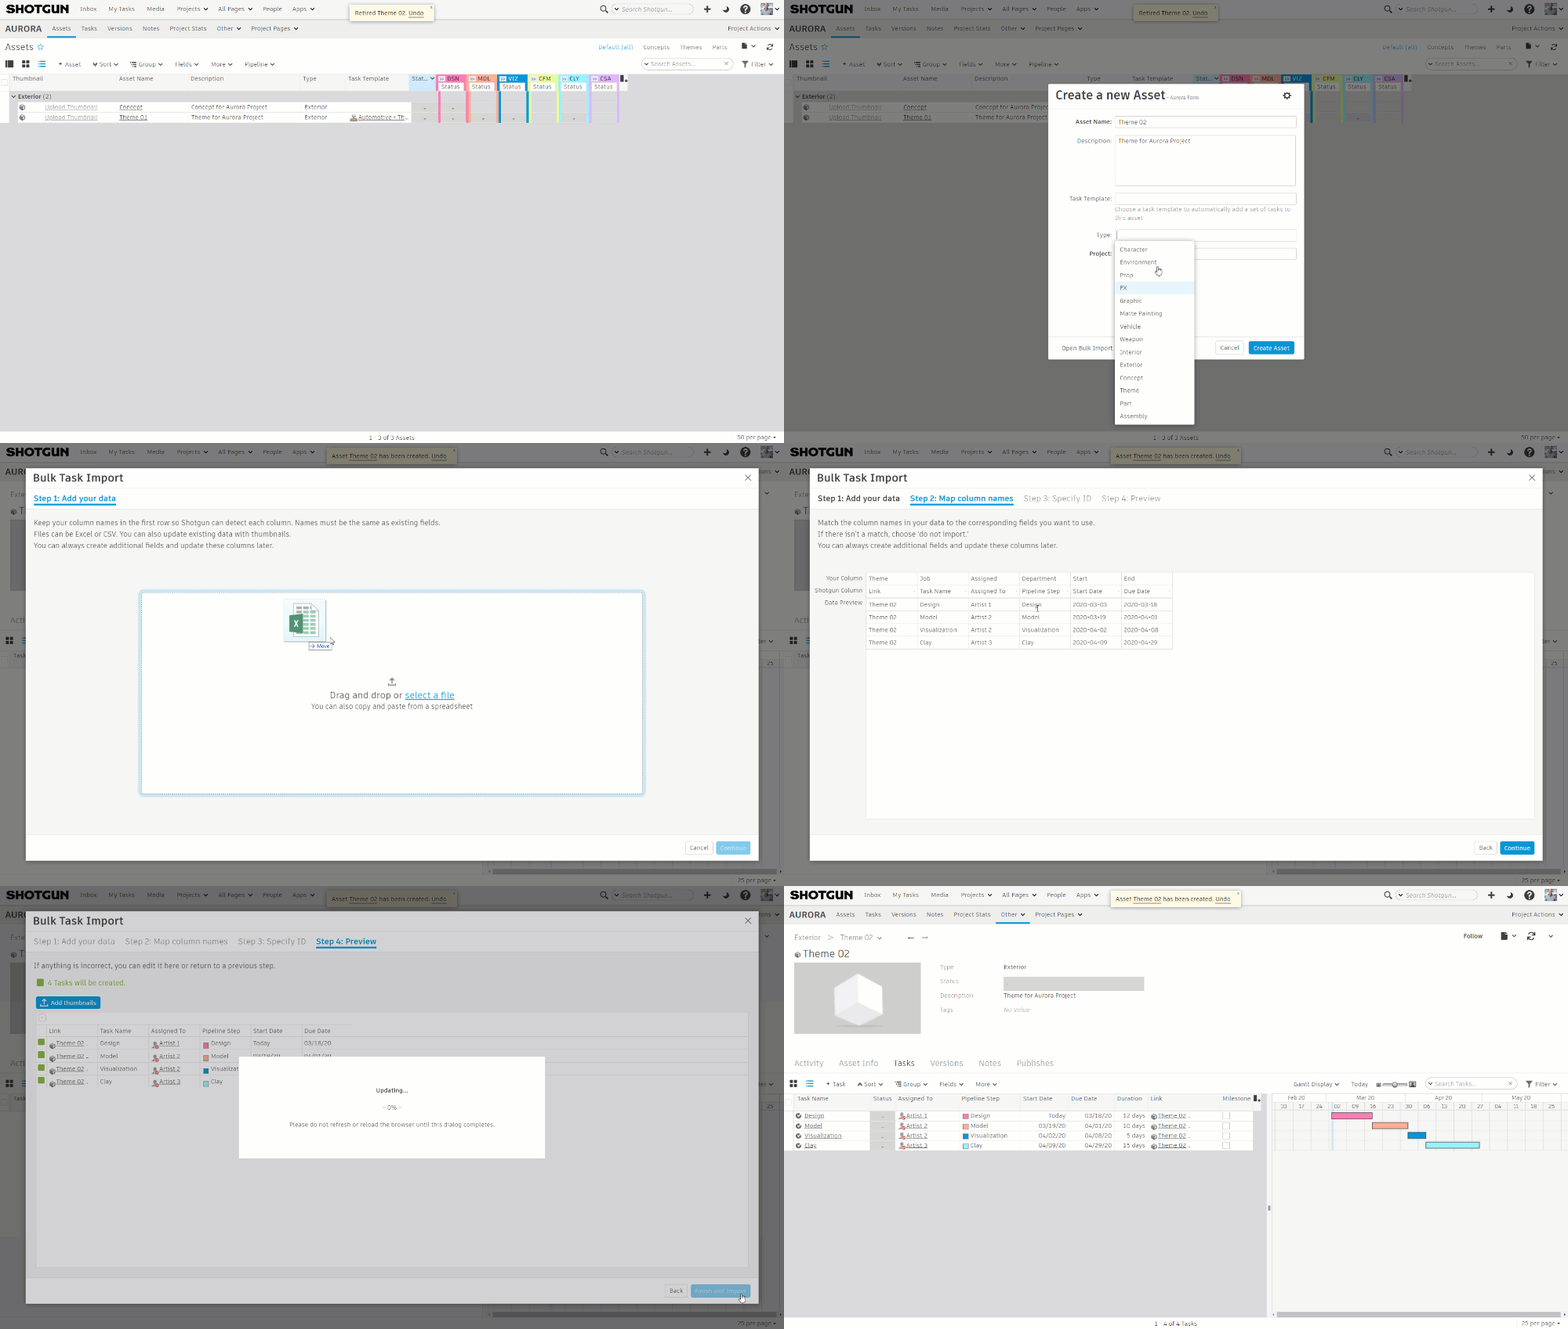
If you have similar information already being stored in spreadsheets, you can easily import them into ShotGrid instead of using the manual creation shown above.
We can use the ShotGrid importer to do this. Let's select the “More” dropdown and then "Import Assets" or "Import Tasks" depending on which page and which information you want to add.
In this example lets assume we have a schedule in a spreadsheet and we would like to add it to an asset. We can drag and drop our excel breakdown directly into the window, or copy and paste from the spreadsheet.
Let’s match the columns, and then specify “Asset Name” or "Task Name" so that names that already exist get updated with more information in our breakdown, for example a description of that entity. You can also add thumbnails (if you have them) to make this more visually appealing.
Now, we have a great foundation to build from and can say “goodbye” to our manual spreadsheets and “hello” to our more automated workflow.