Importer
You can create entities with creation forms, or create entities in bulk by using the Flow Production Tracking Importer.
Entities—like Assets, Shots, Tasks, Episodes, Levels, Notes, etc.—can all be imported with Flow Production Tracking when you have the permission to create these entities. You can also use the importer to update data that already exists in Flow Production Tracking. You can create and update data on entities at the same time using the importer or at any time.
The Flow Production Tracking importer is available from the Add <entity> dropdown from each entity Page.
Learn more about the Flow Production Tracking Importer and use sample data to import in the Getting Started Guides,Getting Your Project Started Topics.
The Importer is broken down into four main steps:
![]()
Step 1: Add your data
- Drag and drop our Microsoft Excel (.xls) file directly into the window or copy and paste from the sheet.
Step 2: Map column names
- Match the column names in your data to the corresponding fields you want to use. If there isn’t a match, choose 'Not importing'.
Step 3: Specify ID
- Choose one or more columns to use as a unique ID so we can find any existing records in your project. If we find a single match, we'll update that entity with the data you are importing. If we find multiple records, you will have to fix your data and retry the import. If we don't find a match, we'll create a new record.
Step 4: Preview
- Preview a summary and any errors that need to be fixed prior to importing.
You can select previous steps and make updates to them while in the importer.
 Contents
Creating entities with the Importer
When importing an entity—like in this example, Assets—follow these steps:
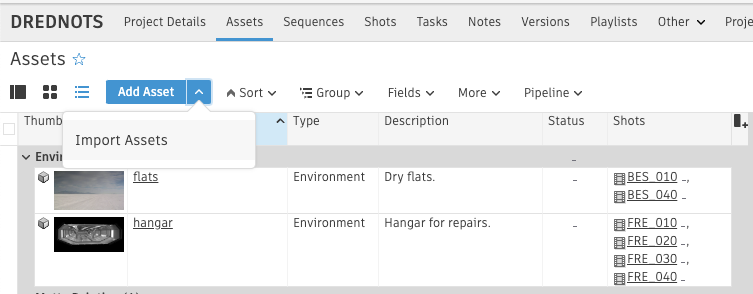
Select the Add Asset dropdown, then Import Assets.
Step 1: Add your data
- Drag and drop our excel breakdown directly into the window or copy and paste from the sheet.
![]()
Step 2: Map column names
You can use search to find the field you would like to map the column to or you can scroll through the available fields and select one.
If a value doesn't exist yet in the field dropdown, you can add them on the fly. You can also add new fields that do not exist yet.
Step 3: Specify ID
- This step is useful when updating already existing records in our Project. We can skip this step since all of the data we're importing is new and the entity records don't exist yet in the Project. Learn more about updating records below.
Step 4: Preview
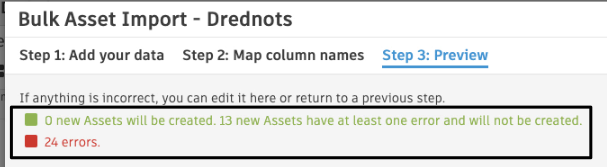
In this step, you address any errors.
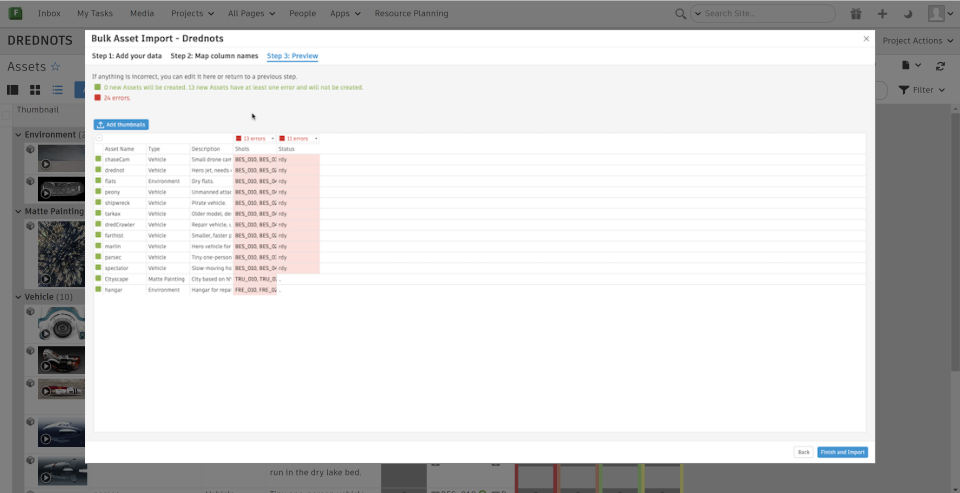
If a linked entity, like Shots, does not exist in Flow Production Tracking yet, you have the option to create them now.
- Select “Fix invalid Shots in this column” then accept if they all look valid.
- You can do the same for any other linked entity that does not exist yet.
- You can also update data directly in the importer, for example, if a Status or Asset Type does not match available options in the list.
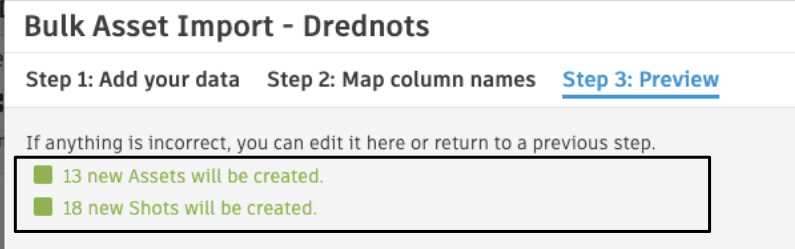
You will see a summary of how many entities will be updated and created.
After fixing any errors, your summary will update:
Optionally, you can add thumbnails to make records more visually appealing—just ensure that the image thumbnails match the same names as the records you are importing.
When ready to complete the import, select Finish and Import.
Importing may take a little while depending on thumbnail image sizes.
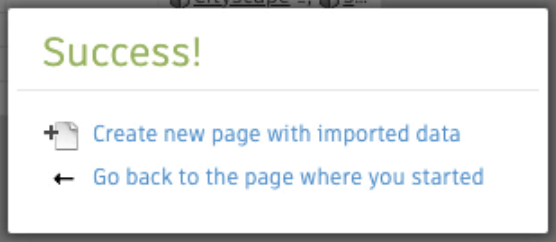
Viewing the data after the import has completed successfully
- Once the import has finished, you can:
- Create a Page with imported data, or
- Go back to the Page where you started
![]()
Every time you import data into Flow Production Tracking using the importer, you can create a Page with imported data. You can visit this page right after importing, and then anytime through the Pages dropdown. This page comes in handy if you need isolate and control the data per import.
![]()
Now, Assets have been imported from the excel breakdown, and have thumbnails to make the records more visually appealing.
![]()
The image transcoding process can take a little while. You may need to refresh the page after a few minutes to see the thumbnail images you added through the importer.
Updating entities with the Importer
To update entities with the Flow Production Tracking importer, you can follow the steps above, but you will select identifiers for existing records so those entities are updated. This configuration happens at Step 3: Specify ID. This example shows steps for how to update Shot data, but these same steps can be applied to any other entity.
From the Shots page, select the Add Shots dropdown, then Import Shots.
![]()
Step 1: Add your data
Drag and drop our excel breakdown directly into the window or copy and paste from the sheet.
Step 2: Map column names
You can use search to find the field you would like to map the column to or you can scroll through the available fields and select one.

If a value doesn't exist yet in the field dropdown, you can add them on the fly. You can also add new fields that do not exist yet.
Continue to Step 3: Specify ID.
Step 3: Specify ID (the most important step for updating records)
This is where you can chose a column to use as a unique ID to find existing Shots in your Project. In this example, the Shot Code column will be used to identify existing Shots for each existing record.
Step 4: Preview
In this step, you address any errors.
- In this case, Sequences that are linked to the Shots will need to be created since they do not exist yet, and invalid statuses will need to be updated prior to importing.
You will see a summary of how many entities will be updated and created.

Optionally, you can update Shot records with thumbnails to make them more visually appealing—just ensure that the image thumbnails match the same names as the records you are importing.
When ready to complete the import, select Finish and Import.
Importing may take a little while depending on thumbnail image sizes.
Updating multi-entity fields
When importing data to multi-entity fields like tags or assets, you can select the update mode:
- Overwrite: Replace the field's entire contents with values from your uploaded file.
- Add: Append new values from your file while preserving existing field data (prevents duplicates).
- Remove: Delete values that match those in your file, leaving other existing values intact.
Single entity fields (like Description or Status) can only use the Overwrite mode.
Add mode is perfect when you need to assign additional assets to shots without losing existing assignments. Remove mode is ideal for tasks like cleaning up outdated asset assignments across multiple shots.
Viewing the data after the import has completed successfully
- Once the import has finished, you can:
Create a Page with imported data, or
Go back to the Page where you started
Every time you import data into Flow Production Tracking using the importer, you can create a Page with imported data. You can visit this page right after importing, and then anytime through the Pages dropdown. This page comes in handy if you need isolate and control the data per import.
![]()
Now, Shots have been updated with more information from the excel breakdown, and have thumbnails to make the records more visually appealing.
![]()
The image transcoding process can take a little while. You may need to refresh the page after a few minutes to see the thumbnail images you added through the importer.