Text
Jump to Mobile or Windows 10
For many projects, text is an integral part of your design. SketchBook understands this, so there are an assortment of Text tool. Do we limit the number of pre-installed available fonts? No.
Use text for comments within an image, in panels for speech bubbles and captions, as commercial messaging, and more. With the Text tools, add text to any image you like, set the font, color, size, and placement.
Use  Text to create simple RTF text objects. Set the font, size, style, and color. Select and position the text. Change its transparency. In the Layer Editor marking menu, use
  Edit Text Layer to modify them. Depending on the project you’re working on, you may need to create individual text files with alpha channels to use elsewhere. For this, check out How to create an alpha channel.
Using text in SketchBook Pro Desktop
SketchBook supports all system and native fonts normally associated with Windows and OS X, as well as most additional user installed fonts. Many personal and commercial use fonts can be purchased or freely downloaded (depending on the type of license) from the web. Typically, font sets are downloaded as zip files and will either be TrueType (.ttf), OpenType (.otf), or PostScript Type 1 (.ps1).
Installing fonts
For both Windows and OS X, simply double-click the font file and select Install to install the font.

Restart SketchBook and you should see the newly installed font listed in the Text tool font list.
Adding text
To add text, in the toolbar, tap
.

Start typing in the Edit Text Layer window.
Use the in-line editing tools to make changes to the text.
For OS X, the formatting options are found in the Font panel.
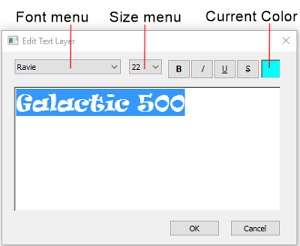
To change the font, select the text, tap the Font menu, select the font you want.

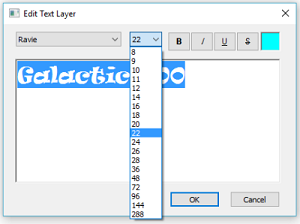
To change text size, select the text, tap the Size menu, select the size you want.
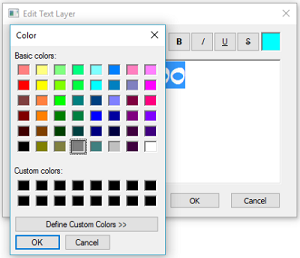
To change text color, select the text, tap the Current Color to access more color, then tap the color you want.
Tap OK when finished. A new layer is created for the text in the Layer Editor.
In-line editing tools for Mac users
Use the Font button in the Edit Text Layer window to access the following text editing tools:
- Collections – Manage the list of fonts that appear in Family. See only the fonts you want. Create custom font collections. Use default sets to load only fun fonts or ones with fixed width. Load only your favorite fonts or those recently used.
- Family – Select a font from the list. If a font family is not listed, change the Collections option to All Fonts.
- Typeface – Choose from Condensed, Condensed Italic, Bold Condensed, Bold Condensed Italic typefaces.
- Size – Set the size of the text.
To set text color, click  .
.
Changing the transparency of text
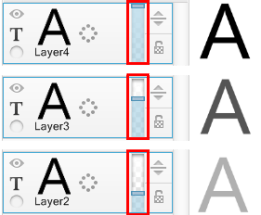
The opacity of a text layer can be changed using the layer’s opacity slider. Click-drag the opacity slider to change the transparency of a text layer.
Transforming text
Once text appears in the middle of the canvas, you are in Transform mode. Move is set as the default transform. Use the puck to select a different mode.
- When rotating or scaling the text, SketchBook uses the center of the text as the pivot point.
- When scaling text, font size is changed, resulting in no visual quality change.
Font size determines how much you can scale a font. A font size of 12 cannot be scaled up as much as one set to 24. A font of 12 cannot be scaled down as much as one set to 5. To scale a font any further, return to the Text window and increase/decrease the font size.
Rasterizing a text layer
Since your text it pixels and not rasterized, you can make changes to it without affecting the quality of the image. However, you can change text into paint, using  , so you can manipulate it like a paint layer. Try using Distort.

When text is rasterized, Edit Text can no longer be applied.
Editing an existing text layer
To edit an existing text layer, click

Flick
Edit Text. This opens the Edit Text Layer window for further editing.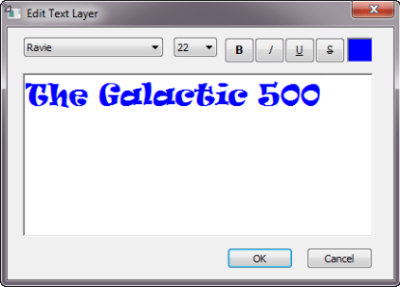
Using text in SketchBook Pro Mobile
Do all your text edits while in the tool. The text created is a paint layer (like what happens to text in the desktop version, once you apply Rasterize Text Layer). Older versions of SketchBook will look slightly different; however, the tools work the same.
Due to the size of some devices, swiping left or right in these toolbars to access more options.
Do one of the following:
For tablet users, in the toolbar, tap
 .
.For handheld device users, in the toolbar, tap
 , then .
Choose any of the following:
- Tap
 and enter your text in the window that appears.
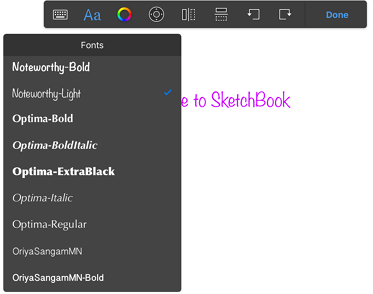
 - Tap
 to select a font.
 - Tap
 to set the color.
 - Tap
 to stretch and distort the text, creating perspective.
 - Tap
 to nudge the content one pixel at a time, by tapping an arrow or dragging from the middle to move in any direction or on an arrow to move in that direction.
 - Tap
 to flip the text vertically.
 - Tap
 to flip the text horizontally.
 - Tap
 to rotate the text counter-clockwise.
 - Tap
 to rotate the text clockwise.
- Tap
Tap
 to accept the changes.
Using text in SketchBook Pro Windows 10
In the toolbar, tap
.
Choose any of the following:
- Tap and enter your text in the window that appears.
- Tap to select a font.
- Tap to set the color.
- Tap to stretch and distort the text, creating perspective. See Distorting text for more information.
- Tap to nudge the content one pixel at a time, by tapping an arrow or dragging from the middle to move in any direction or on an arrow to move in that direction.
- Tap to flip the text vertically.
- Tap to flip the text horizontally.
- Tap to rotate the text counter-clockwise.
- Tap
 to rotate the text clockwise.
 - To change the font size, tap-drag with two fingers and expand or pinch them.
- To freely rotate the text, tap-drag with two fingers and rotate.
- To freely move and re-position content, tap-drag with one finger.
- Tap
Tap
to accept the changes.