Stage 2: Finalize Configuration in Okta
Mapping Attributes and Complete Configuration
In order to complete the directory sync integration in the spoke, follow these steps.
After you are re-directed to the spoke, the Agent Installation screen appears.
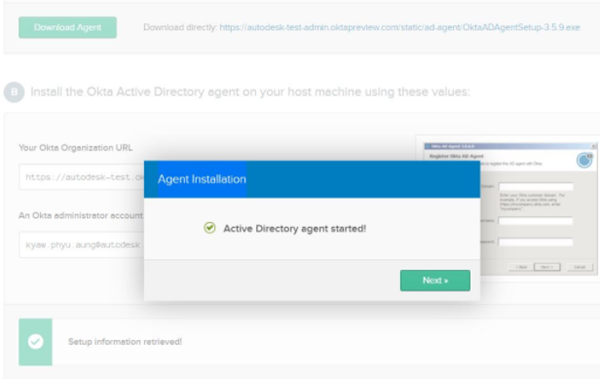
Click Next. A list of organizational units (OUs) categorized in terms of Users and Groups displays.
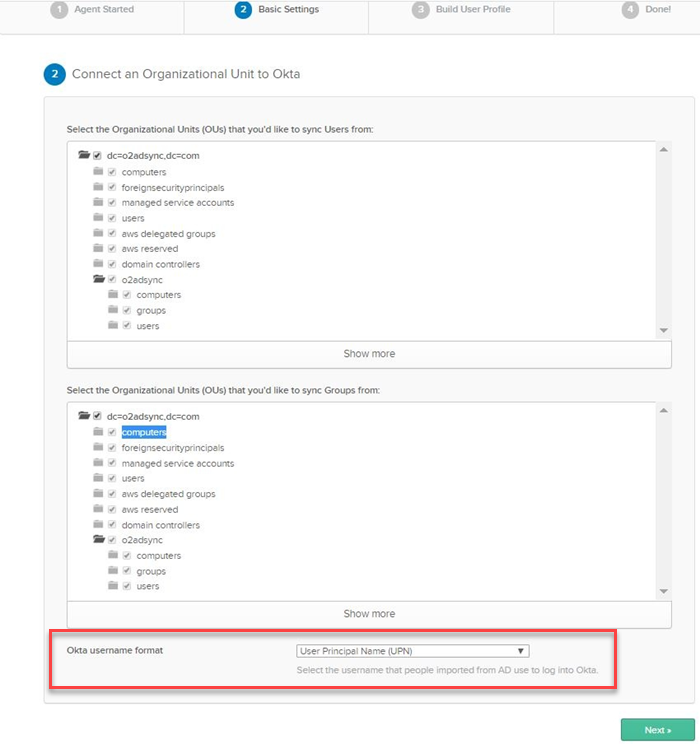
Select the relevant folder checkboxes from the OUs to sync the users and groups to Okta respectively.
Under the Okta Username Format drop-down menu, Select User Principal Name (UPN) and click Next. The Import AD Users and Groups pop-up screen is displayed.
 Note:
Note:This process verifies that your agent configuration and basic settings are populated. You should finish the configuration successfully with the above message "Active Directory agent configured!". If you get stuck, refer to the detailed instructions in Okta.
Click Next. The entire attribute list is displayed by default.

Select the attribute checkboxes from the list that are relevant to you to build your Okta User profile.
Note:You can add or remove attributes to be included for users. The mandatory attributes that are required for SSO are auto-selected.
- Object GUID
- First Name
- Last Name
Click Next.
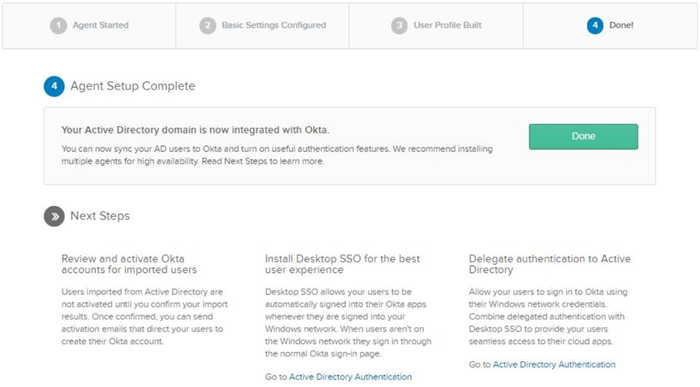
Click Done to complete the active directory configuration.
Sync Settings
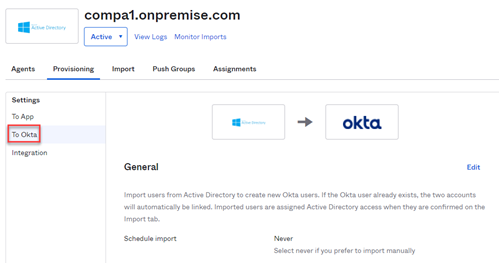
In Okta under your directory integration, select Provisioning tab and click the Settings-->To Okta. Click the Edit button to configure the following elements.
Configure Custom Attribute
Scroll down to configure the mapping for ObjectGUID to externalId.

Click the Edit button.
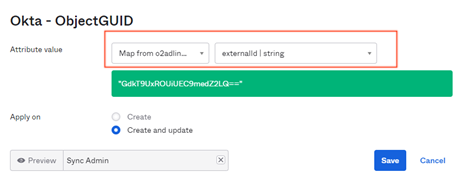
For Attribute Value, from the drop-down menu select your domain and externalId.
For Apply on, select the checkbox Create and update and click save to complete the attribute mapping.

Configure Sync Frequency
Once the active directory configuration is complete, periodic synchronization with active directory can be configured.
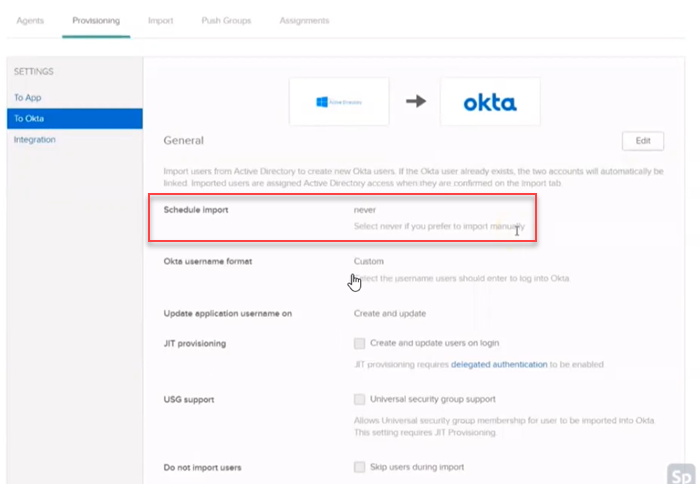
The import can be scheduled on an hourly basis or once a day. If you need on-demand sync, you can sync by signing in to Okta to initiate the Import now option.
JIT User Provisioning
JIT (just-in-time) provisioning for the users and USG (Universal security group) support options can be enabled here by selecting the checkboxes, if required.
With just-in-time provisioning, admins can allow new users to be automatically created in Autodesk.
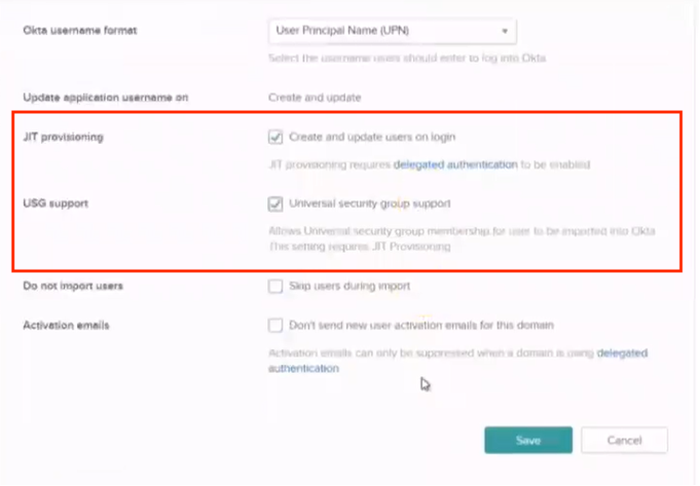
USG is a type of group on AD which is supported in Okta if this option is enabled. Upon selecting the desired settings, Click the Save button to proceed.
User Creation and Matching
When importing users, you can create rules to match any attribute such as username or email, that is currently mapped from the AD profile to an Okta user profile. This helps to determine whether an imported user is new or if the user profile already exists in Okta.

If a match is identified, you can define Auto-confirm/Auto-activate users rules. Click the Save button to save the rules applied.
Select Auto-confirm exact matches and Auto-activate new users checkboxes to confirm assignments automatically to avoid manual clearing of the import results user list.
Profile and Lifecycle Mastering
Active directory remains as the authoritative source over Okta for the user profiles if the checkbox Allow Active directory to master Okta users is selected. Configure this option to de-activate users in Okta when the user is deactivated in the active directory and this information is synchronized. Also, the same is applicable for the reactivation process as well.
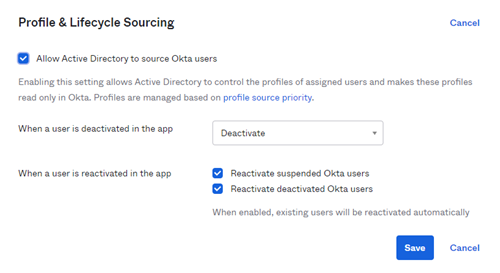
Click Save button to proceed.
Import Users
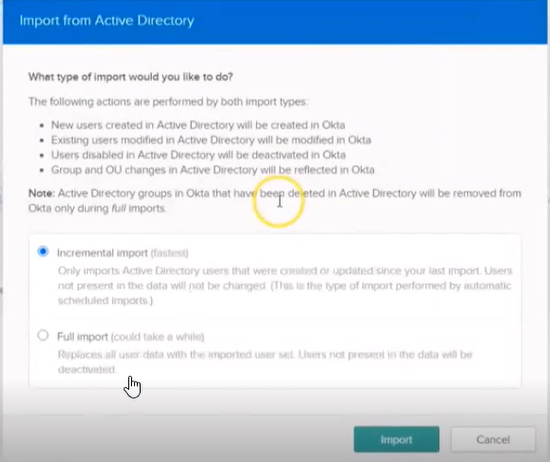
There are two ways users can be imported from the Active directory.
- Incremental import - Only imports active directory users that were created or modified since your last import schedule.
- Full import - Imports all the new and existing active directory users. This kind of import happens when you first connect Okta to active directory. Deleted users and users who moved out of the Organizational Unit (OU) are deactivated in Okta only during full imports.
Go to Import tab under your domain in Okta to start importing users from Active Directory.
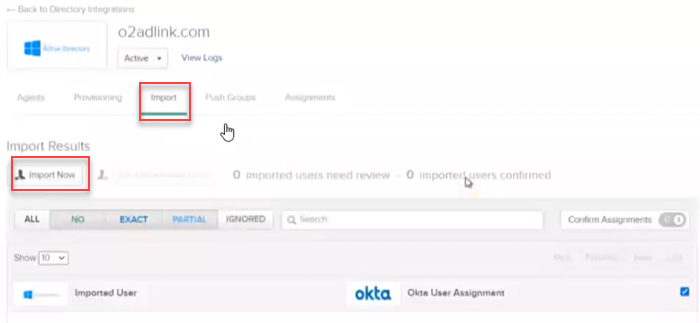
Click the Import Now button. The Import from Active Directory dialog box displays.
 Note:
Note:Incremental import can be a scheduled import while full import is always a manual one.
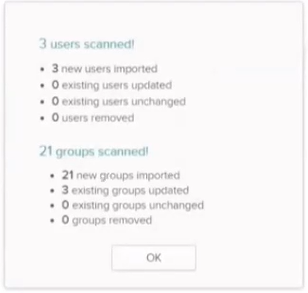
Click the Import button. The Import Results dialog box displays.
To view your import, go to Autodesk Account to view the users list (organised under your respective groups) you just imported will be sent under their existing group.