Set up SSO with Microsoft Azure
This section explains how to set up your SSO connection using Azure as the identity provider, so that users can sign in to Autodesk with their organization’s email address. This connection uses SAML (Security Assertion Markup Language) to allow Autodesk to communicate with Azure to authenticate users.
Set up your SSO connection with Microsoft Azure (video: 11:33 min.)
To complete the video setup process, continue watching Test and turn on SSO
This article shows the pre-configured settings of the Autodesk SSO app in Azure, including the SAML attributes mapping, so that you can use Automatic Setup in Autodesk Account. Refer to Set up SSO with Microsoft Azure Manually in case of any issues with the Autodesk pre-configured app or to view/update the SAML mapping source.
Register Autodesk SSO as a Gallery Application on Azure
To set up SSO with Azure, you must register Autodesk SSO on the Azure Portal.
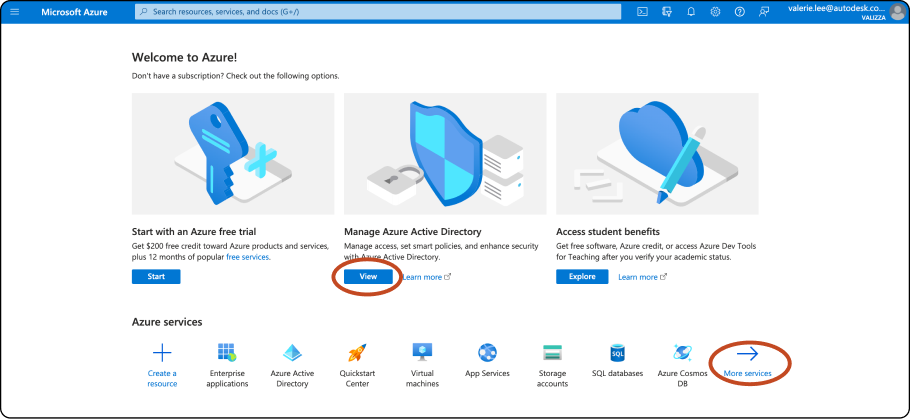
Open the Azure Portal and sign in as an administrator. Under Manage Azure Active Directory, click View.
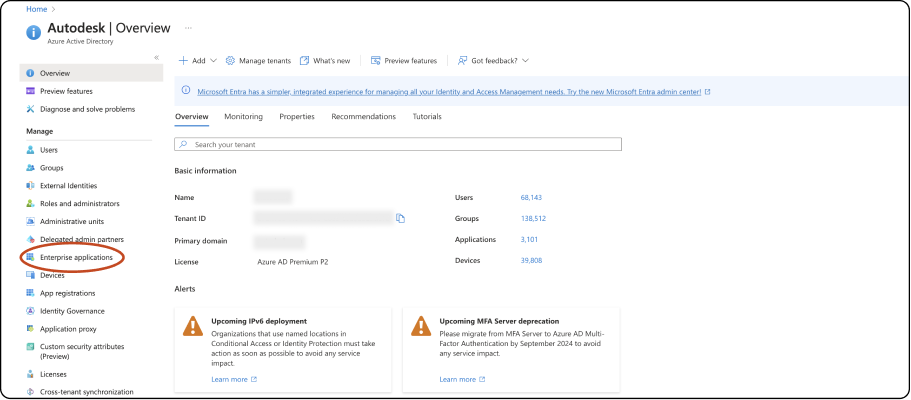
Click Enterprise applications.
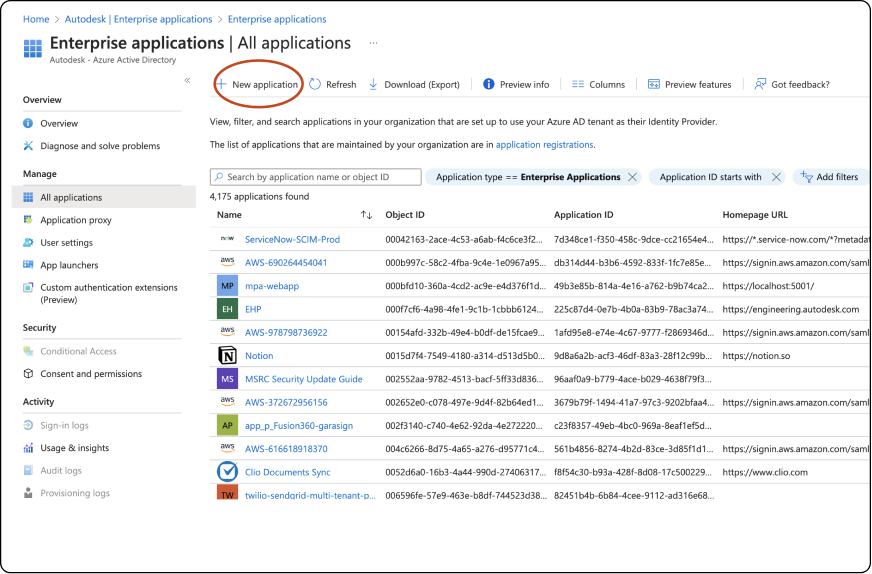
Click + New application.
In the Browse Azure AD Gallery section, type
Autodesk SSOin the search box, then select the Autodesk SSO application from the results panel.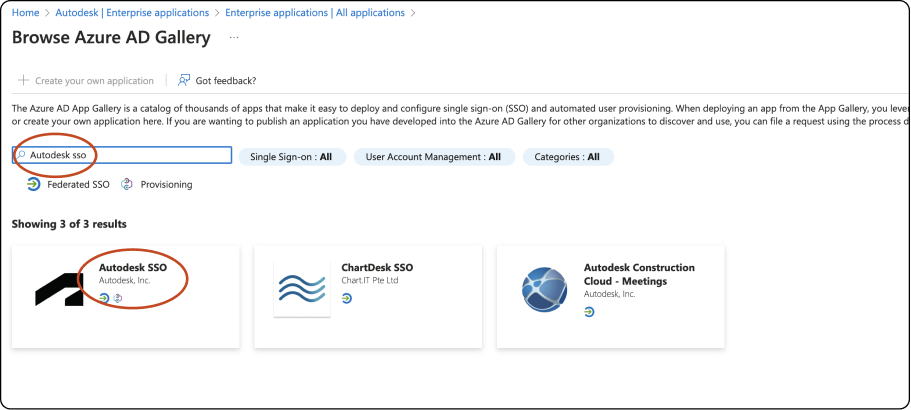
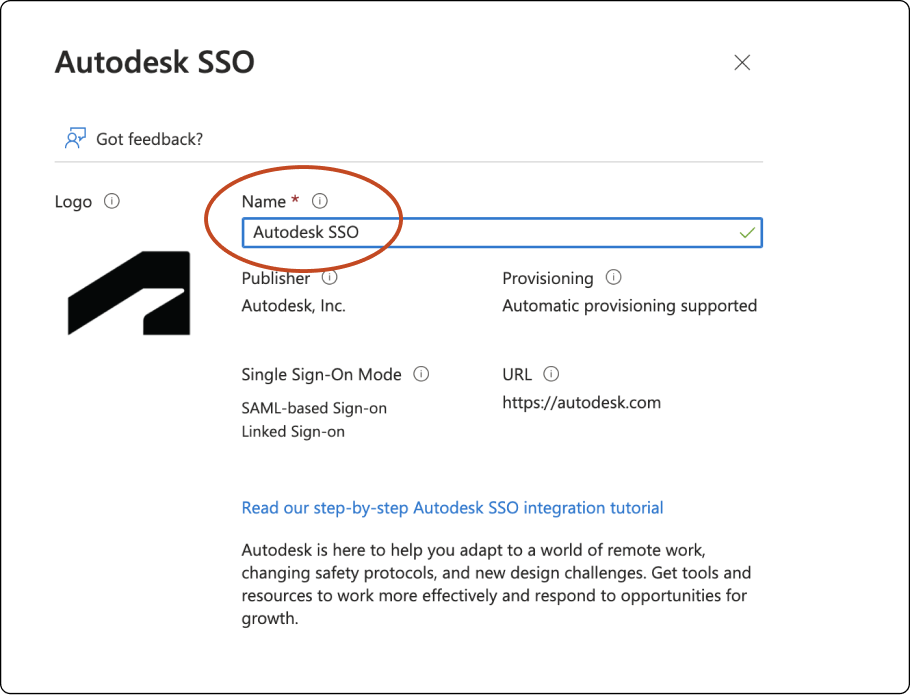
In the Name field, type in a name that you’ll recognize this SSO connection by and click Create.
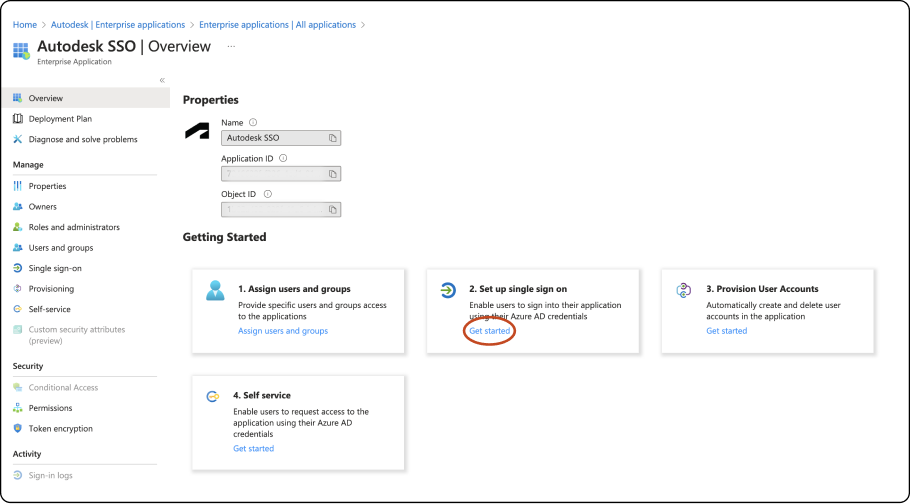
Once the application integration page loads, go to 2. Set up Single Sign On and click Get Started.
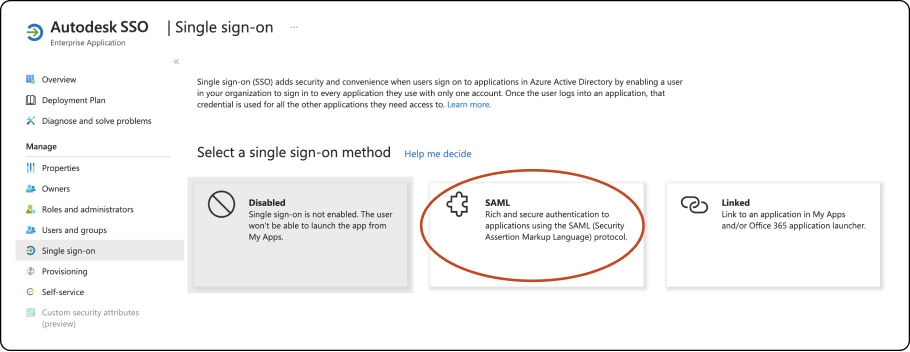
Select SAML as the sign-on method.
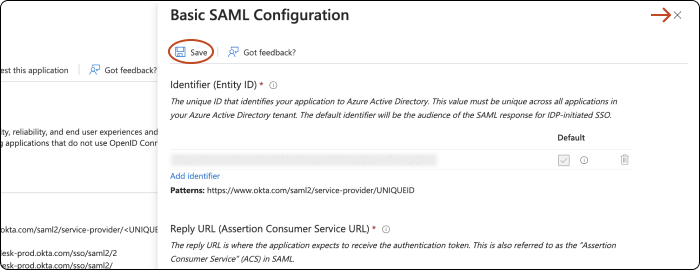
Go to Section 1 - Basic SAML Configuration, and click edit to enter these dummy values:
Reply URL(Assertion Consumer Service URL) :
https://autodesk-prod.okta.com/sso/saml2/1Sign-On URL :
https://profile.autodesk.com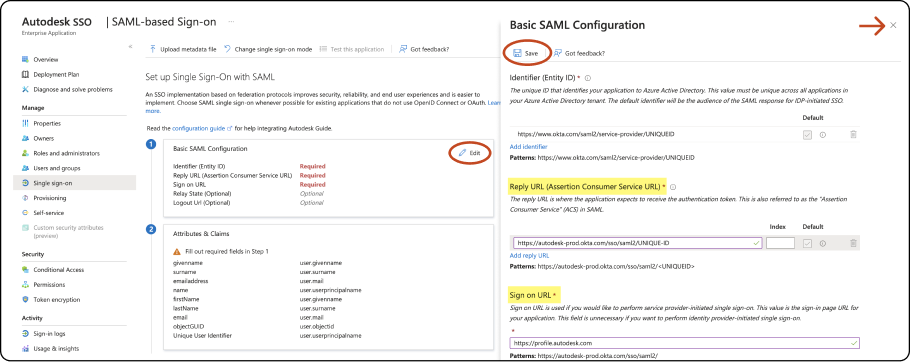
Click Save to save the values and X to close the pop-up window.
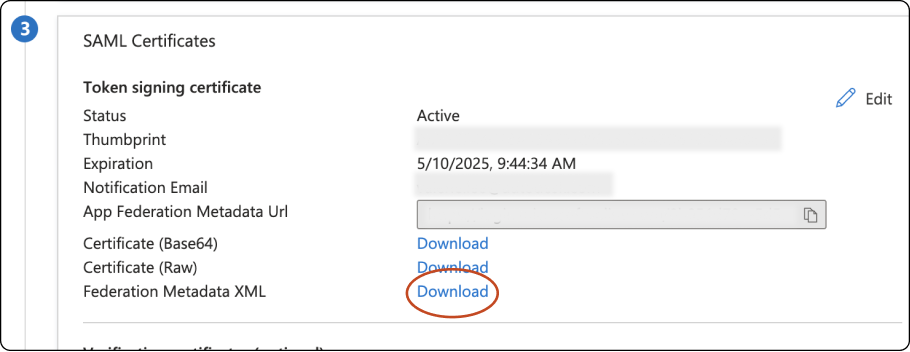
Go to Section 3 - SAML Certificates, and next to Federation Metadata XML, click Download.
Begin setup in Autodesk
In Autodesk Account, go to User management > By user or By Group.
Select your team from the drop-down list and click the Team Settings ⚙️ icon in the upper right-hand corner.
Go to the section Single sign-on (SSO) and select Manage SSO.
Select Manage SSO tab > Set up connection.
Autodesk Account > Step 1: Add identity provider and metadata
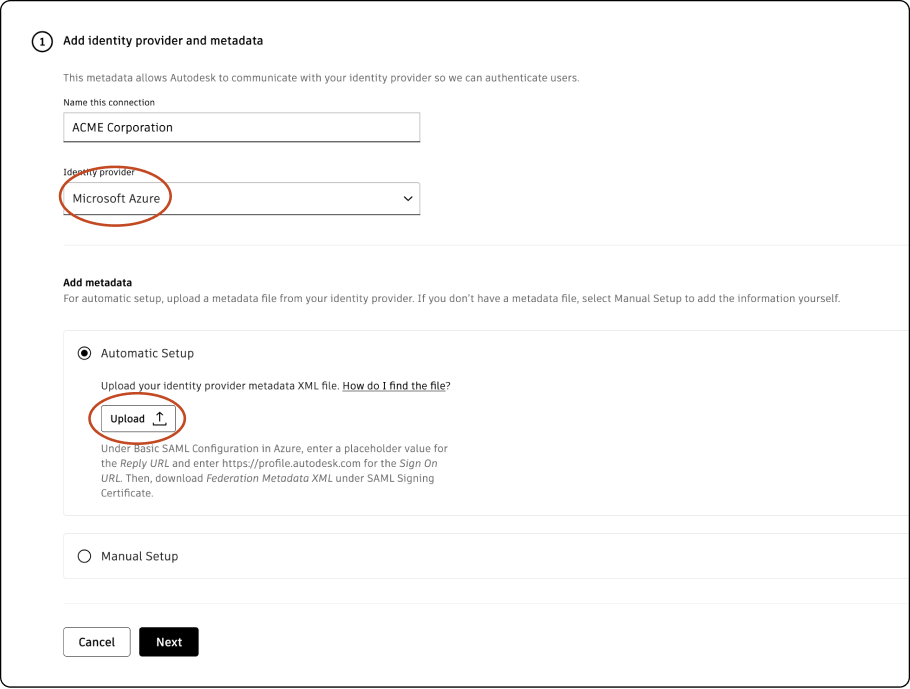
First, you will be asked to Name your connection. Enter a name that will help you easily identify the connection between your identity provider and Autodesk. The name you choose can also help differentiate between connections. The name you choose must be unique and not in use by another team or organization throughout Autodesk.
Select your identity provider Microsoft Azure from the drop-down menu
Under Automatic Setup, select Upload to upload the federation metadata XML file downloaded from Azure. This will automatically fill in the Entity ID, Sign-on URL ,and Identity provider certificate.
Confirm that the fields are filled in and click Next.
*In Autodesk Account > Step 1: Add identity provider and metadata, you will see a selection for the binding method next to the Sign-on URL. Binding refers to the mechanism used to transmit authentication data between your identity provider (Azure) and the service provider (Autodesk). There are two binding methods: Post and Redirect. The Post method is recommended and is selected by default. This method transmits SAML messages within an HTML form using base64-encoded content. Because messages are encoded, it is more secure than the Redirect method and is recommended as a security best practice. The Redirect method transmits SAML messages encoded as HTTP URL parameters. The response is part of the URL and may be captured and exposed in various logs, making this method less secure than the Post method.
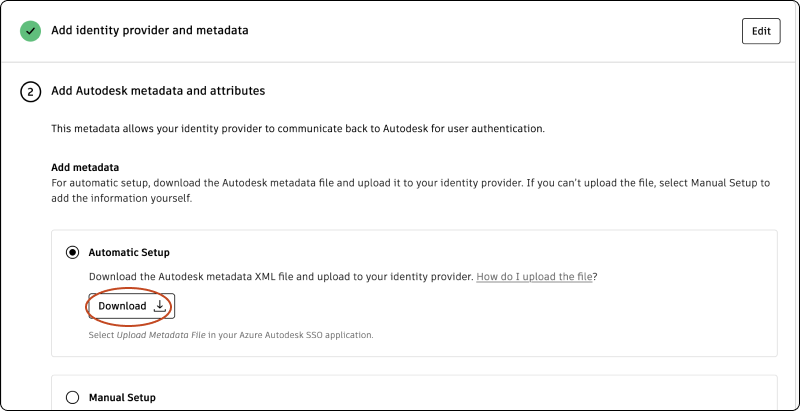
Autodesk Account > Step 2: Add Autodesk metadata to Azure
Under Automatic setup, click Download to download the metadata file from Autodesk
Switch to Azure portal, click Upload metadata file and select the Autodesk metadata file. This will automatically fill in the Identifier and Reply URL values.
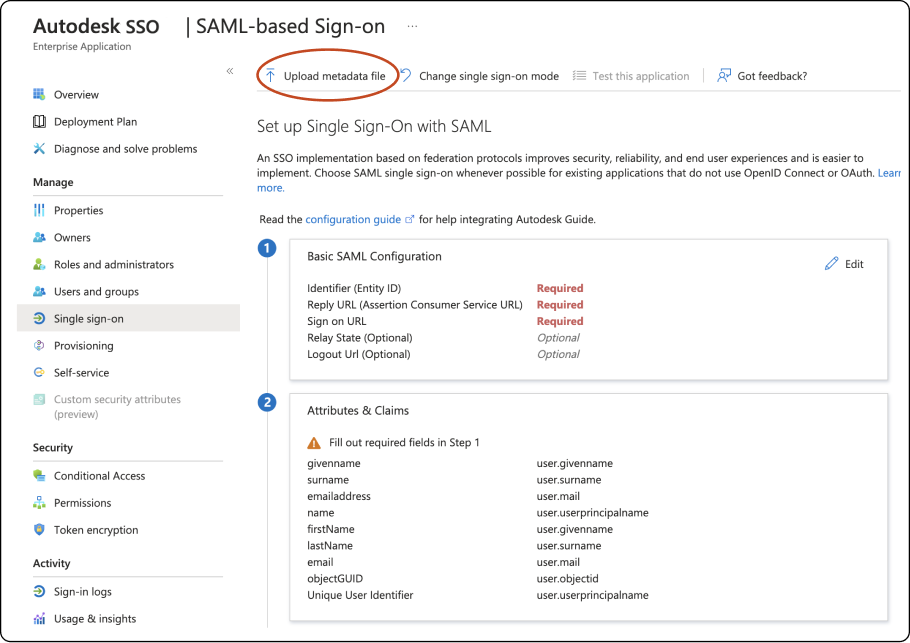
Click Save to save the values and X to close the pop-up window.
Once the file is successfully uploaded, switch to Autodesk Account and click Next.
Autodesk Account > Step 3: Test your connection
Now you’ll need to test your SSO connection to make sure that Azure and Autodesk can communicate with each other to authenticate users.
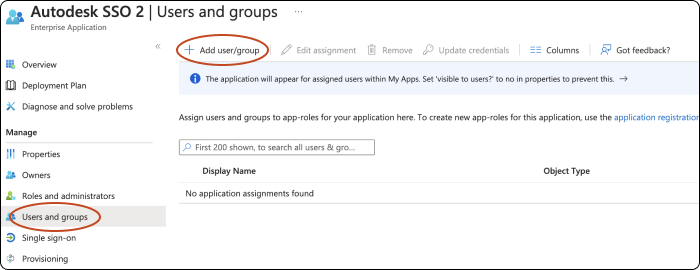
To test your connection, go to the Azure portal, select Users and groups in the navigation and click Add users/group to add your users into the Autodesk SSO gallery application. View Azure’s documentation Assign a user account to an enterprise application for more information.
Switch back to Autodesk Account and click Test Connection to be to be redirected to your organization’s SSO sign-in page. (If you are not redirected,see Troubleshooting).
Ensure that you use the same window to perform the connection test.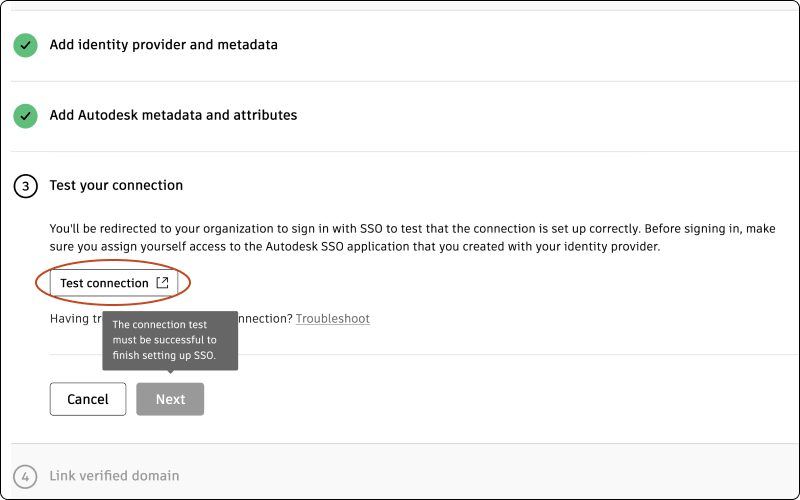
Sign in with your organization email and password to make sure that the SSO connection between Azure and Autodesk is set up correctly. If the test is successful, you will see the message “Connection Test Result: Success” and a list of properties.
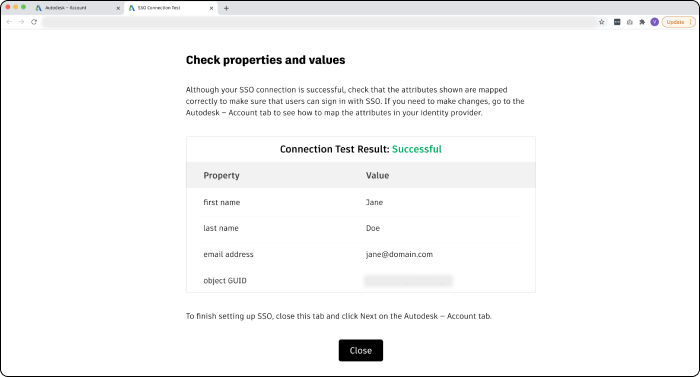
Confirm that the attributes have mapped correctly by comparing the Property and Value columns. The property “first name” should appear next to the user’s first name, “last name” should appear next to the user’s last name, and so on. If you need to make changes, return to your Azure portal and re-map the attributes.
Once you have confirmed that attributes are mapped correctly, close the tab to return to Autodesk Account and click Next.
Note:In order to proceed to step 4, which involves linking a verified domain, it is crucial that your connection is tested successfully.
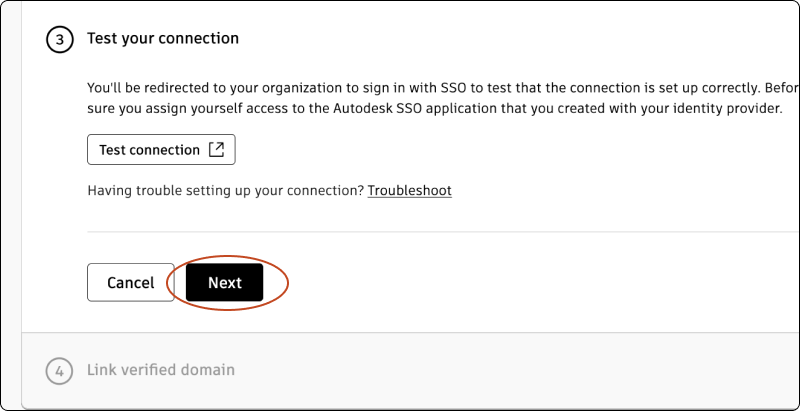
Autodesk Account > Step 4: Link verified domains
You will see a list of your verified domains. Select one or more verified domains to link to your connection.

Click Save connection to complete the setup.
If a domain is not verified, you can still save the connection and link it later. If you have not added or finished verifying domains, go to Add and verify domains to complete the process.
Previous: Set up your connection
Next: Test and turn on SSO