How To: Generate New Certificate
This article will include instructions for the following identity provider: Microsoft Azure, Okta, OneLogin, PingOne and Google Cloud Identity
If your Identity Provider is not listed above, we recommend generating your identity provider’s signing certificate with the following selections:
- Signing option: Make sure your signing option location is in ‘Assertion’ only.
- Signing algorithm: Use the SHA2-Family of algorithms, such as SHA256, for signing the SAML assertion.
Microsoft Azure
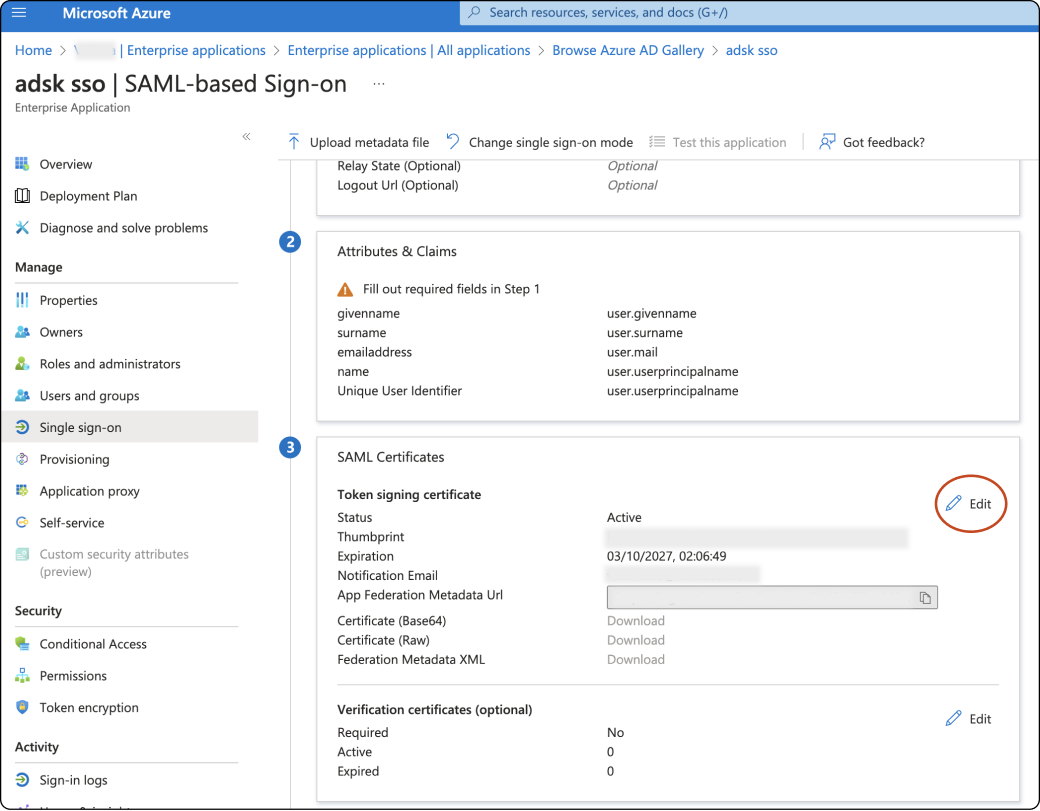
Open the integration application page for the Autodesk/Adsk SSO gallery app that you created.
Go to Azure section 3 - SAML Certificates and click Edit.
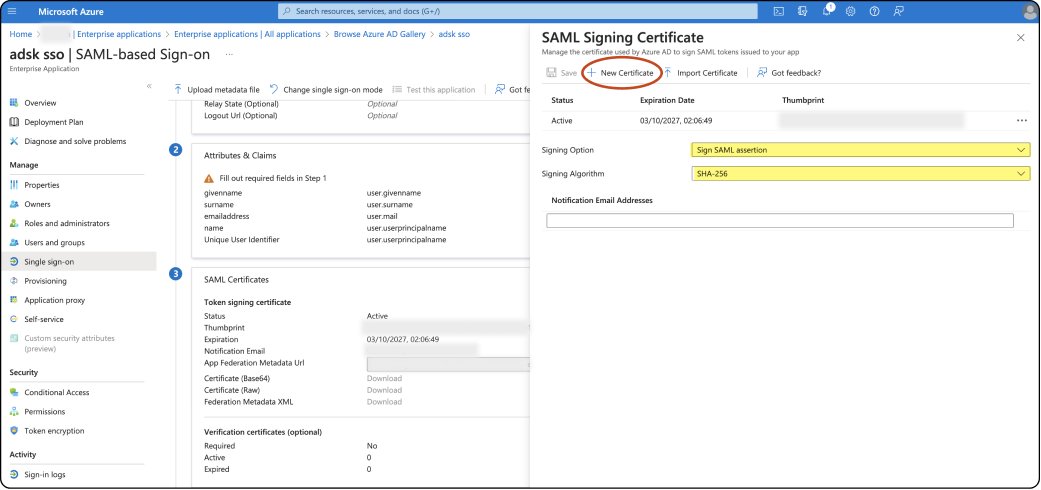
In the Signing Option, select Sign SAML assertion and in the Signing Algorithm, select SHA 256. Click + New Certificate to create new certificate.
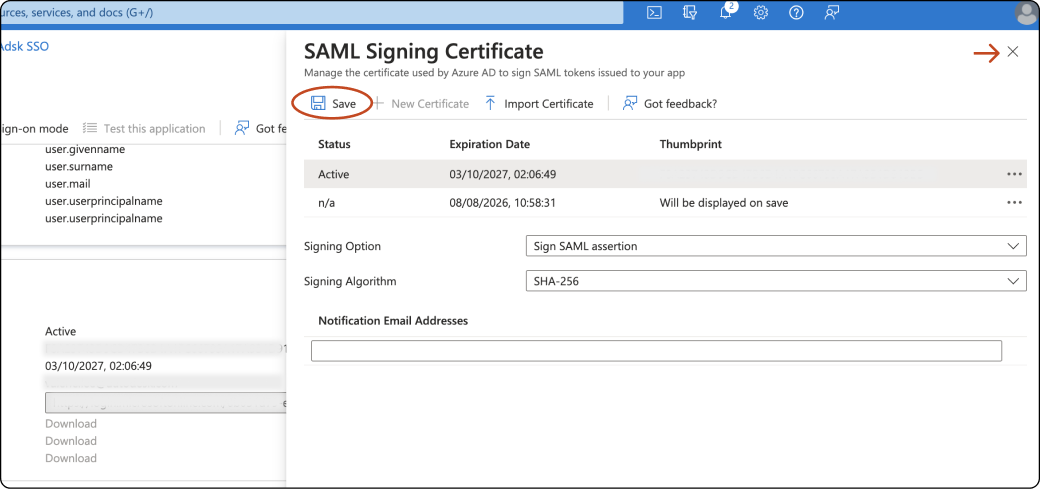
Save to save the values and X to close the pop-u p window.
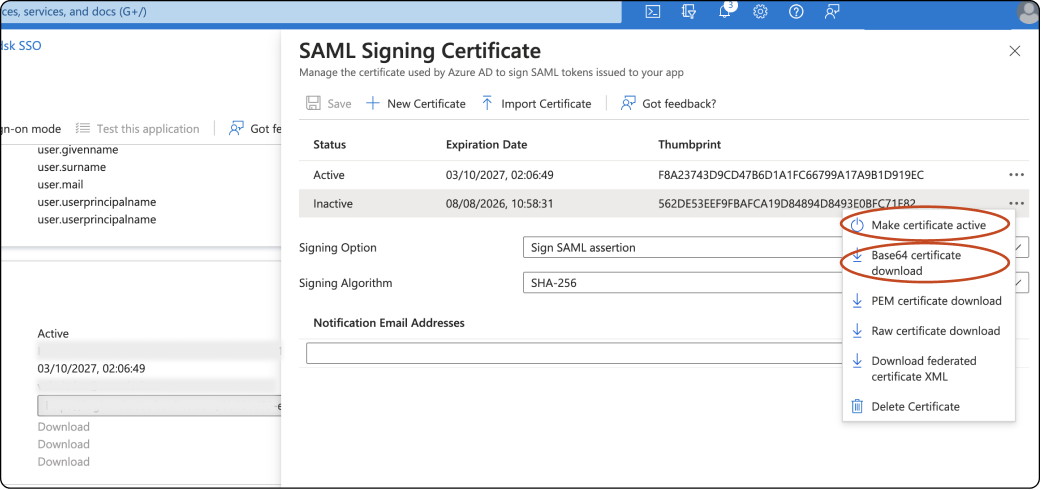
Go to back to Azure section 3 - SAML Certificates and click Edit.
Click Make certificate active and download Base64 certificate download.
Once the file is successfully downloaded, switch to Autodesk Account Step 1 – Add Identity Provider and metadata, and upload the new certificate in Identity Provider certificate.
Okta
Open the integration application page for the Autodesk/Adsk SSO gallery app that you created.
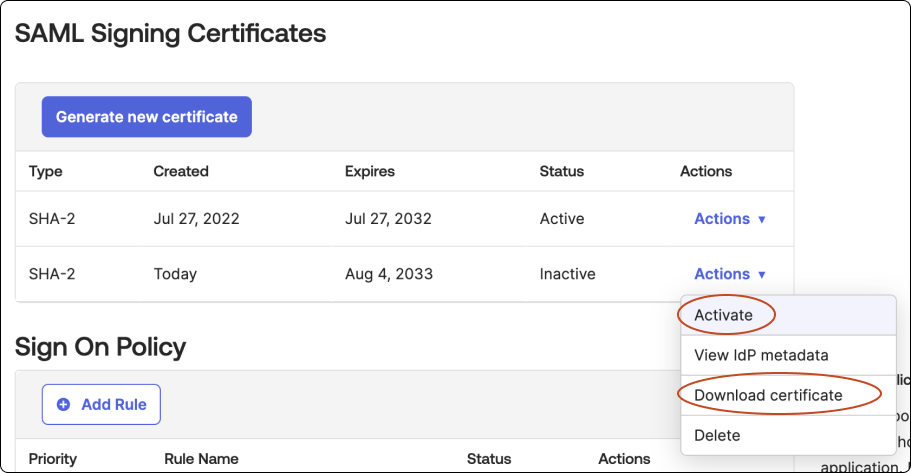
Select the Sign On tab and scroll down to section SAML Signing Certificates. Click on Generate new certificate.

In the new generated certificate, click Actions > Activate > Activate certificate.
Click Actions again and click Download certificate.
Once the file is successfully downloaded, switch to Autodesk Account Step 1 – Add Identity Provider and metadata, and upload the new certificate in Identity Provider certificate.
OneLogin
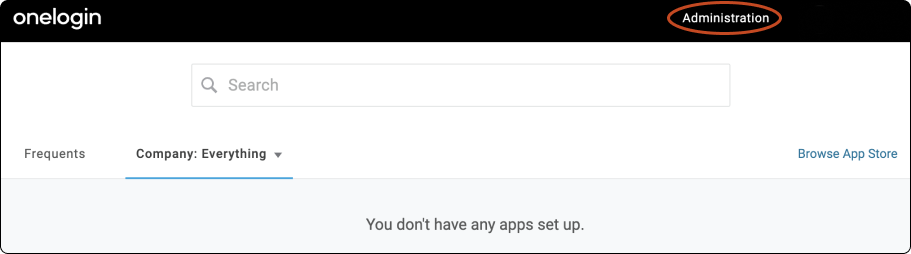
In the navigation pane, click Administration.
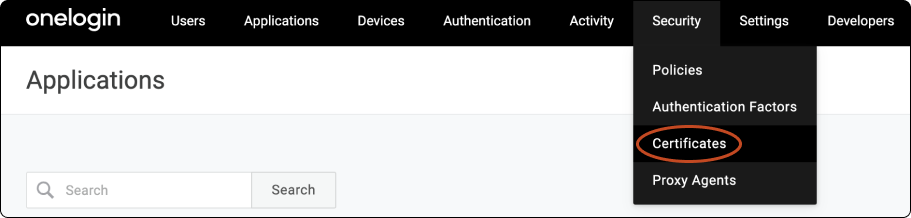
From the Security menu, open Certificates.
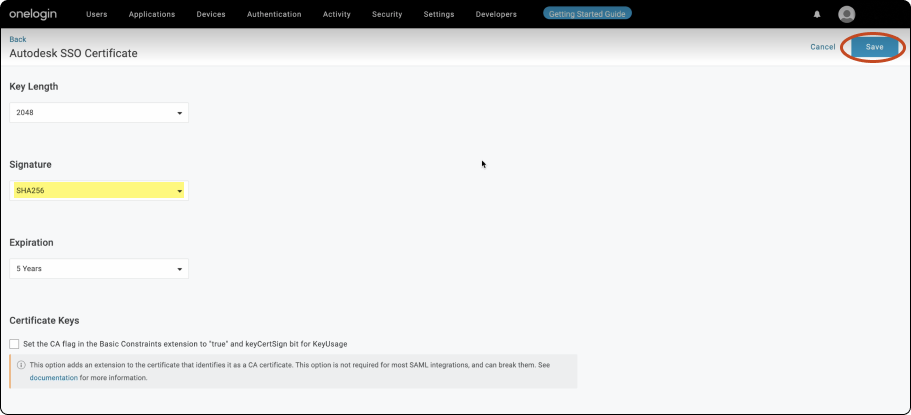
Click New and enter a name for the certificate.

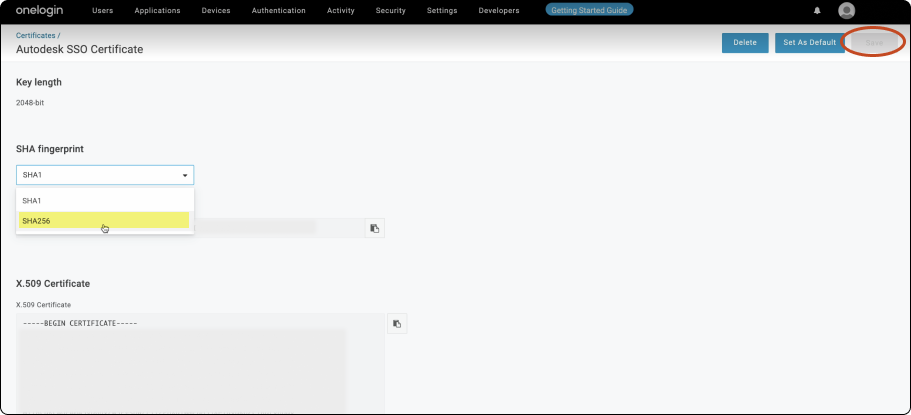
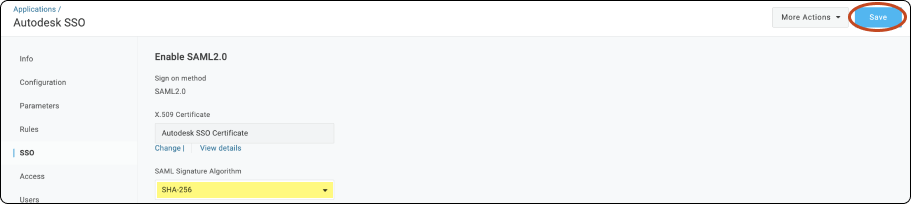
Under Signature select SHA256 and click Save.
Under SHA fingerprint select SHA256 and click Save.
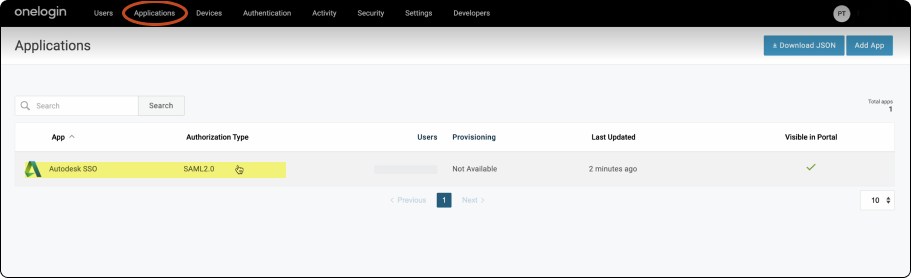
From the Applications menu, open Applications and select the Autodesk application created.
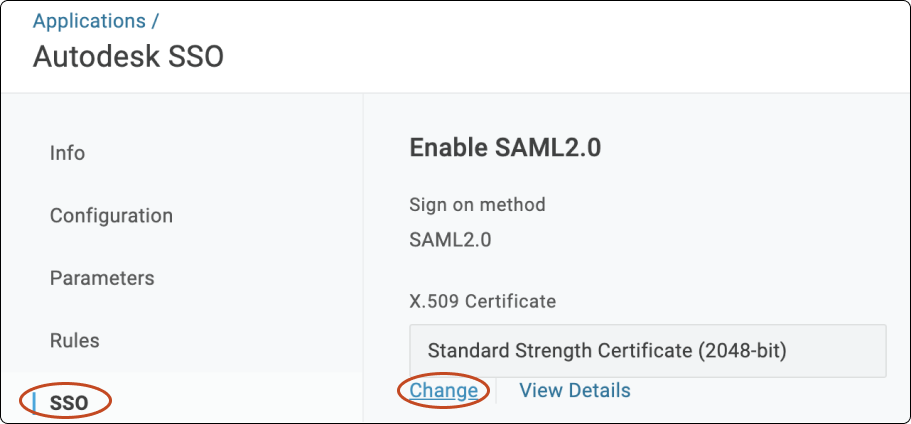
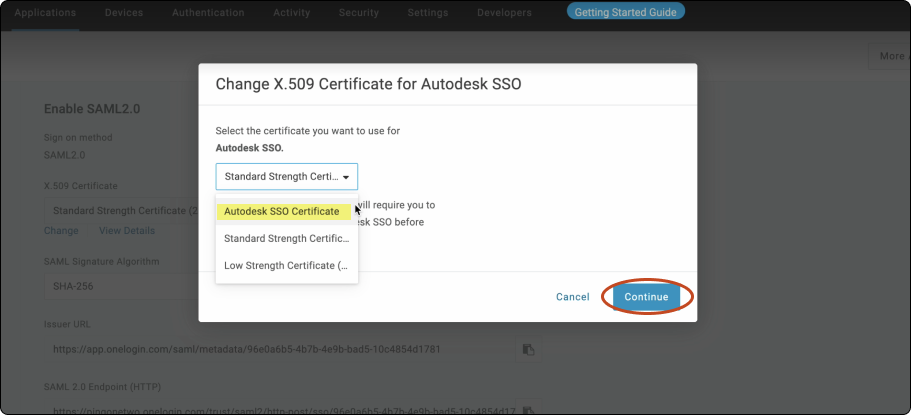
Click SSO. Under X.509 Certificate, click Change to change the certificate to the newly created certificate and click Continue once you have done so.
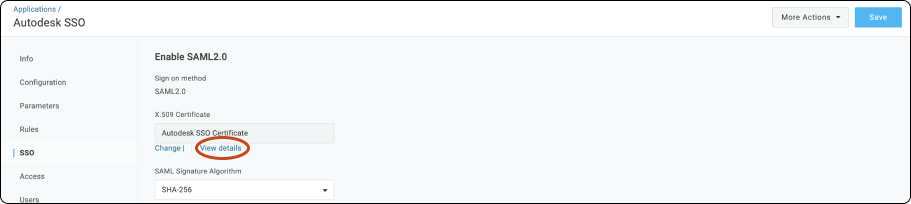
Ensure the SAML Signature Algorithm is SHA-256 and Save > View details. Click Download to download the certificate.
Once the file is successfully downloaded, switch to Autodesk Account Step 1 – Add Identity Provider and metadata, and upload the new certificate in Identity Provider certificate.
PingOne
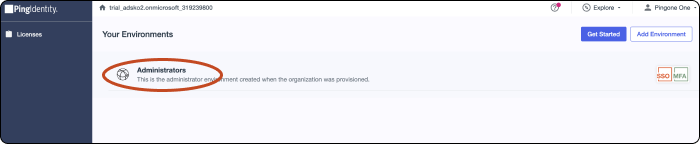
Click Administrators to begin.
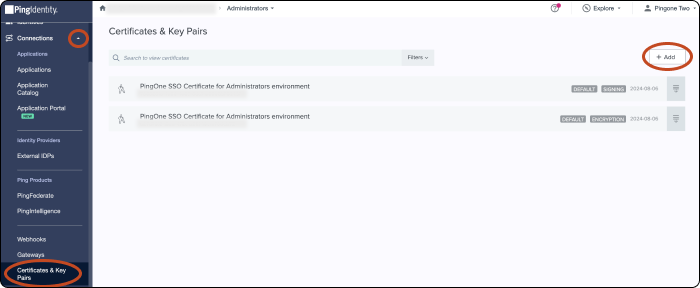
In the navigation, click Connections > Certificates & Key Pairs > + Add > Create Key Pair.
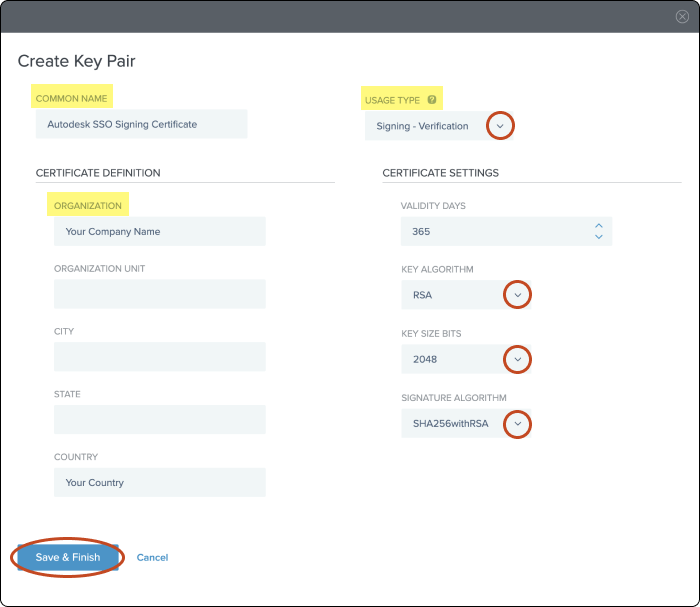
Under Common Name and Organization, enter a name for the certificate and your organization respectively. Under Usage type, select Signing – Verification.
For the Certificate Settings, ensure the Key Algorithm is set to RSA, Key Size Bits in 2048 and the Signature Algorithm is SHA256withRSA.
Click Save & Finish.
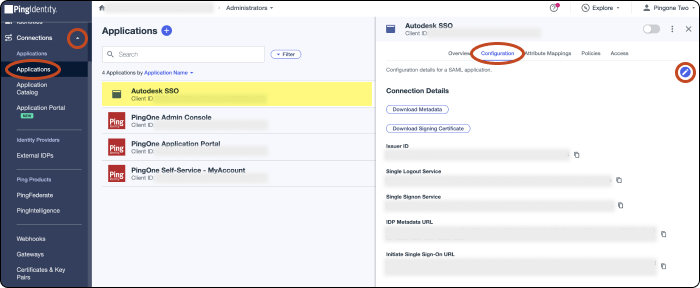
In the navigation, click Connections > Applications and select the Autodesk/Adsk SSO gallery app that you created. Click the Configuration tab > Edit.
Change the signing key to the new certificate added. Ensure the Sign Assertion is selected and Signing Algorithm set to RSA_SHA256. Click Save.
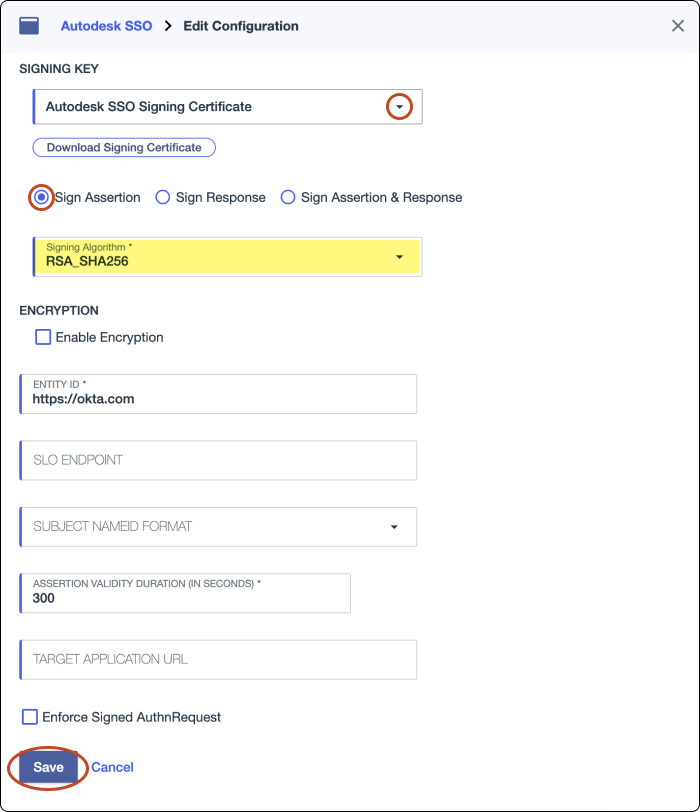
Under Connection Details, click Download Signing Certificate > X509 PEM (.crt) to download the certificate.

Once the file is successfully downloaded, switch to Autodesk Account Step 1 – Add Identity Provider and metadata, and upload the new certificate in Identity Provider certificate.
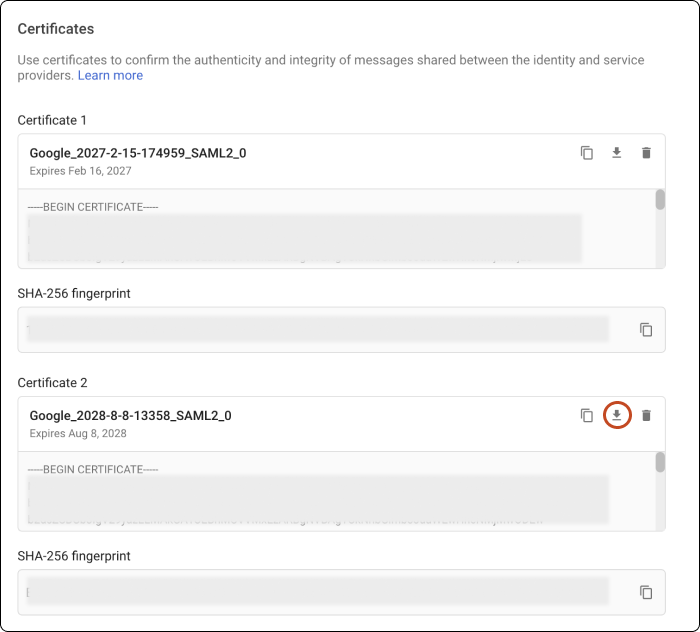
Google Cloud Identity
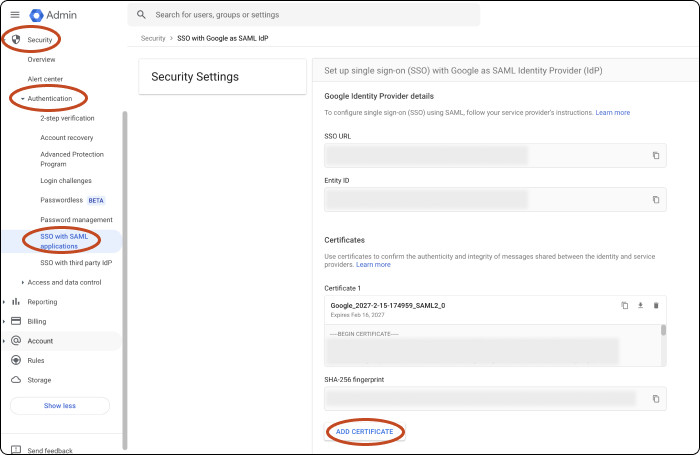
Expand the Security tab on the left-hand side menu and select Authentication > SSO with SAML applications. Under Certificates, click Add Certificate.
Download the new certificate that will be used for uploading Autodesk in the final step.
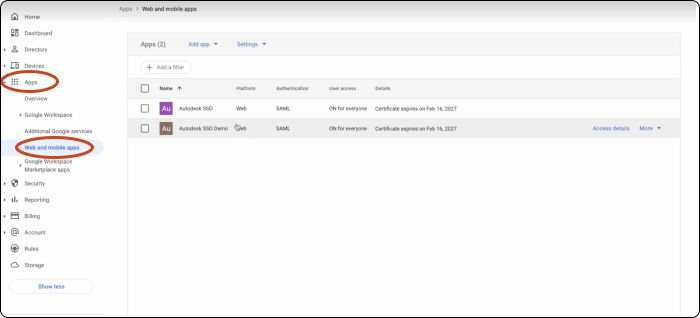
Go back to the left-hand side menu, select Apps > Web and mobile apps. Select the Autodesk/Adsk SSO gallery app that you created.
Click Service provider details.
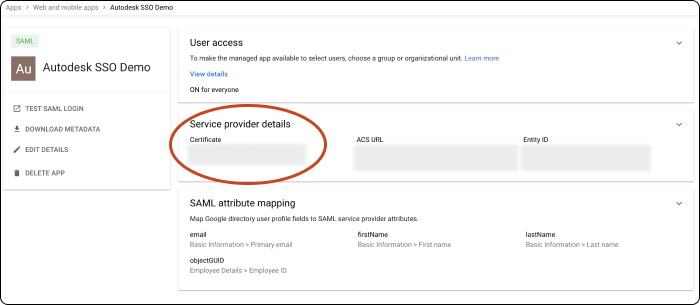
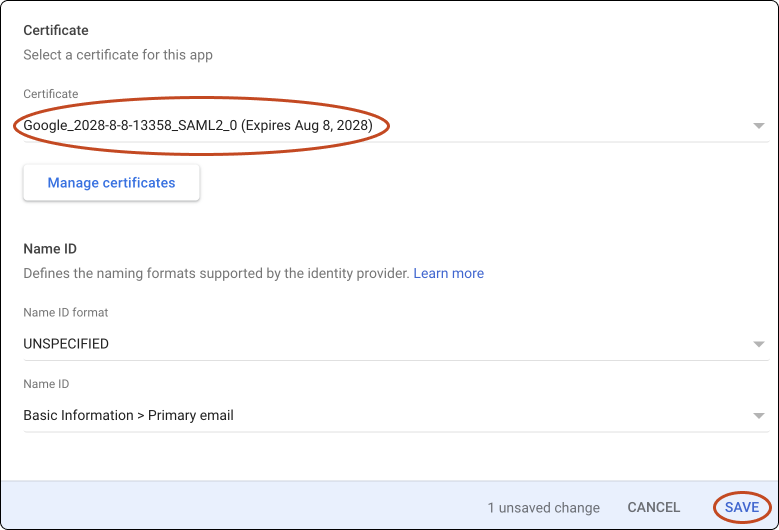
Under Certificate, select the new certificate created. Click Save.
Switch to Autodesk Account Step 1 – Add Identity Provider and metadata, and upload the new certificate in Identity Provider certificate.