Example: HumanIK through Flow
Everything described in Set up floor contact using HumanIK can also be set up to happen when the Event > Level Loaded event gets triggered in a level flow graph.
In order to replicate that behavior, you could compose a level flow graph looking like this:
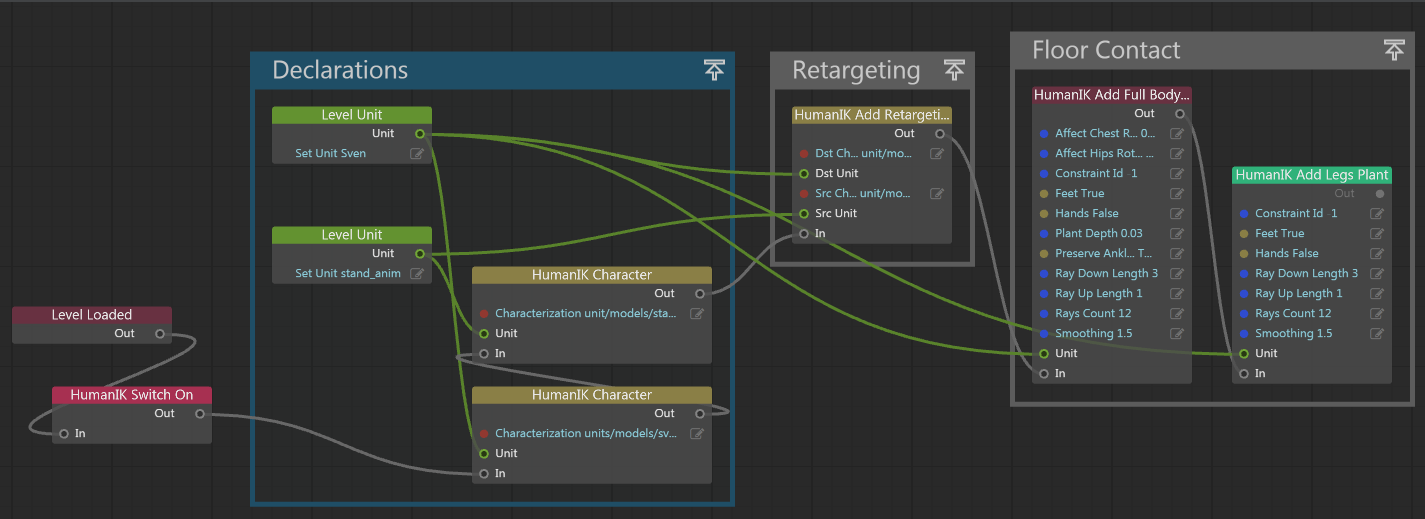
As you can see, there are 4 sections in the graph. We'll refer to these as Switch On, Declarations, Retargeting, and Floor Contact.
A single HumanIK > Setup and Debug > HumanIK Switch On node turns HumanIK on when the level gets loaded.
(HumanIK is disabled by default.)
This section lets you declare characters to the HumanIK plug-in.
Create HumanIK > HumanIK Character nodes to declare character units to HumanIK. These take two inputs:
the unit they are controlling (characterName for the first node, the motion clip for the other node)
the .character resource containing the characterization data for each of the units
The resource name is usually similar to the level unit name; it is just prefixed with units/.
Do not specify the .characterization extension.
Consists of a single HumanIK > Character Retargeting > Add Retargeting node.
Inputs are the source and destination units and the character resources. Source is the motion capture unit, destination is characterName.
Two nodes have to be defined for the floor contact to work; a full body plant node first, then a legs plant node.