Generate navigation mesh
This topic describes how to generate navigation mesh in the Stingray engine. You will learn how to consume level geometry and tag the navigation mesh.
The Navigation mesh can be automatically generated from:
- Units
- Actors
- Terrains
- Prototypes
To open the generation window, select Window > Navigation from the main menu bar.
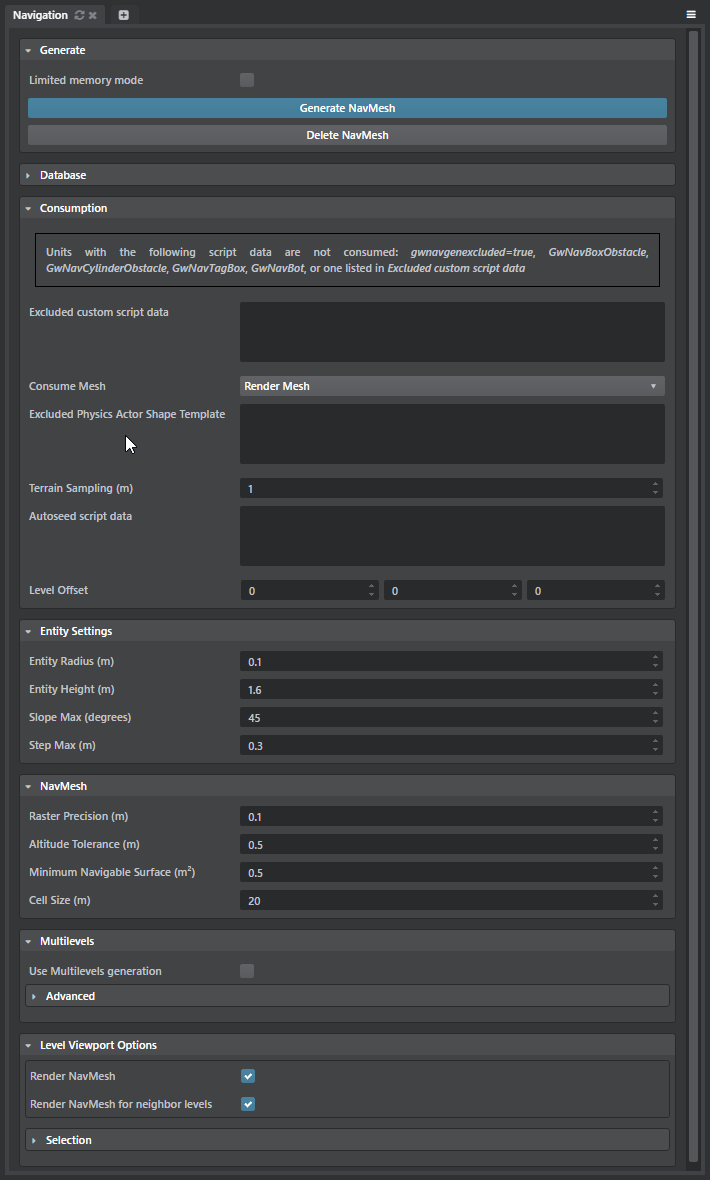
Configure input in the Navigation options.
Refer also to the complete Gameware Navigation documentation for details.
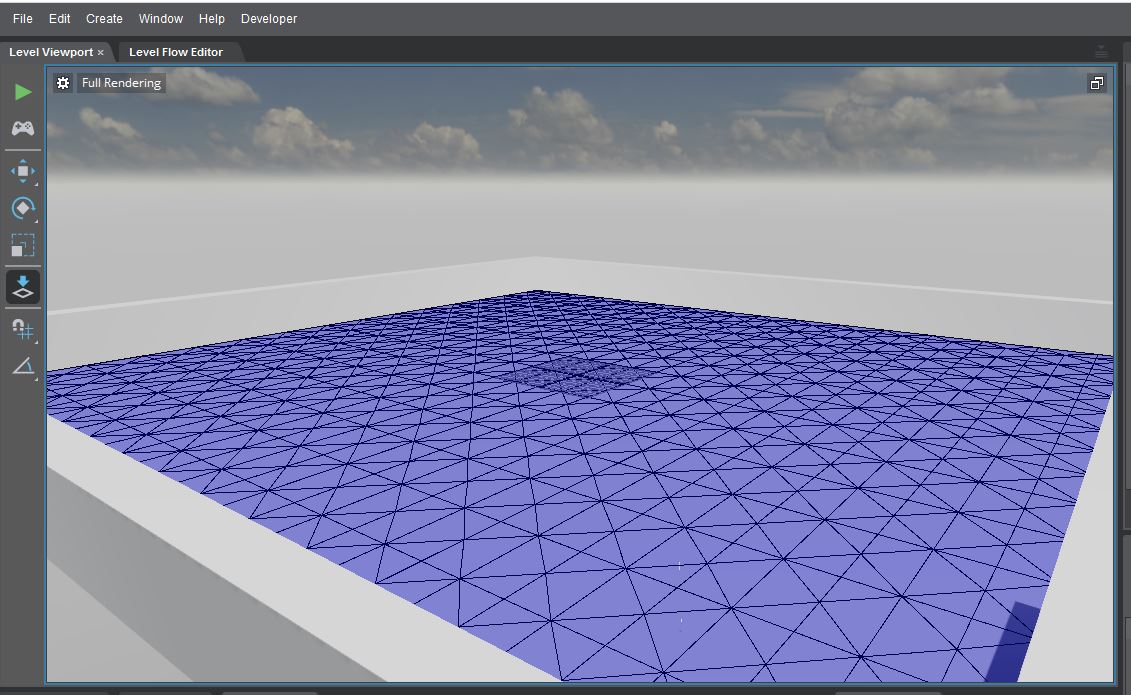
Click Generate NavMesh in the Navigation options to generate NavData.
Once generated, the NavMesh is rendered on top of the consumed Level geometry.
Tip: If you don't want the NavMesh rendered, turn off the Render NavMesh in the Navigation Options window.
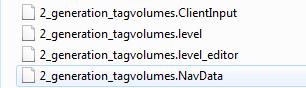
Generated NavData is saved beside the .level file with the same base filename and a .navdata extension.
To delete the generated NavData, you can click Delete NavMesh in the Navigation Options window.
Tagging the NavMesh lets you:
- Define areas or layers where bots are allowed or not allowed to walk, see "Allowed, forbidden and custom cost of navmesh layers" under Set up levels to use Gameware Navigation.
- Associate a smartobject to a given area (such as a door step or breakable bridge) to control the state and cost of this area.
- Associate a custom ID to triangles for spatial reasoning or custom path following.
The NavMesh can be tagged at generation time either on a per-unit base or using the level editor's volumes with provided volume types.
To tag a Unit add a script data object GwNavGenTag with the following children:
- Boolean script data is_exclusive : if set to true the navtag punches a hole in the NavMesh
- Integer script data layer_id
- Integer script data smartobject_id
- Integer script data user_data_id
- Object script data color with integers script data r, g, b
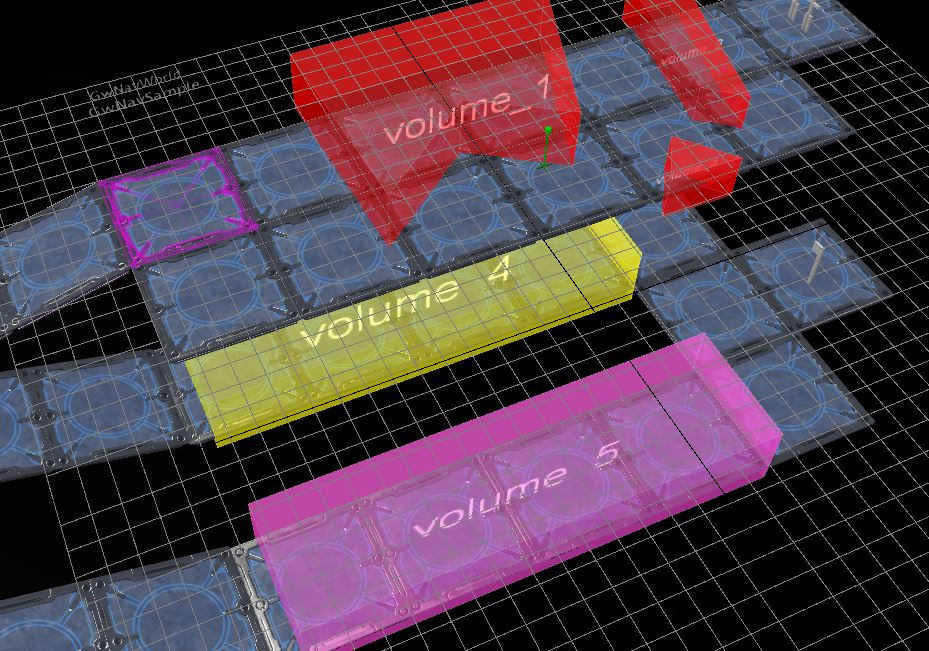
The gwnav volume types are located in core/gwnav/volumes.
- Choose a gwnavexclusivetagvolume volume type to remove at generation time NavData inside a volume.
- Choose a gwnavtagvolume_layerXXX volume type to tag the NavMesh with layer XXX.
- Choose a gwnavtagvolume_smartobjectXXX volume type to associate the smartobject XXX to the intersecting NavMesh.
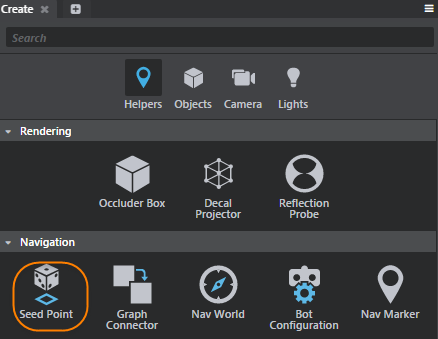
Spawn seedpoint Unit instances to only keep NavData connected to these seedpoints. This allows to prevent having NavData on tree tops, barriers or roof tops.
Also note that NavMarker unit can also be used as gwnavseedpoint script data since this unit is instanciated to mark places to go during the game, hence if a NavMesh is generated there it should be kept. Though gwnavseedpoint is unchecked by default for NavMarkers.
Seedpoints are accessible using the Create panel:
Multilevels Generation is useful if you have several levels loaded at the same time at runtime and you want your Bots to be able to move seamlessly from one level to another level. Each level needs a NavMesh generated at its runtime location, and each level must be generated with the same settings.
To set up, enable, and generate multilevel NavMeshes, create multilevels.gwnavgen_firstinit file. This file is used to intialize the multilevels NavMesh generation. Each level listed will have its generation settings aligned with the first level generated with 'Use multilevels' checked, and their offset set as specified. The offset must be the one corresponding at runtime.
This file is optional; it is also possible to setup the multilevels directly in the Navigation panel of the editor, by checking 'Use multilevels' for each level implied in the multilevels generation.
Create a valid sjson file called multilevels.gwnavgen_firstinit with the following format.
  initial_levels_offset_list = {
    default = {
      level_resource_name_1 = [0,0,0]
      level_resource_name_2 = [10,0,0]
    }
  }
In the Navigation options (Window > Navigation), enable Use Multilevels generation.
Click Generate.
A multilevels.gwnavgen_settings file will be created to share and sync the gwnavgen_settings files of level listed in multilevels.gwnavgen_firstinit.
Level offset can be modified in the Navigation panel.
Note: All the levels involved in the multilevels generation are displayed in the Multilevels List.

Tip: In order to iteratively generate Multilevel NavMeshes, it’s a good idea to back up .GenIO, and .ClientInput files in the project_gwnav folder to your source control (in addition to the project folder).