Working with Points, Curves, and Projections
Create a point on a surface to use as a reference for creating plies and analyses of a model. After you create the point, you must project it to be part of the surface, unless its only purpose is to be used as a laser target. A point is defined by Cartesian coordinates. You can also create points to be used as laser targets; these types of points do not need to be projected onto a surface.
You can also create curves (sketches) from Inventor. A curve is necessary when using Guide Curve Offset propagation mode for fiber placement. Curves also need to be projected onto a surface.
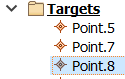
You can edit points, curves, and projections by double-clicking them in the TruPlan browser. Points and curves are stored in the Targets folder, while projections are stored in the Seeds folder.
Create a Point
-
Click Point
 on the TruPlan ribbon.
The Point dialog box opens.
-
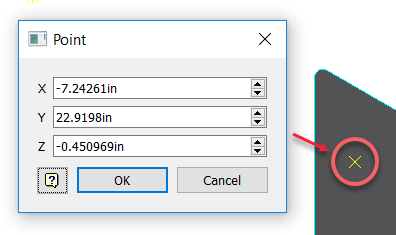
In the Inventor window, click on or near the object where you want to create the point.
The coordinates of the point are shown in the Point dialog box, and a preview of the position of the point is shown in the application window.
-
Adjust point values or click different locations in the window to change the location where the point will be created.
- Click OK to fix the point in the position you want.
The point is created along with a new entry in the TruPlan browser in the Targets folder.
Create a Curve
You can create a curve (sketch) in the Inventor 3D Sketch environment, then return to TruPlan to assess the design.
-
Click Curve
 on the TruPlan ribbon.
The Inventor 3D Sketch ribbon opens.
-
Create your sketch using the tools on the Inventor 3D Sketch ribbon.
Tip: When you do this, the Inventor window does not show the STL file you are working on in TruPlan. To give yourself a reference upon which to create the sketch, you can import the STL file so that it shows in the Inventor Window. (In Inventor, click Manage Import.)
 -
Click Finish Sketch on the 3D Sketch ribbon.
Your sketch opens in the TruPlan tab and is removed from the 3D Sketch ribbon. You need to project it onto a surface so that you can use it in TruPlan.
Project Geometry onto a Surface
-
Click Project
 on the TruPlan tab of the Inventor ribbon.
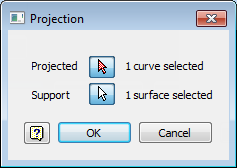
The Projection dialog box opens.
-
Click the Projected selection arrow
 .
. - Select a point or curve (sketch) to project.
- To select multiple items, hold down the Ctrl or Shift key while repeating the two previous steps.
- Select the surface geometry to which you want to project the selection.
-
The Projection dialog box now shows that a support surface has been selected.
-
Click OK to close the Projection dialog box.
- Right-click the point in the TruPlan browser and select Update. (Not necessary if automatic updates are enabled.)