Project types
Projects are used to organize and manage the effort and data related to your product's lifecycle within Upchain. They enable you to easily track statuses and due dates, while having all your information in one place. Importantly, no data can be added to or created in Upchain without a project to store that data. Therefore, you must create at least one project to get started using Upchain.
By default, Upchain provides you with three project types:
- Engineering
- Build to Print
- Design Project
as well as the option to create a template project. Having different project types enables you to manage different types of work and create separate workflows for each project type to manage its specific lifecycle.
Create a new project type
In this section of the Administration page, you may create your own custom project type. This means you can customize the type of work your business often engages in. Once you have created a custom project type, you must contact Autodesk support to add your new project type to the project type picklist. After this is done, you may then proceed to create a workflow specific to this project type to govern its lifecycle.
To create a custom project type:
Navigate to Administration > Engineering > Project types.
Click Create project type.
The Create project type window opens.
Type in a name and description for your new project type.
(Optional) Specify whether you want to use an Effective date for projects of this type (see here for more information on project effectivity).
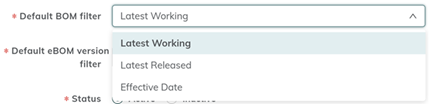
Choose the Default BOM filter that appears above the navigation pane in the BOM section.
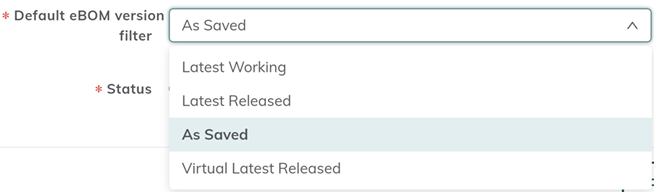
Choose the Default eBOM filter that appears in the BOM table.
Set your project type Status to Active or Inactive. You might make your project type inactive until you are ready for users to begin using it.
Click Create.

You new project type is created and appears in the table with your chosen status.
- Contact support to add this new project type to the
PROJECT.TYPEpicklist so that it is available for selection to create a workflow. - Create a project workflow to be able to activate and use the new project type. See About project workflows for more information on creating a project workflow.
Edit a project type
Navigate to Administration > Engineering > Project types.
Select the project type in the table.
The Project details view opens on the right side.
Click Edit.
Make changes to any of the following:
- Name
- Description
- Has effective date
- Default BOM filter
- Default eBOM filter
- Status (Active/Inactive)
Click Save.