Complete a change request task
Tasks created during a change request (CR) may be completed in a number of different ways depending on what the task is. Some may be completed from the Change request dashboard while others require a bit more work.
Complete out of the box tasks
The default system change request workflow has the following steps:
- Updates the CR status to Work in Progress.
- Updates the item statuses to Approval Pending.
- Sends a task to the Project Manager to approve or reject the request request.
- Release the items. This updates their status to Released automatically.
- Update the CR status to Completed and the workflow ends.
The task created in step 3 may be completed in a number of ways:
On the CR, beside the workflow name, a button (or buttons) appear to complete the task.
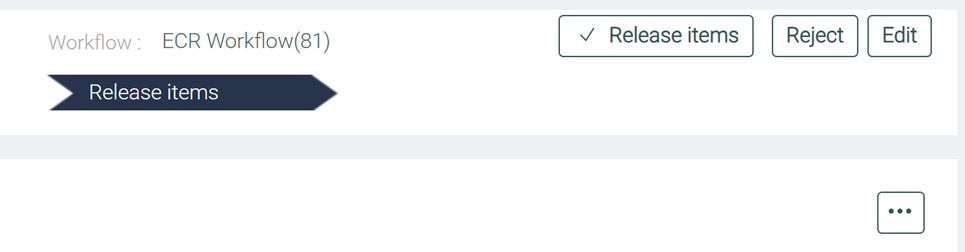
In the CR Tasks tab, click the task listed. This loads the task's detail pane with a button to complete the task.
In the CR dashboard, click the CR to load its details view. At the top is a button to complete the task.
In the CR dashboard, expand the task list below the CR. Click the task to load its details pane with a button at the top to complete the task.
Complete Tenant Admin configured tasks - an example
Tasks may be generated from a number of different primitives and not all of them may be completed in the same way.
For the following example, a CR workflow has been configured with an Object decision primitive with the following settings:
- Type - Associate Multi Item Attribute Task
- Rejections Criteria - Item Type = Manufactured Item AND Material is null or empty
- Passed Status (for items) - Approval Pending
- Failed Status (for items) - Development
- Re-check Criteria before completing task - selected
Consider the following CR example. The PEDAL item does not have a value filled in for the Material attribute. When the workflow reached the step where it is checking manufactured items for missing materials, it detected that for the PEDAL item (along with several others) this attribute is missing. In this case, the CR looks like this:
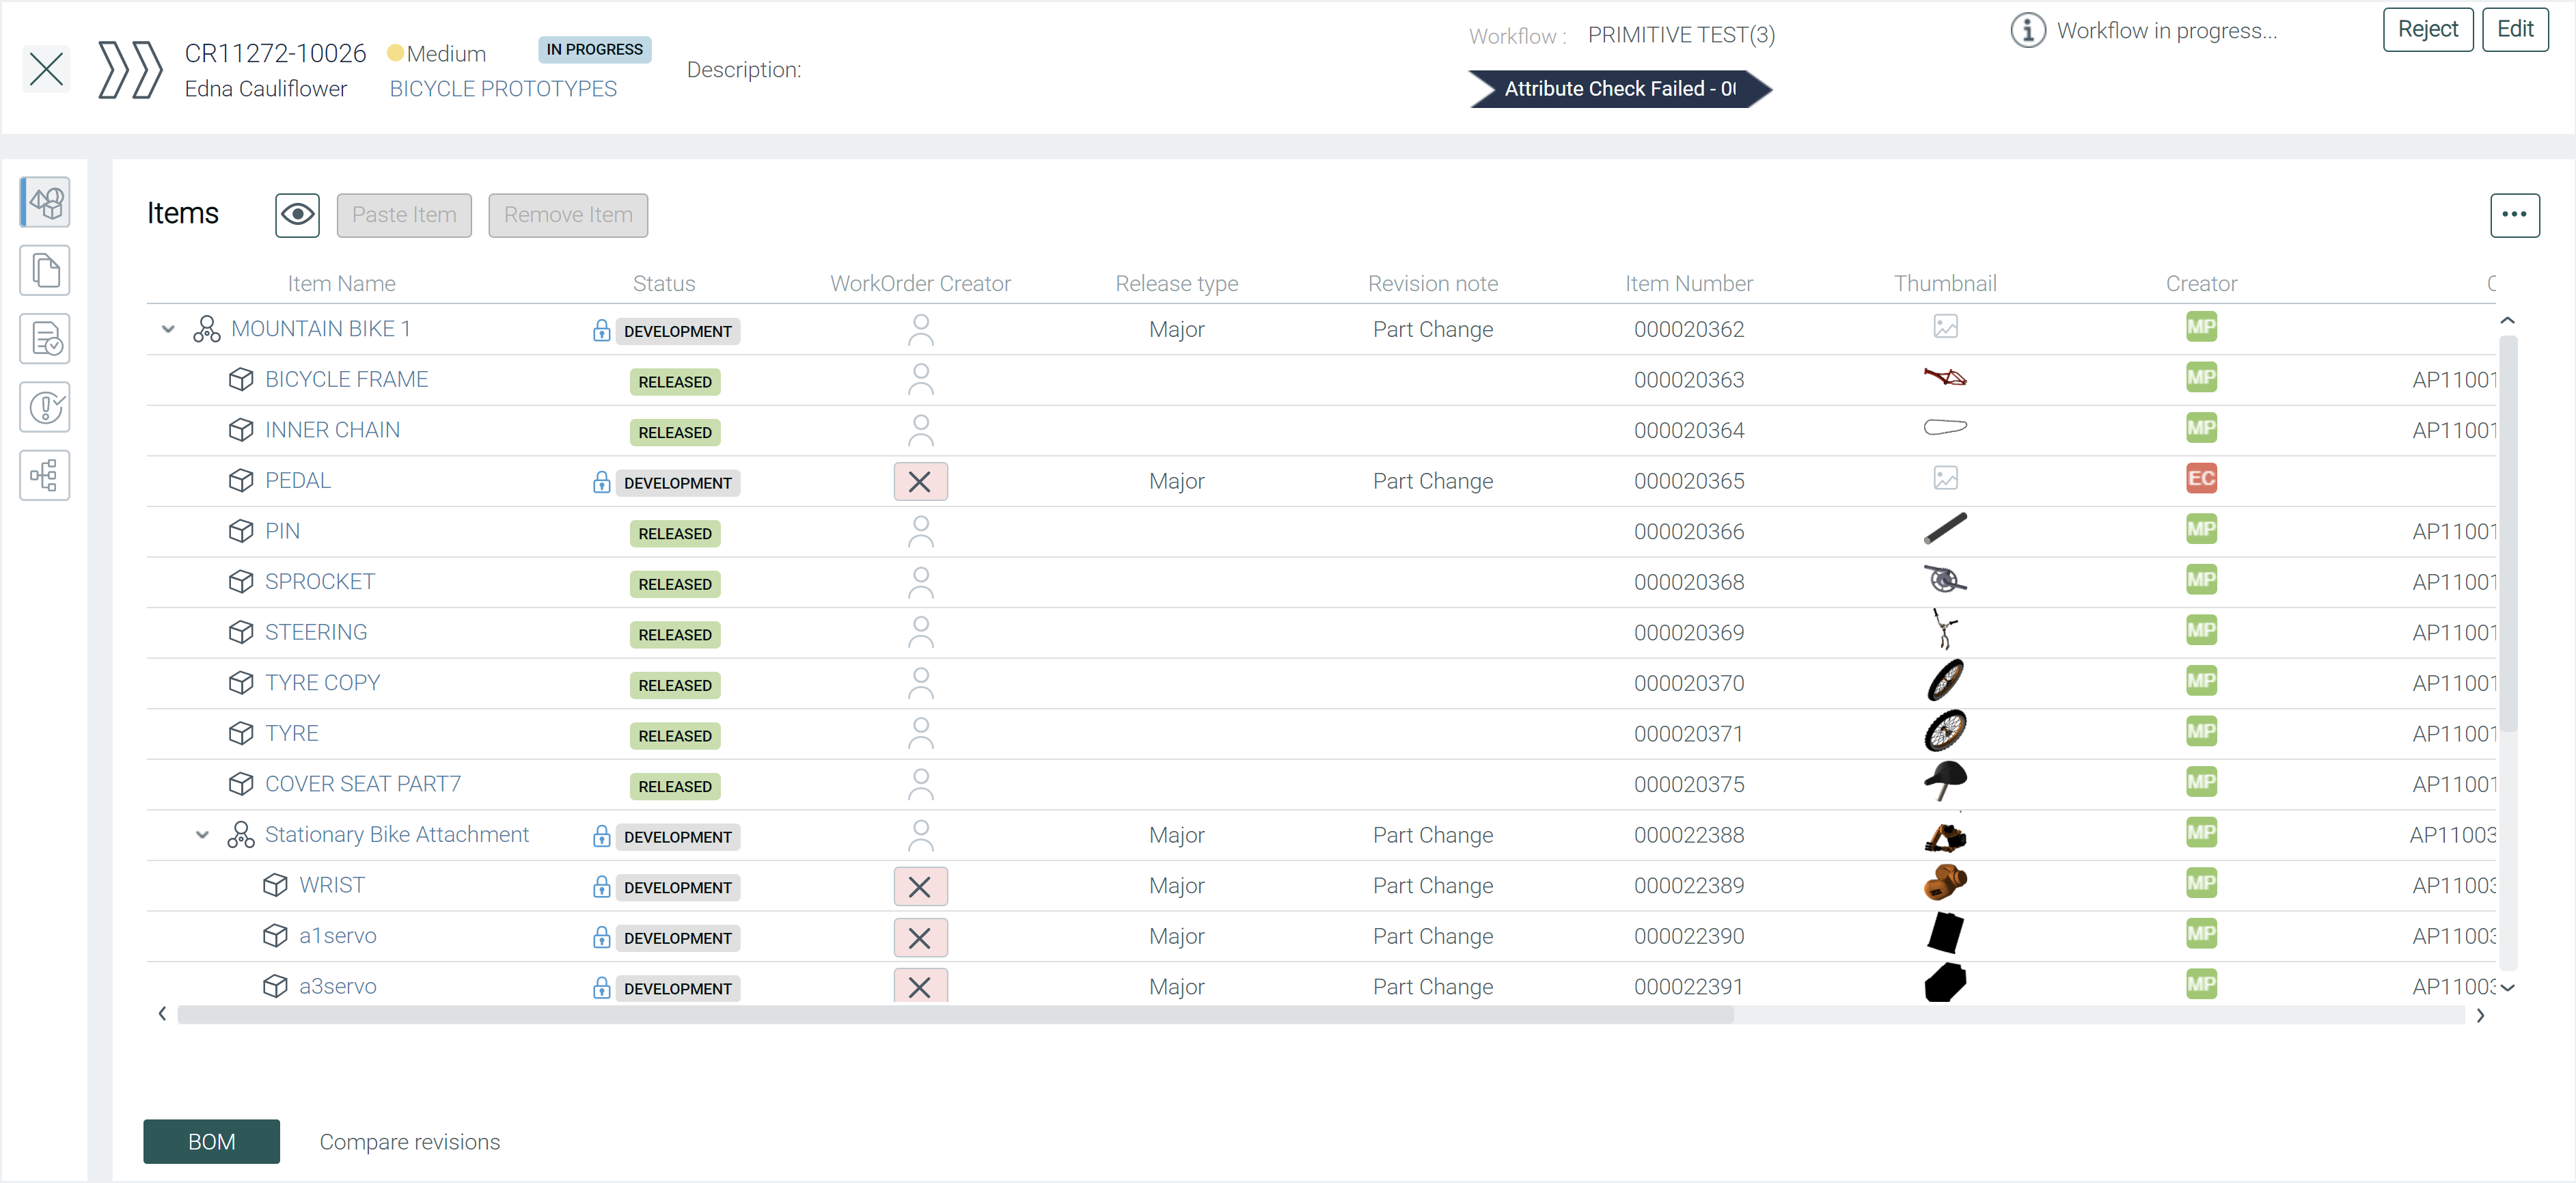
Notice that each item that has failed the check has an x symbol ( ) beside it. The items that failed have also been assigned a status of Development so that you can edit the item so that it meets the criteria.
A separate task is created for every item that fails the Material attribute check. You can see the full list of tasks in the Tasks tab:
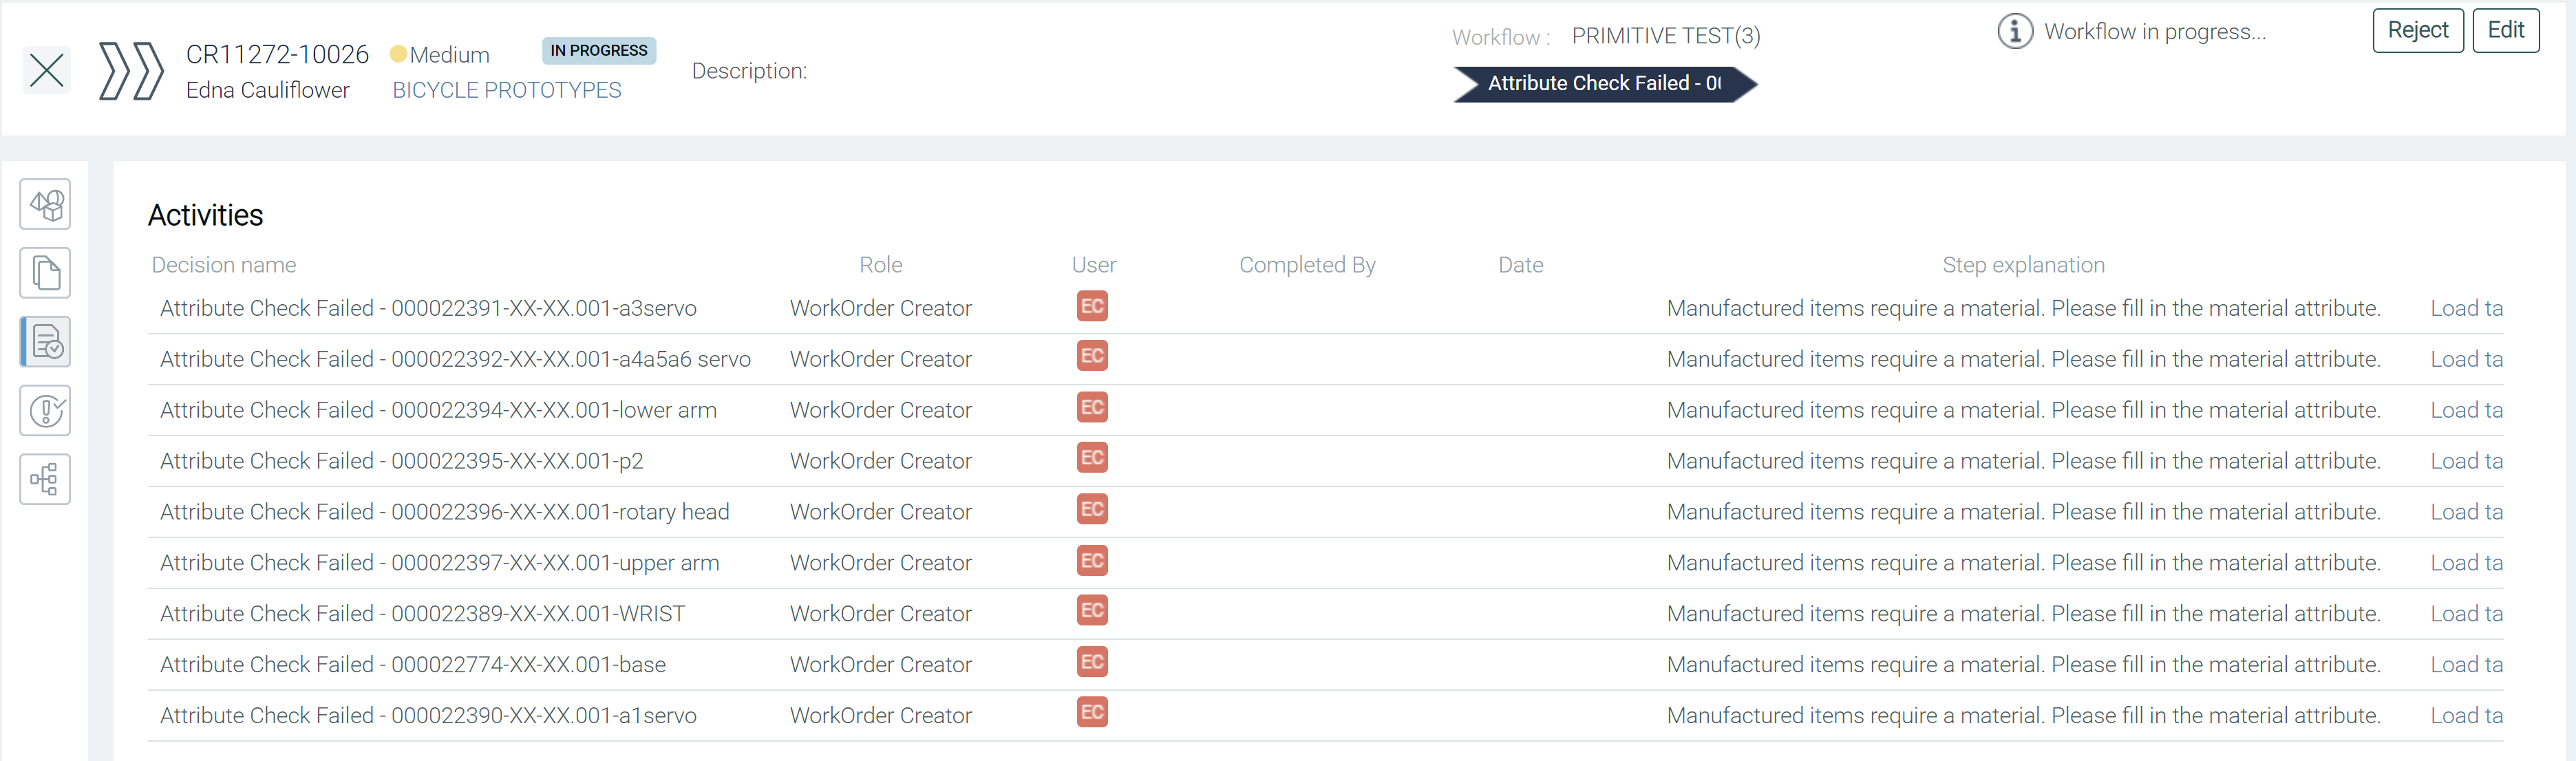
The important columns are Decision name and Step explanation. The Decision name column gives you a brief description of the task as well as the item number and item name of the item that failed this check. The Step explanation column gives you a more detailed description of the task.
Address the tasks
In this example, it is easiest to complete the tasks from the Items tab. Each item that has failed the check displays a beside it for easy identification. Click this symbol to see the button to complete the task.

However, if you attempt to select Attributes filled in at this stage, you will receive an error message indicating that the task is not really completed.
This is because the item still has a missing Material attribute. You can fill in the missing attribute directly within the CR:
- Select an item in the Items tab that failed to load its details on the right side.
- Click the pencil icon (
 ).
). - Edit the necessary attributes.
- Click the save icon (
 ).
). - Now, click the x symbol () beside the item.
- Select Attributes filled in.
Upchain rechecks that you have indeed completed the task and updates the item status to Pending now that it passes the check.
Repeat the above process for all other items that have a missing Material.