About the Upchain CAD Connector and initial setup
The Upchain CAD Connector is the hub from which you can launch the CAD plugin for supported CAD softwares and the Generic plugin. Once launched, you'll use the plugin to capture, manage, and share CAD data, through Upchain, without having to leave your CAD environment.
The CAD plugin is Windows-based. We strongly recommend running the CAD plugin on Windows 11.
This topic describes the process to download, install, launch, and sign in and out of the CAD Connector.
Download the Upchain CAD Connector
Click the arrow icon next to your profile picture at the top-right of the screen.
Select Plugins from the drop-down.
The Plugins page opens.
Click the Download button next to Upchain CAD Connector to start downloading the installation file.
Now you have downloaded the latest installation file and can proceed with the installation.
Install the Upchain CAD Connector
To start the installation, run the downloaded installation file.
You are asked to verify that you want to run the installer.
Click Run.
Go through the installer, following the on-screen directions.
Change the default destination folder, if desired.
You can now use the CAD Connector to launch your preferred CAD plugin.
config.pro file and set the save_file_iterations option to No. This is to prevent PTC Creo from automatically appending its own version number to the file name as changes are made.Launch the CAD plugin
The CAD Connector lists plugins for all supported CAD applications that it has detected on your computer. If you have more than one version of a CAD system, the CAD Connector lists all supported versions.
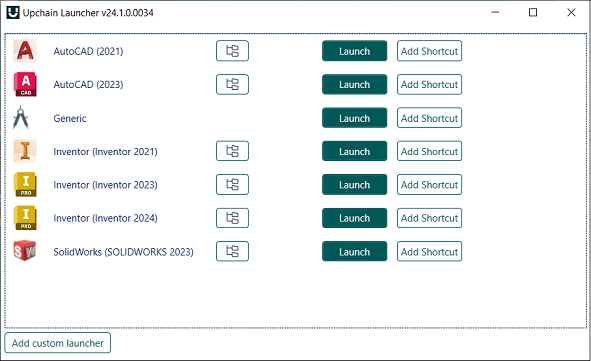
To launch a CAD plugin, find it in the list and click Launch. The CAD Connector launches the CAD application as well as its corresponding plugin.
Click Add shortcut to add a shortcut of that plugin to your desktop. You can then use this shortcut to launch the plugin directly.
Launch the CAD plugin for Siemens NX
The Upchain CAD plugins require specific dependency files to be present in the CAD Connector installation folder to be able to run correctly with your chosen CAD program. Upchain does not include these dependencies as part of the CAD Connector installation. Instead, the first time you launch the CAD plugin for Siemens NX, the CAD Connector will automatically copy the necessary dependencies from the corresponding CAD program installation folder to the CAD Connector installation folder.
However, if you have custom installations of your CAD programs or your installation files are locked for some reason, it could be the case that the CAD Connector is not able to find and copy the dependencies it needs to be able to launch the appropriate CAD plugin. In this case, you will receive an error message with a list of the dependency files it could not copy.
To resolve this issue:
Take note of the files listed in the error message.
Locate these files in your CAD installation directory.
- The default for Siemens NX is
C:\Program Files\Siemens\NX xxxx.
- The default for Siemens NX is
Copy the files into the CAD Connector installation directory. The default is
C:\Program Files{{upchain}}{{upchain}} CAD Connector.Open the CAD Connector and try launching the relevant plugin again.
If you do not have administrative privileges on your computer, you may need to reach out to your IT team to assist with this procedure. If you are still facing issues please contact support.
Enable the Inventor CAD plugin
The Upchain CAD plugin is available as an integrated add-in for Inventor. You can complete the one-time set of steps outlined below to enable the Upchain CAD plugin to open whenever Inventor is launched. Alternatively, you can enable an Upchain CAD plugin button within Inventor to open it only when required.
To enable the CAD plugin as an add-in within Inventor:
Open Inventor either directly or by using Upchain CAD Connector.
In Inventor, navigate to Tools > Options > Add-ins.
In the Add-In Manager YYYY dialogue box, under the Applications tab, scroll down until you find Upchain.
Deselect the Block checkbox.
Select the Loaded/Unloaded and Load Automatically checkboxes, as desired.
- If you select only Loaded/Unloaded , you will need to enable Upchain as an add-in each time you launch Inventor and want to use Upchain.
- If you select only Load Automatically , you will be required to sign-in to Upchain each time you launch Inventor.
Click OK.
If you do not wish to have the Upchain CAD plugin load every time you launch Inventor, or you accidentally close the CAD plugin, you can add a button to the Tools ribbon bar to the User Commands section to allow you to quickly open the CAD plugin again.
To add Upchain to the ribbon bar:
- Navigate to Tools > Options > Customize.
- In the Customize dialogue box under the Ribbon tab, scroll down to Upchain.
- Click Upchain.
- Click the right arrows in the center of the dialogue box.
- (Optional) Select the box under the Large column to create a large button.
- (Optional) Select the box under the Text column to add text to the button.
- Click Apply, then click Close.
Upchain now appears as a button on the ribbon bar in the Tools tab and can be launched from here.
Add a custom launcher
If your files are stored in a different location from where you installed the CAD Connector, or you use special batch files or similar to launch your CAD software, the CAD Connector may not detect your applications automatically. If this is the case, you can add a custom launcher to the CAD Connector.
- Click Add custom launcher in the bottom-left corner of the plugin.
- Click Browse and locate the full path to your CAD application, that is, the path to the .exe file that launches your CAD program. For example, for SOLIDWORKS this might be
C:\Program Files\SOLIDWORKS Corp\SOLIDWORKS\SLDWORKS.exe. - Select the plugin type and CAD version of the CAD software you are using. If you don't see your version listed here, you may select another version closest to it.
- Enter a title for the plugin.
- Click Add.
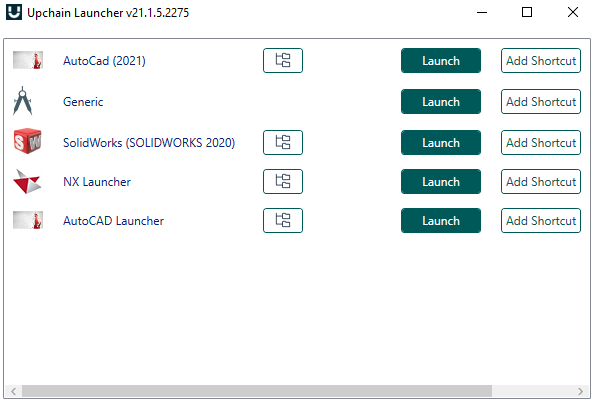
The newly-added launcher appears in the CAD Connector.
Add custom launchers for Siemens NX and AutoCAD
If you are creating a custom launcher for AutoCAD or Siemens NX, then you will also need to include the path to the directory that contains its dependency files. To add a custom launcher for Siemens NX or AutoCAD:
Ensure you have installed the latest CAD Connector.
Open the CAD Connector.
Click the Add custom launcher button in the bottom-left corner of the CAD Connector window.
Beside the Path field, click the Browse button and locate the full path to your NX or AutoCAD application, that is, the path to the .exe file that launches your CAD program.
- The default for NX is
C:\Program Files\Siemens\NX xxxx\ugraf.exe. - The default for AutoCAD is
C:\Program Files\Autodesk\AutoCAD 202x\acad.exe.
- The default for NX is
Select the plugin type (Nx or AutoCAD) and version of the CAD program you are using.
Beside the Dependencies Directory field, click the Browse button and locate the directory where the dependencies are located.
The dependencies for NX are:
NXOpen.dllNXOpen.UF.dllNXOpen.Utilities.dllNXOpenUI.dlland are found in
C:\Program Files\Siemens\NX xxxx\NXBIN\managedby default.The dependencies for AutoCAD are:
Autodesk.AutoCAD.Interop.dllAutodesk.AutoCAD.Interop.Common.dlland are found in
C:\Program Files\Autodesk\AutoCAD 202xby default.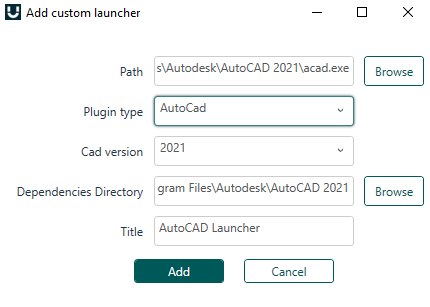
Enter a title for the launcher.
Click Add.
Your custom launcher is added to the CAD Connector.
Sign into the Upchain CAD plugin
For the Upchain database to be connected with the plugin, you need to login in.
Open the appropriate CAD plugin.
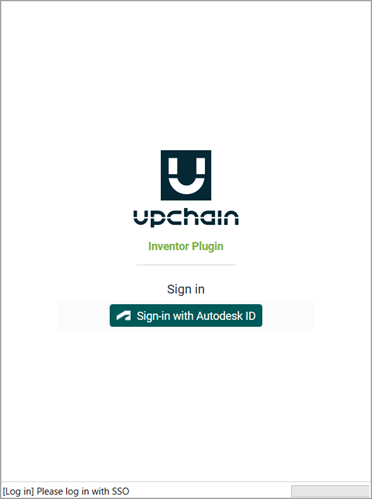
Click Sign-in with Autodesk ID.
A window opens indicating that the sign-in procedure continues in a web browser. The browser opens as well.
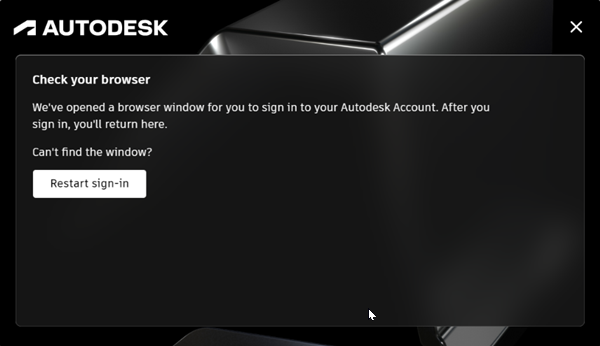
In the browser, sign in with your Autodesk credentials.
Note: If you are already signed into other Autodesk products, such as Inventor or AutoCAD, you do not need to sign in again. The browser displays a message that indicates who you are currently signed in as.Click Go to product.
You are now signed into the CAD plugin. You can close the browser and begin working with the plugin.
Once you've signed into the CAD plugin, you'll also be signed into the Web application and any other Upchain plugins as well when you launch them.
You'll remain signed in until you sign out, even if you close and re-open the CAD plugin as long as you have enabled Auto-login in the plugin settings.
Sign out of the Upchain CAD plugin
Click Sign out ![]() at the bottom of the menu bar to be signed out of the plugin.
at the bottom of the menu bar to be signed out of the plugin.
If you sign out of the Upchain plugin, you will not be signed out of any other Upchain or Autodesk applications. However, if you sign out of an Autodesk product, such as Inventor or AutoCAD, you'll be signed out of all Upchain and Autodesk applications as well.